Connecting Klaviyo
Communicating with your customers throughout their trial is imperative. With Klaviyo, you can do just that.
Klaviyo simplifies sophisticated email sequences for businesses. It's the perfect tool to check-in with your customers during their trial.
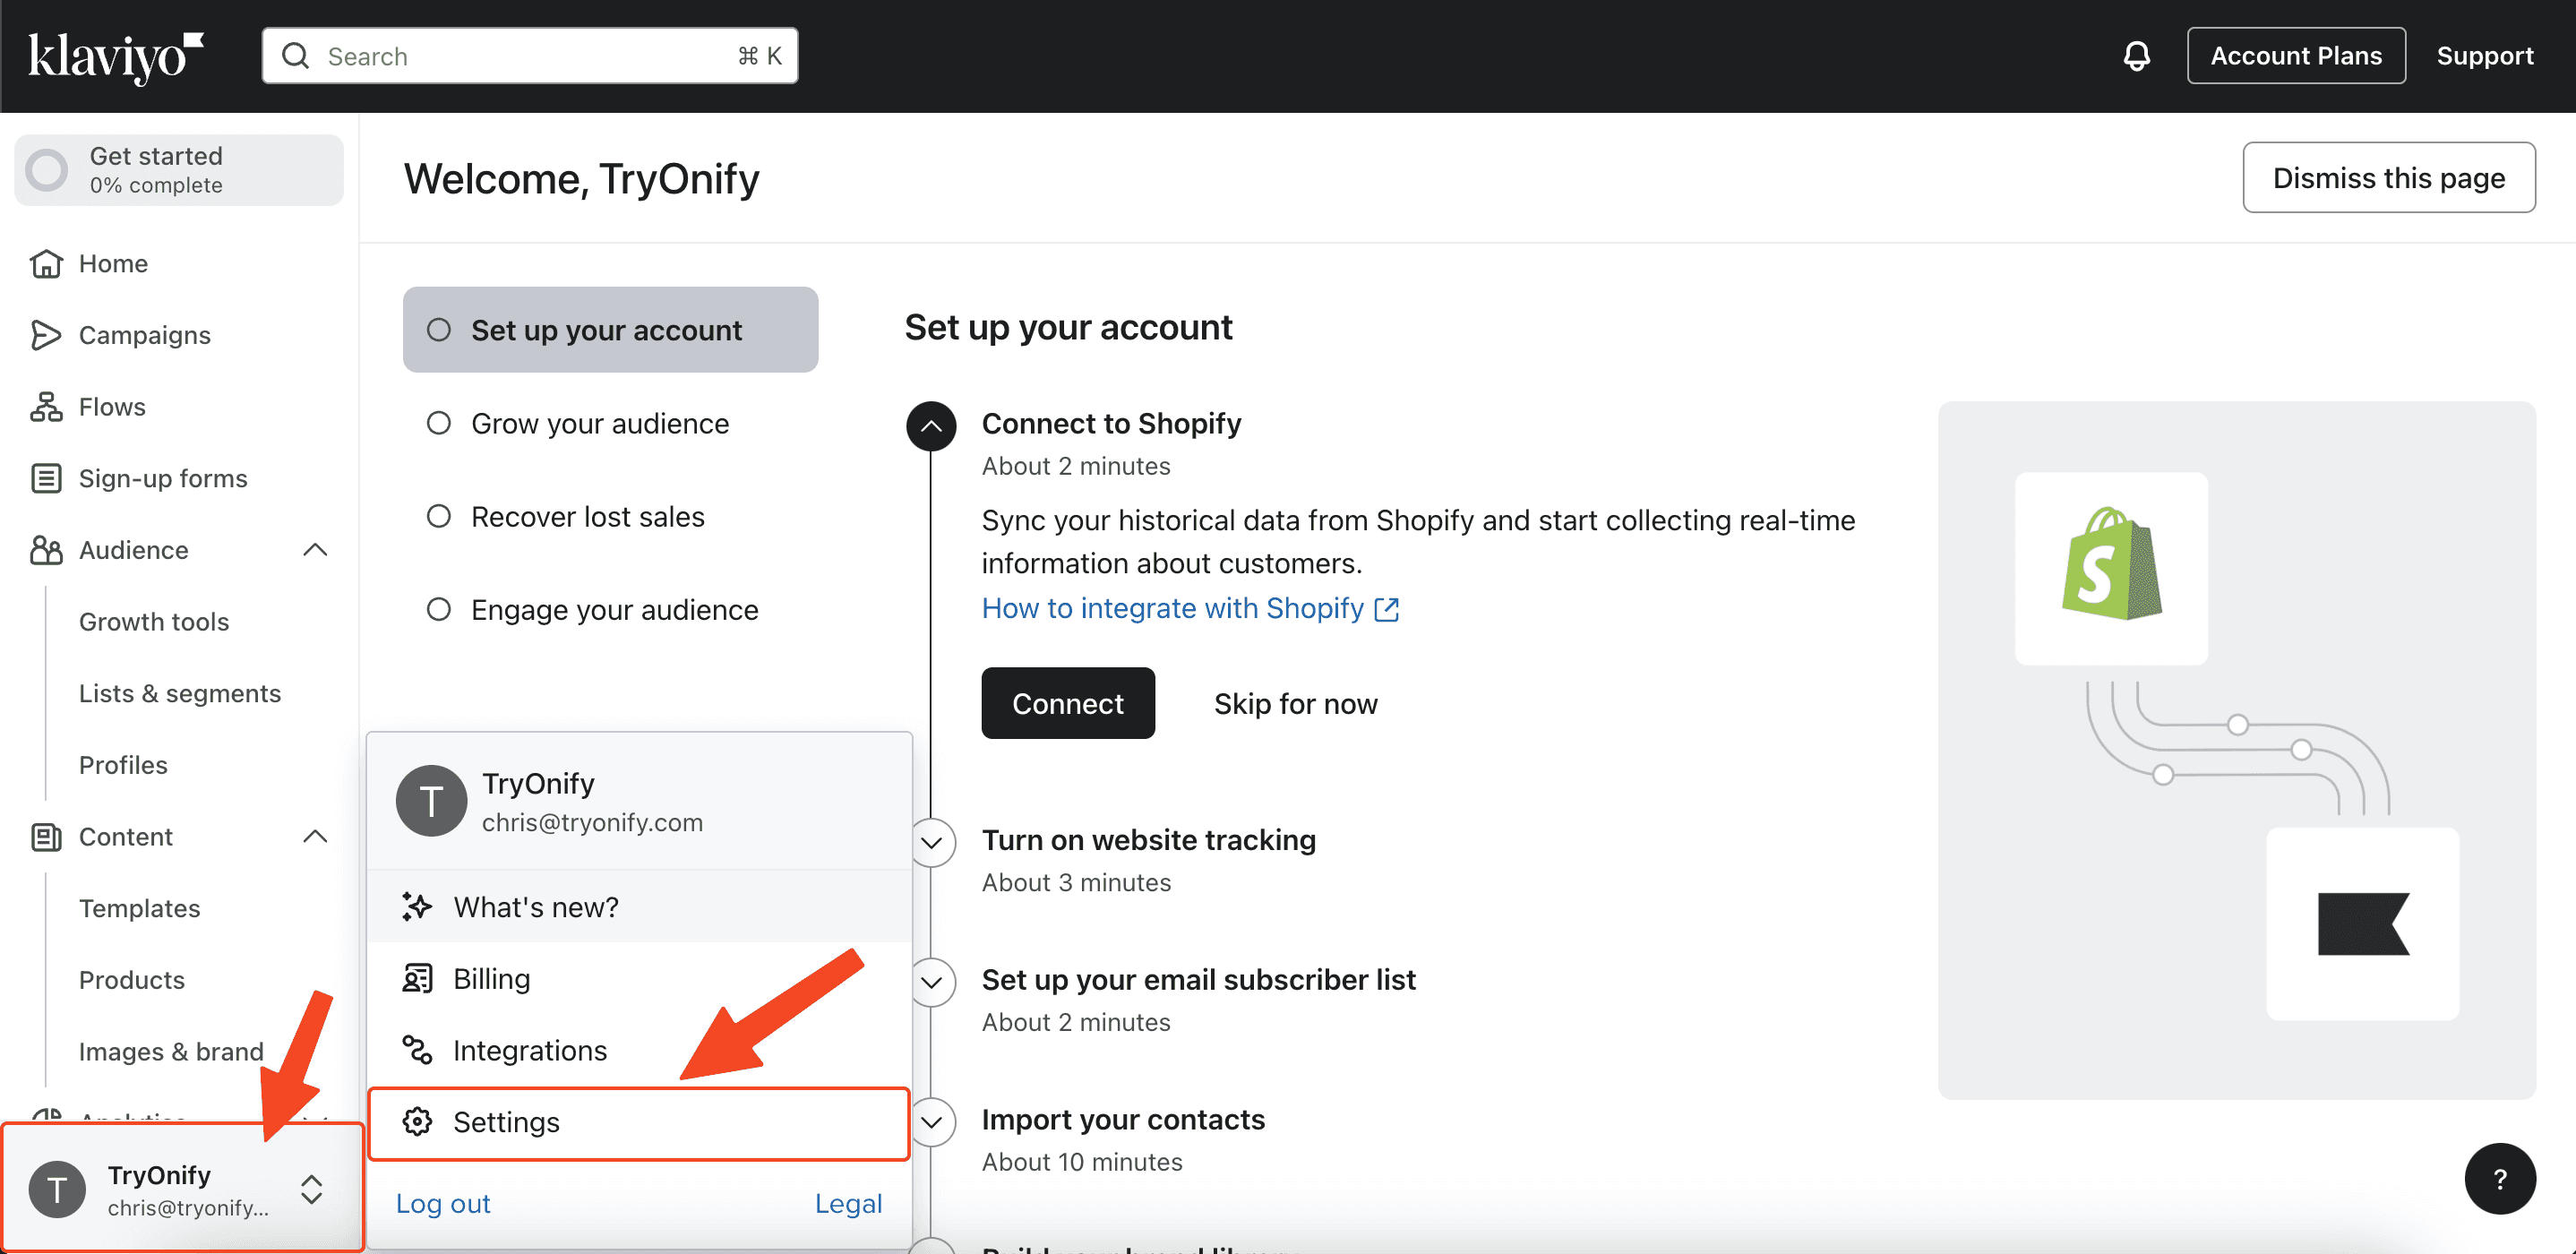
The first thing you'll want to do is login to your Klaviyo account. If you don't already have one, make one. Once you've logged in, click your Profile in the bottom left corner and then click "Settings".
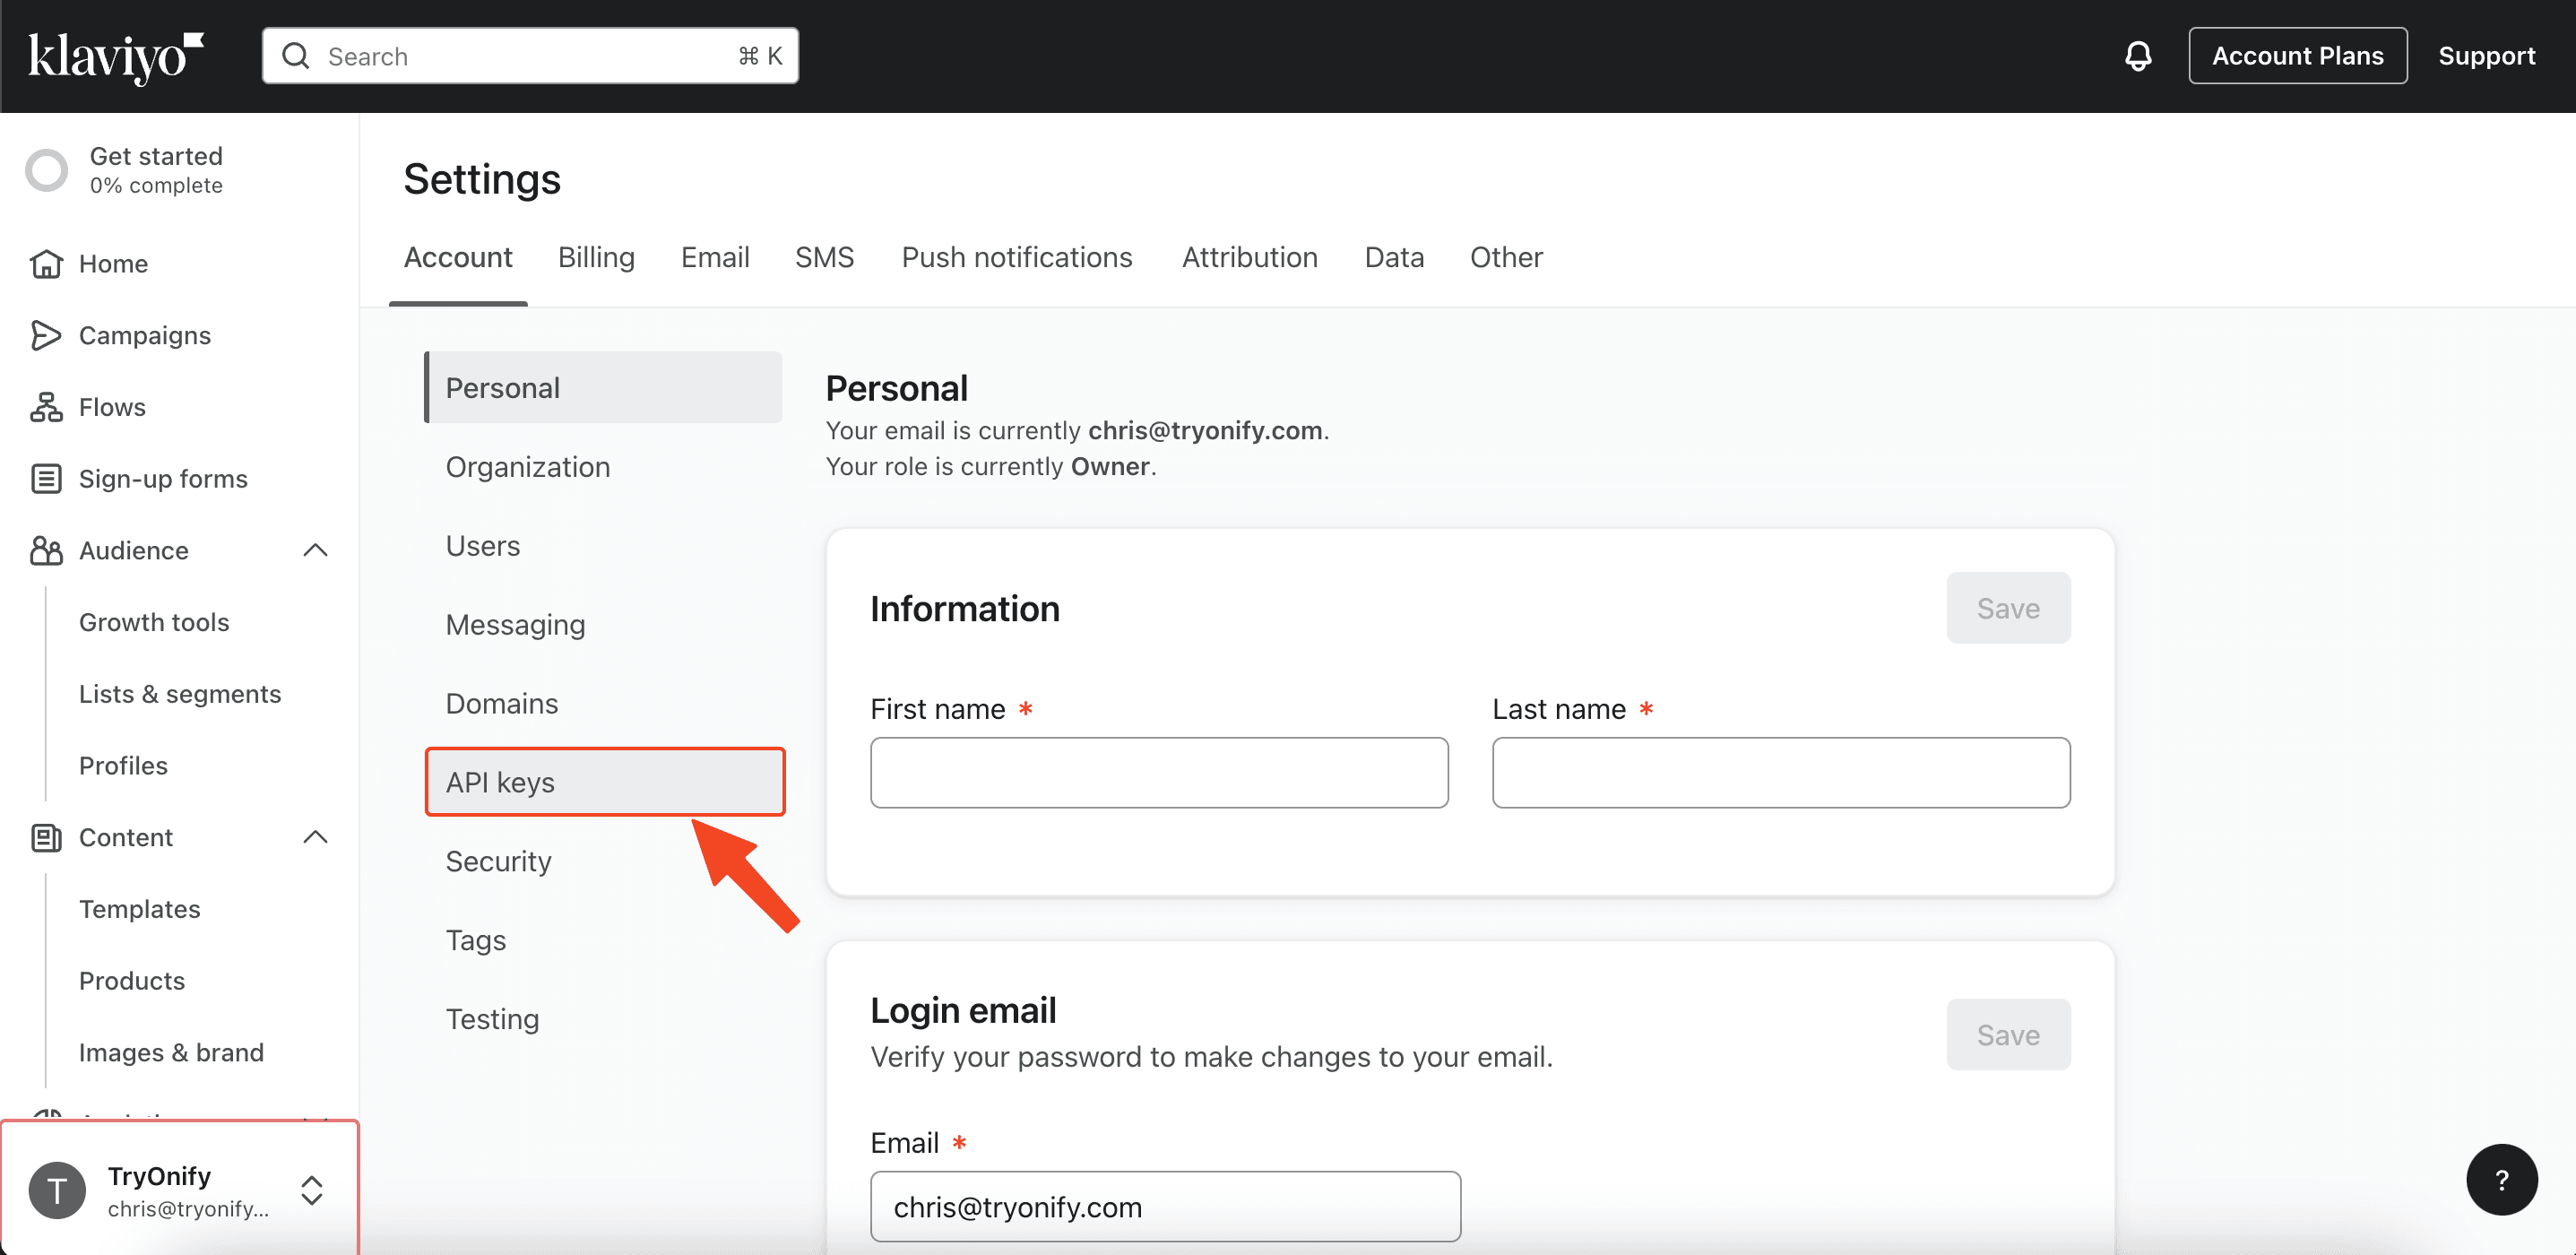
From the Settings page, click "API keys".
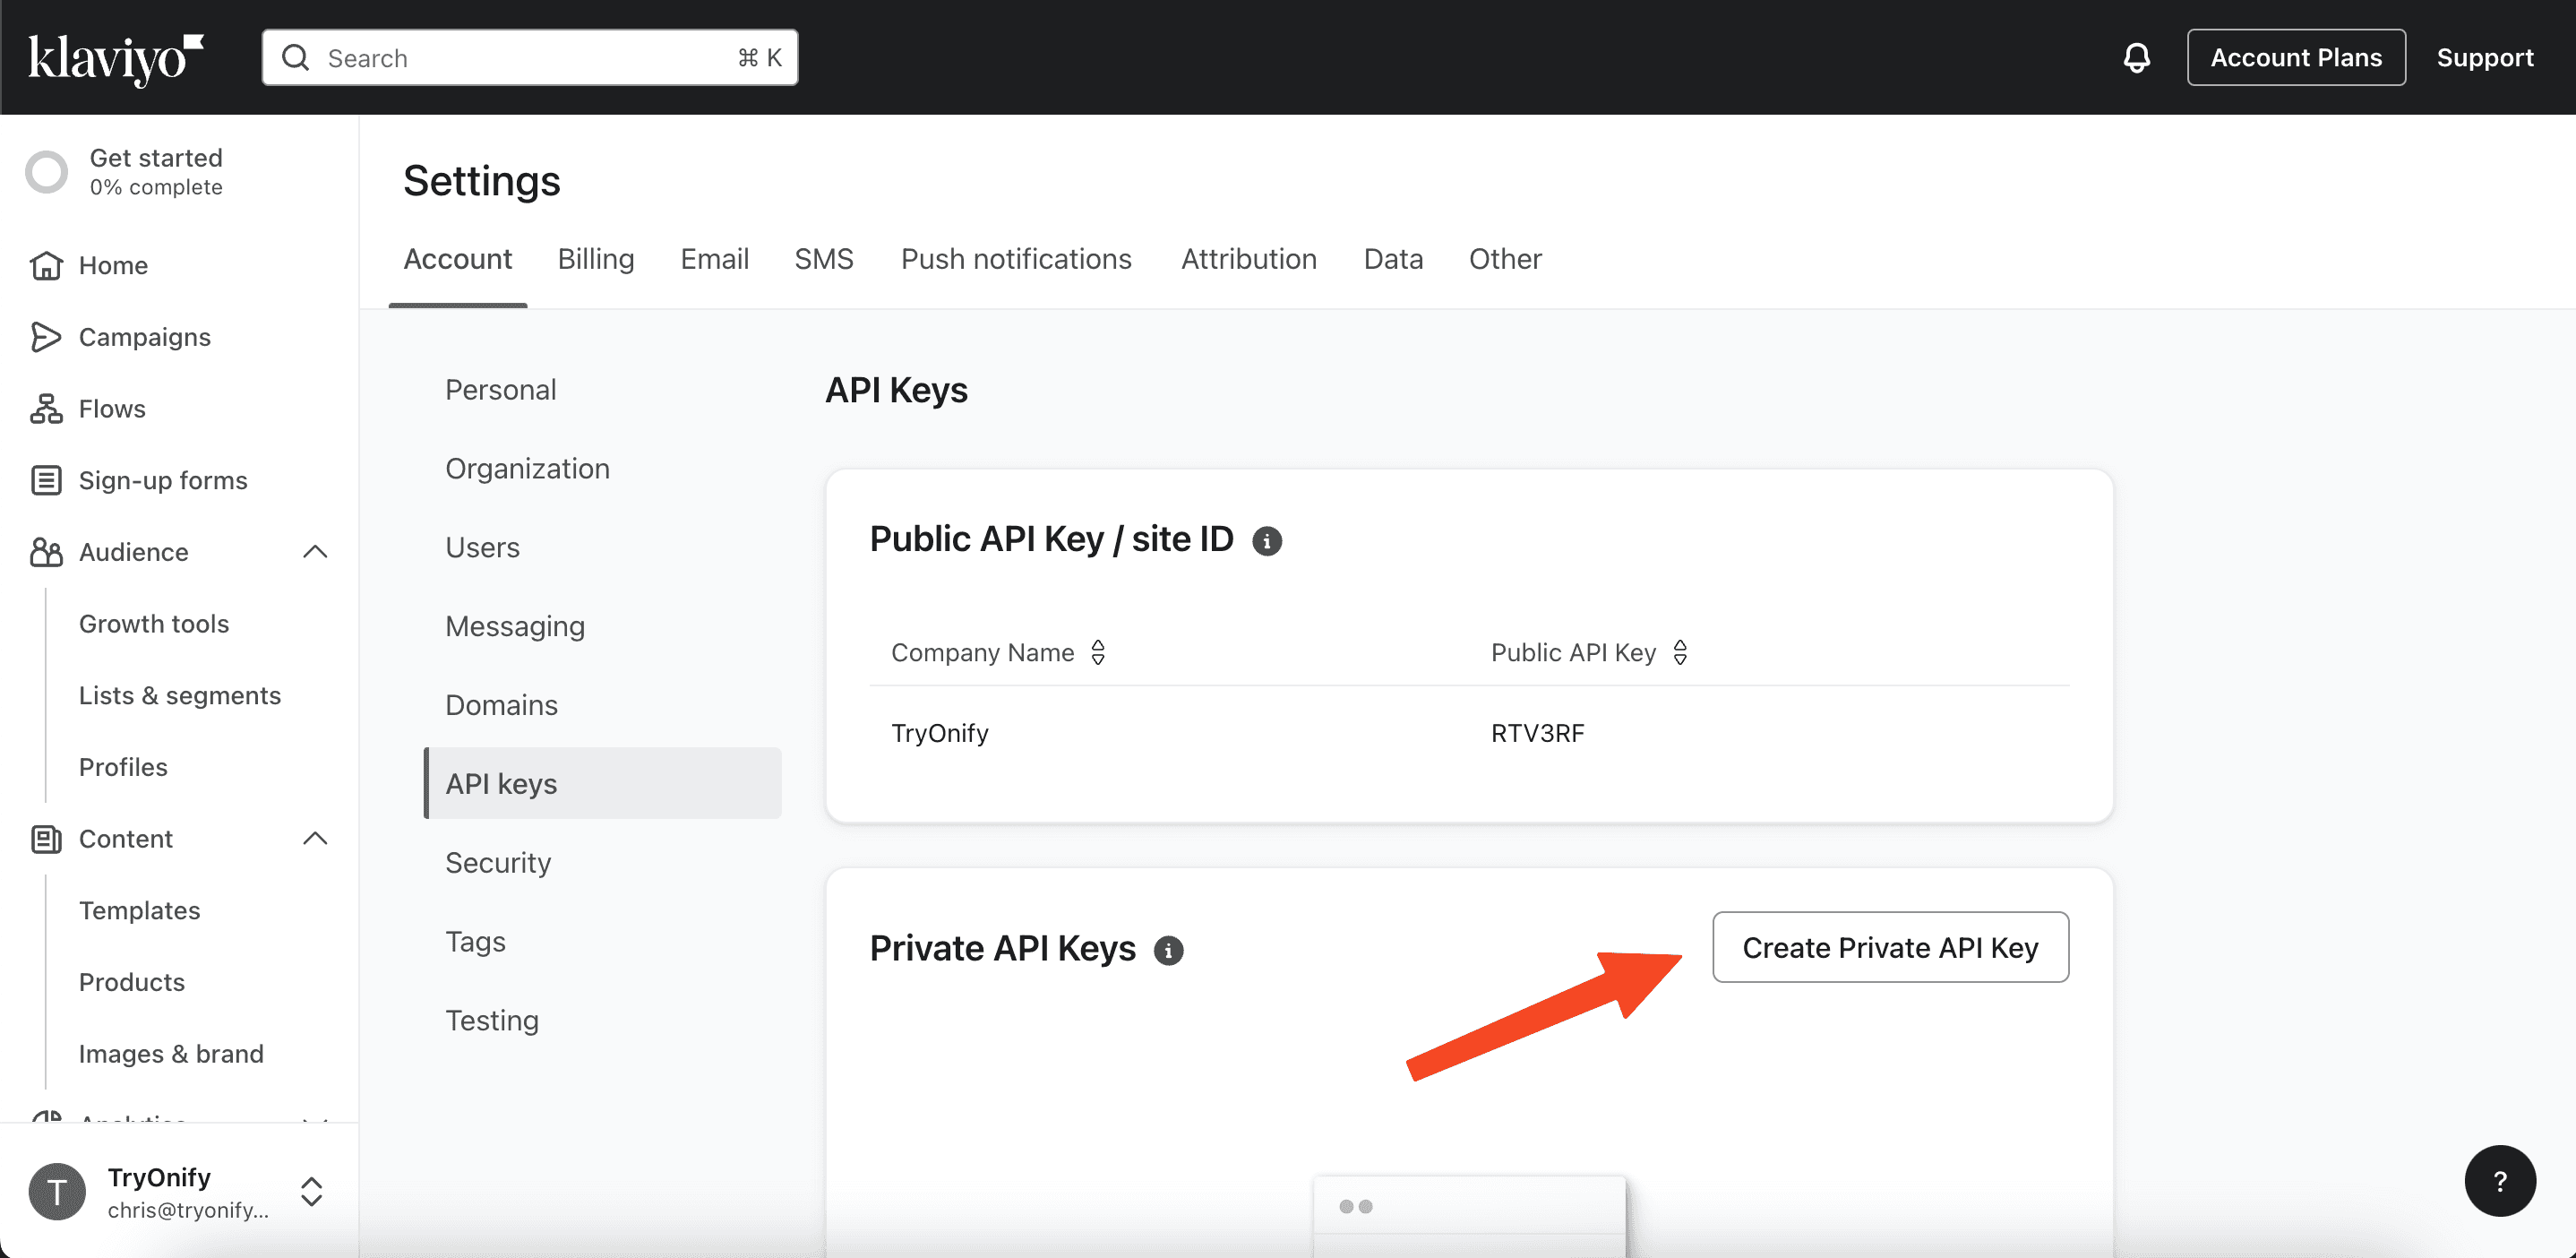
Next, click "Create Private API Key".
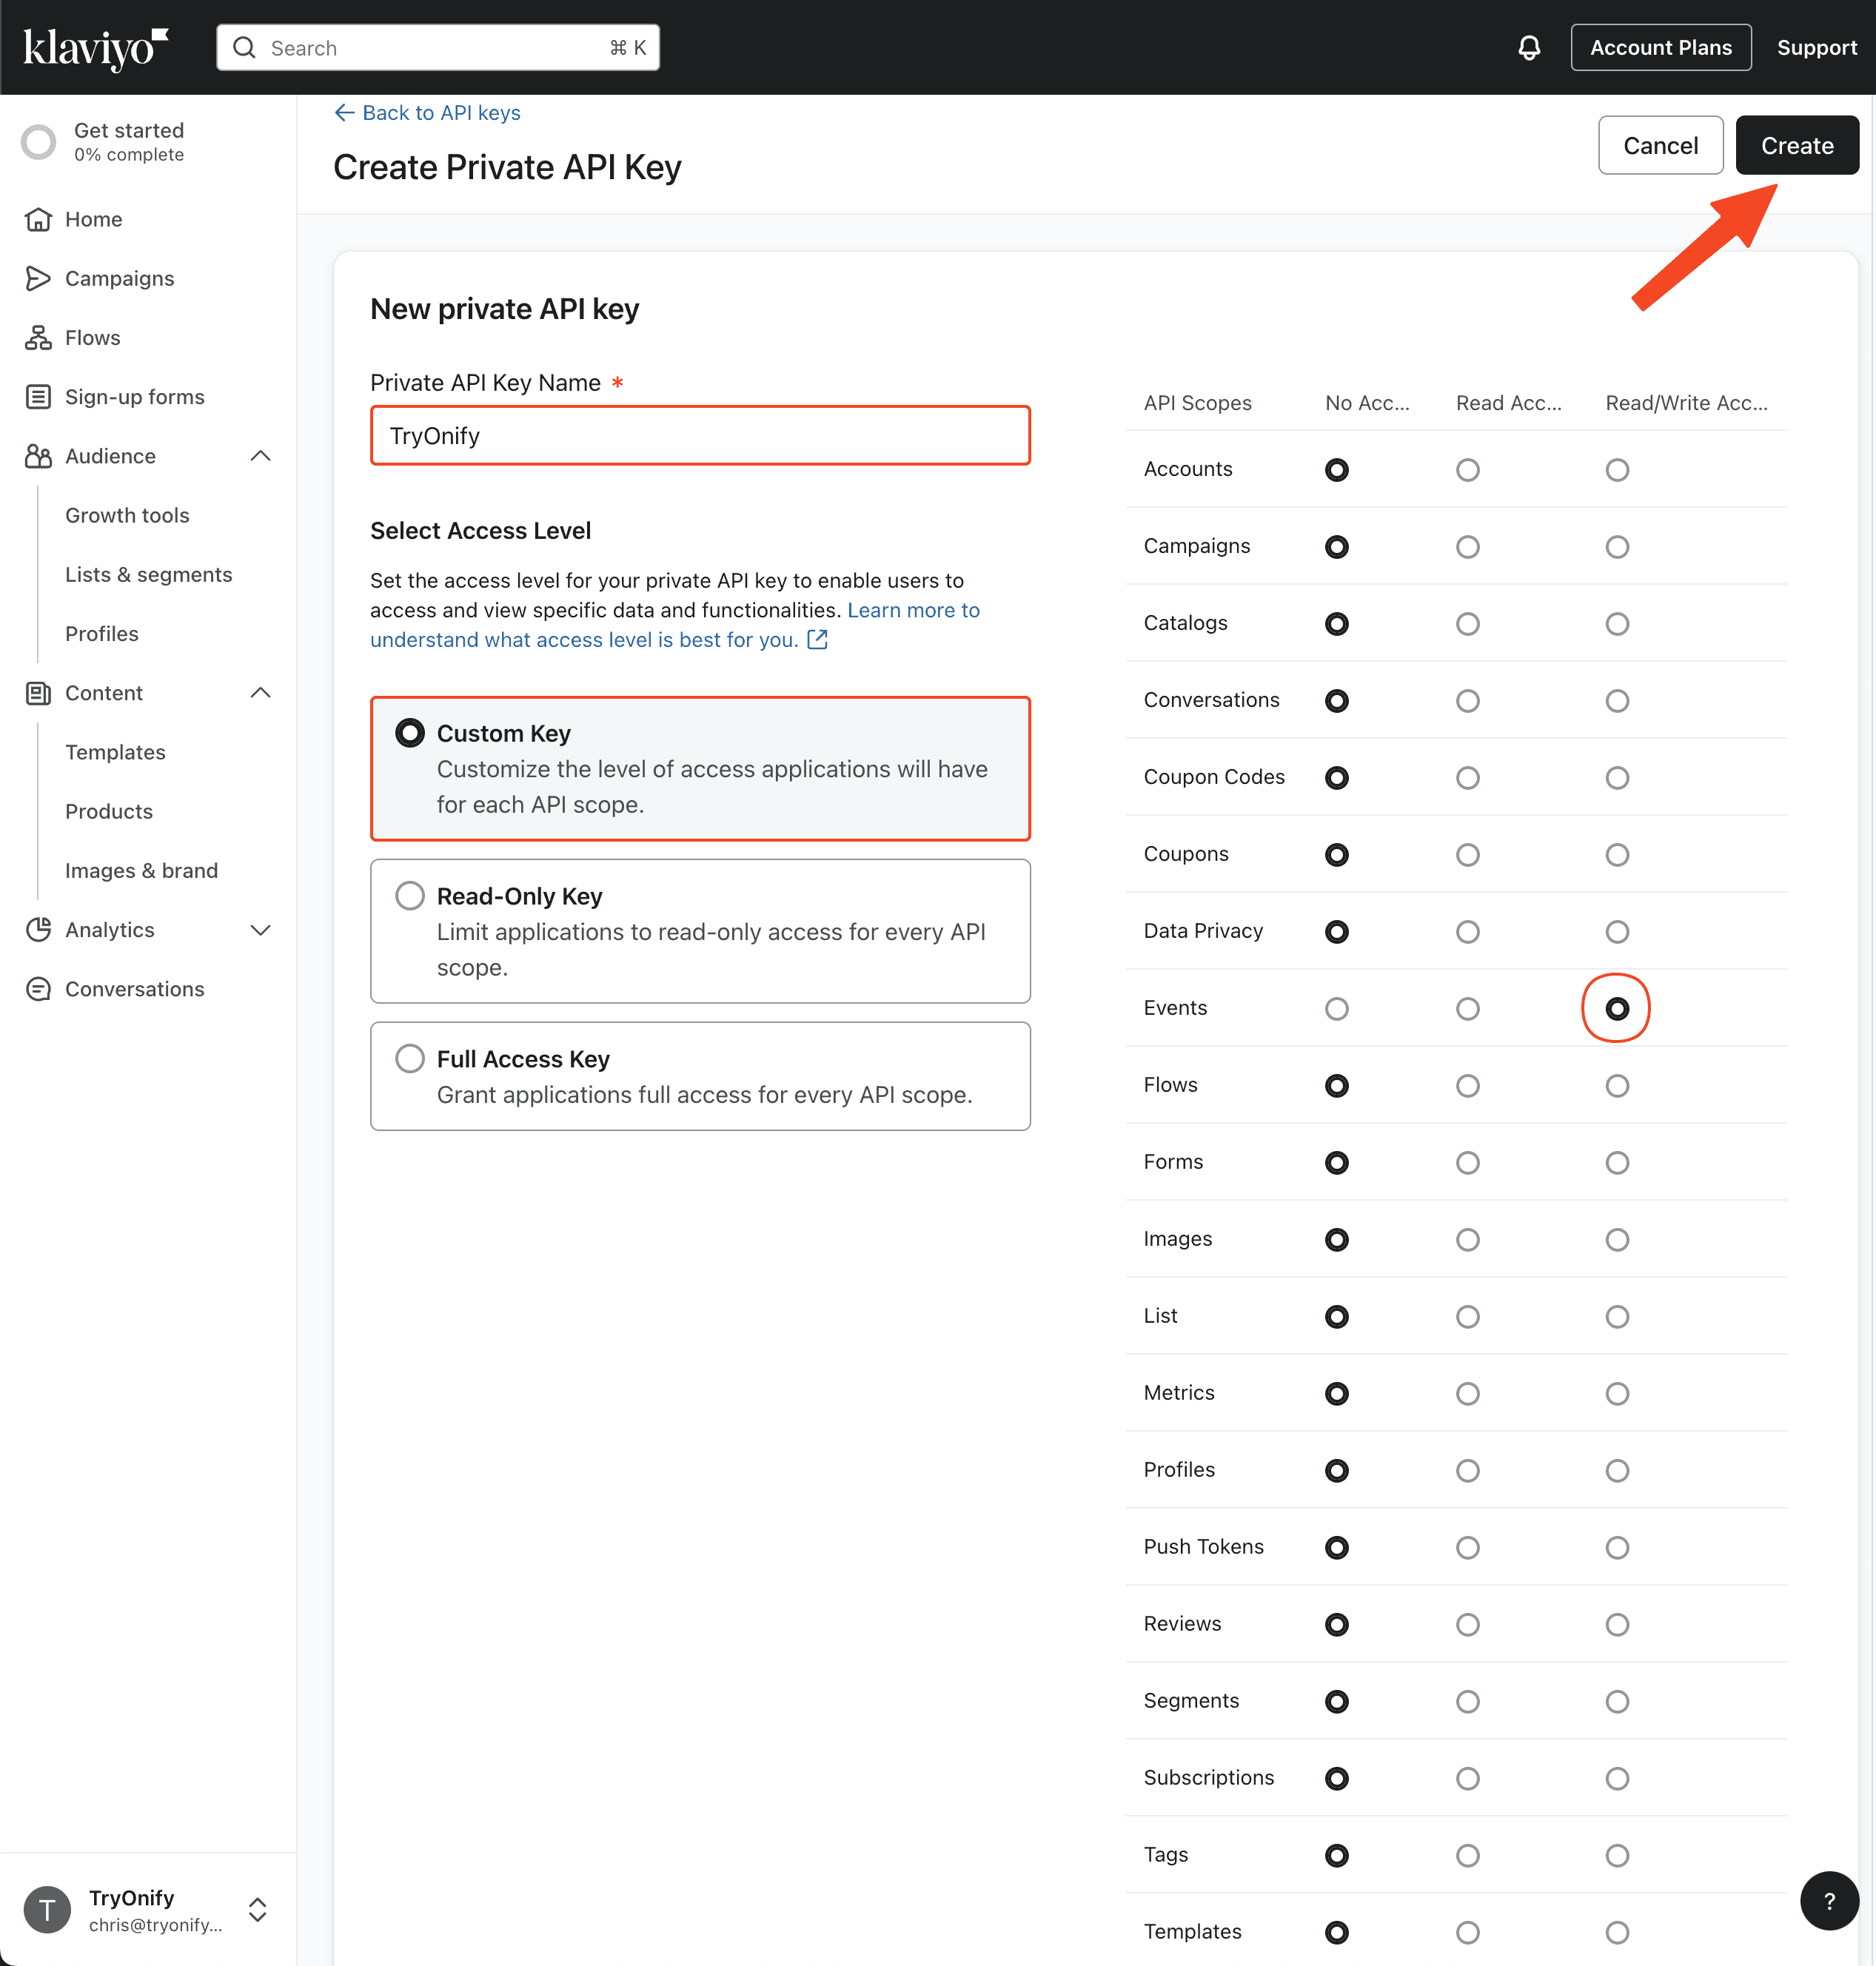
You can name your API key whatever you want. We recommend keeping it simple and naming it "TryOnify" in case you use end up using Klaviyo for other things. Make sure "Custom Key" is selected and change the permission for Events to Read/Write Access. Finally, hit "Create" in the top right corner.
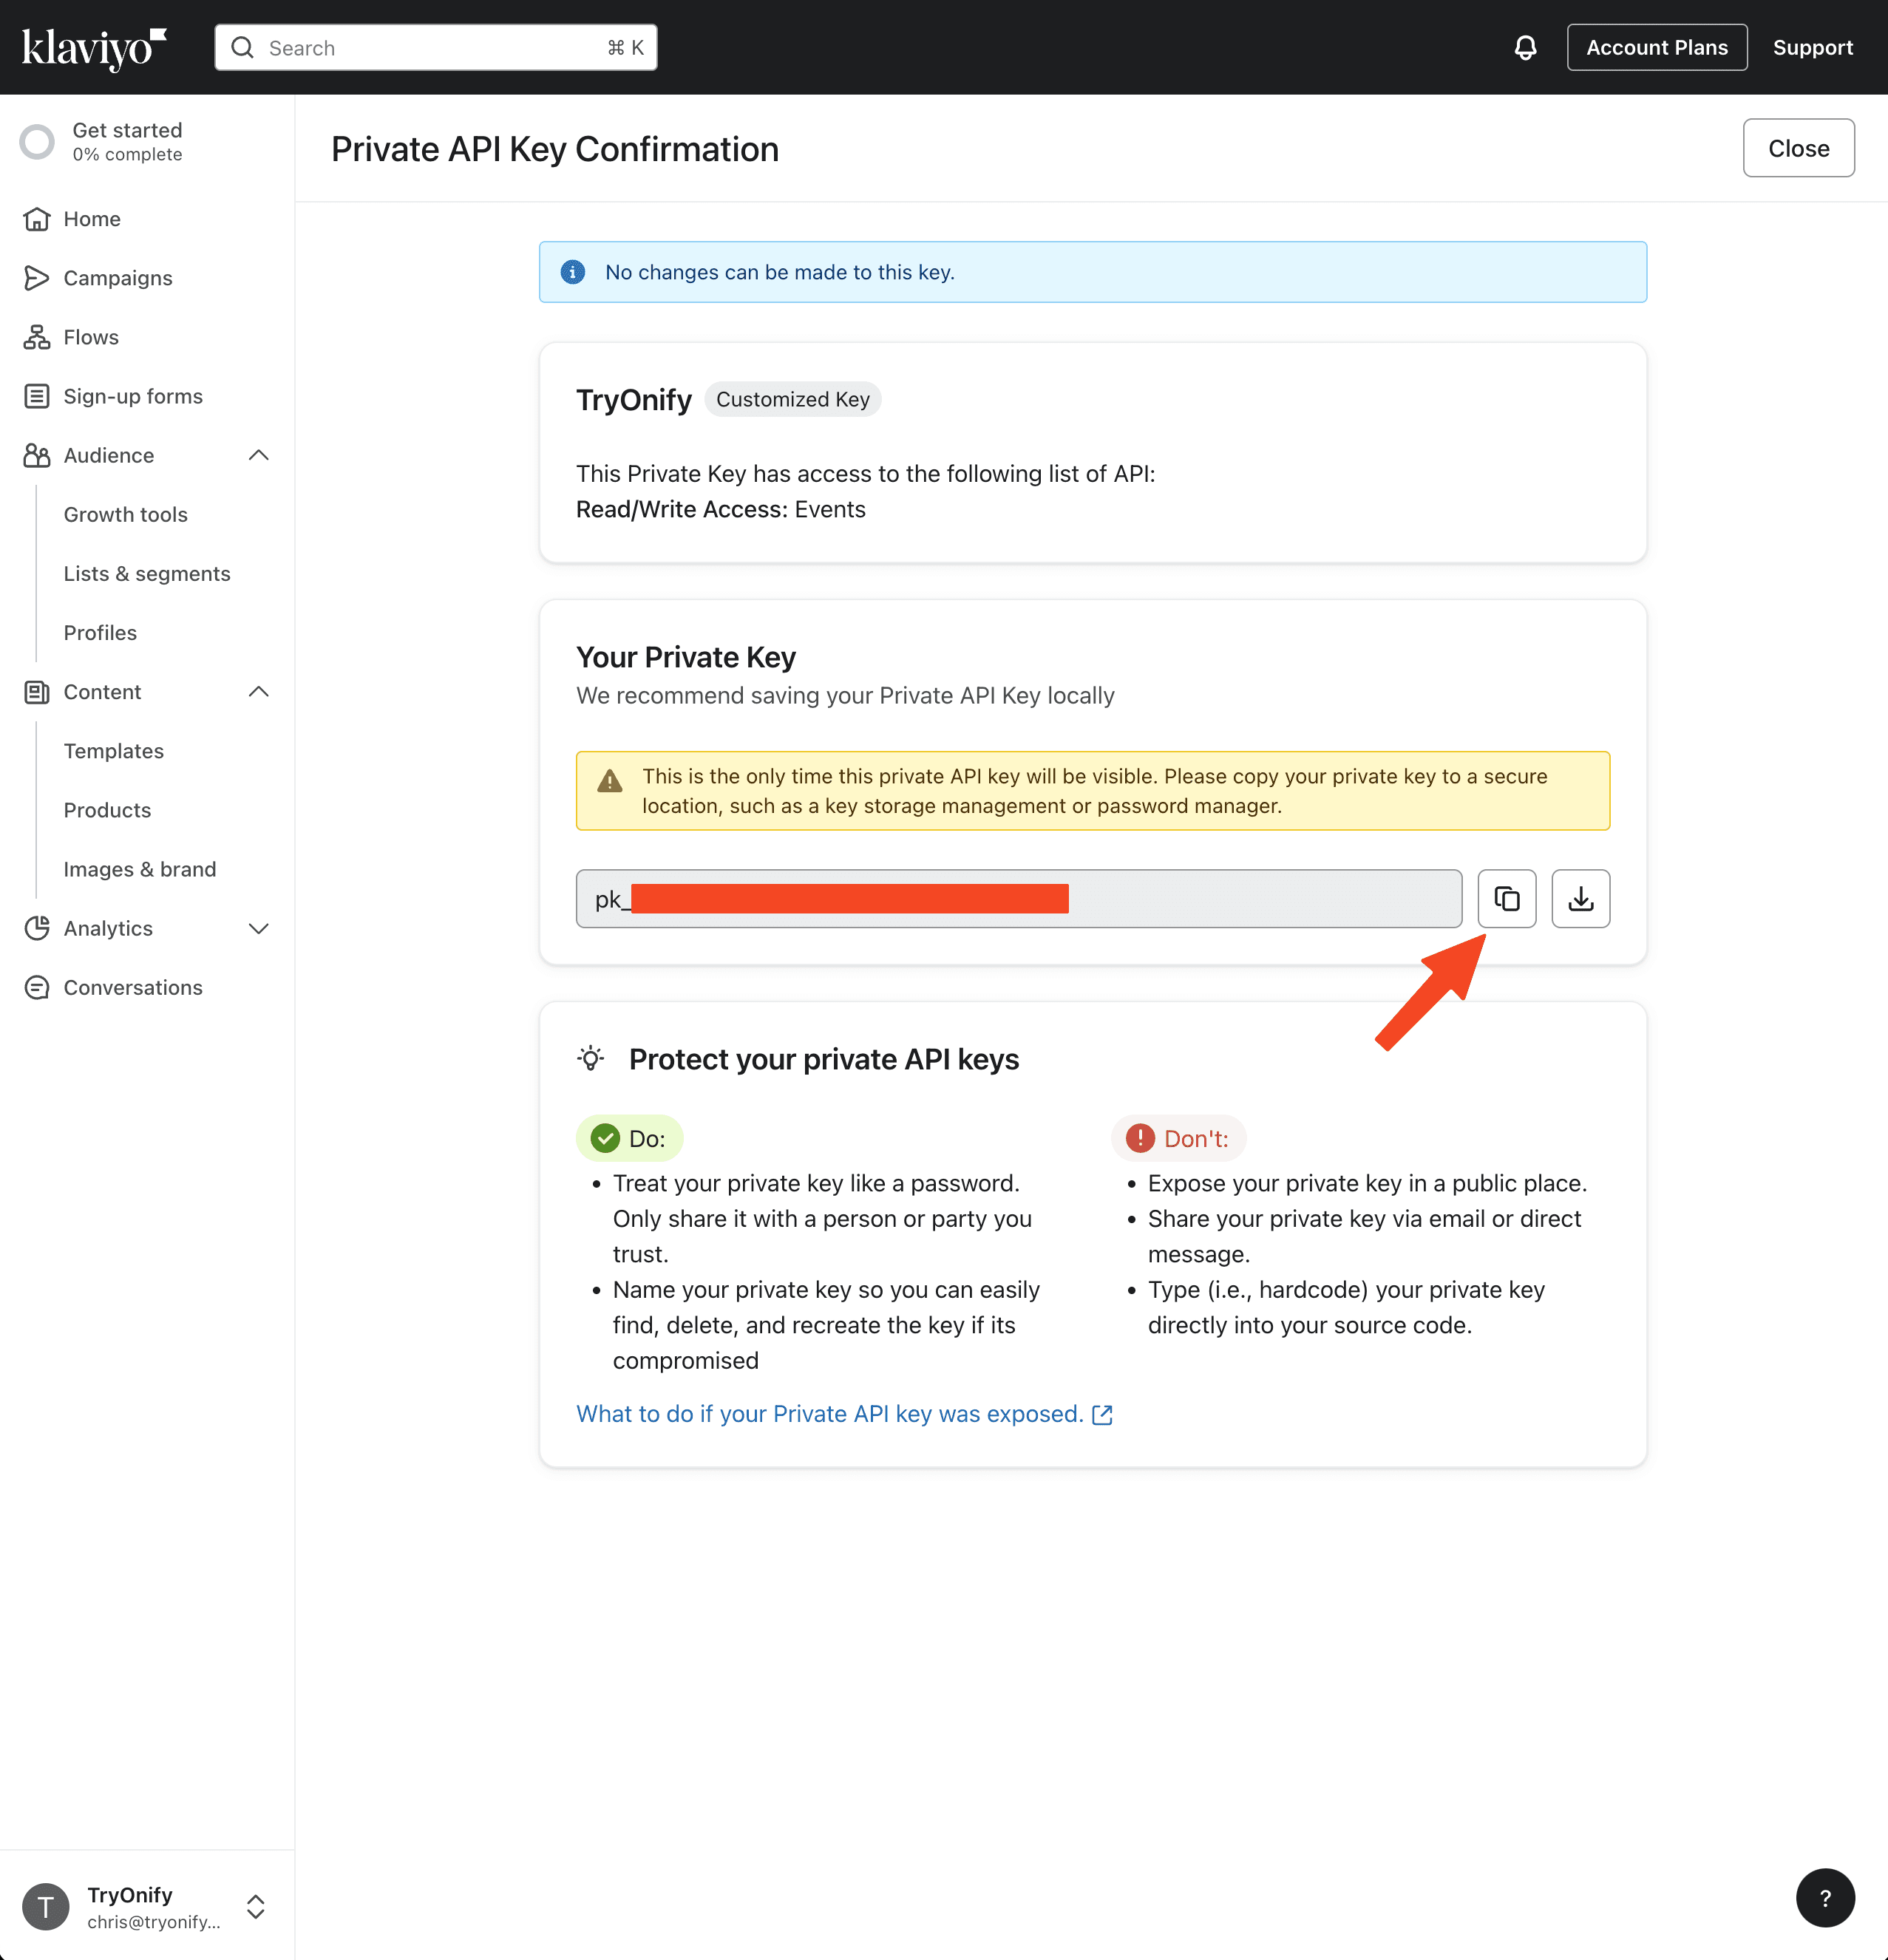
Here you can copy your new private key. If you still have the TryOnify app Settings open in Shopify Admin, go ahead and paste the private key into the Private Key field under Klaviyo in the Integrations section. Otherwise, paste it in your notes since we still need to grab the public key.
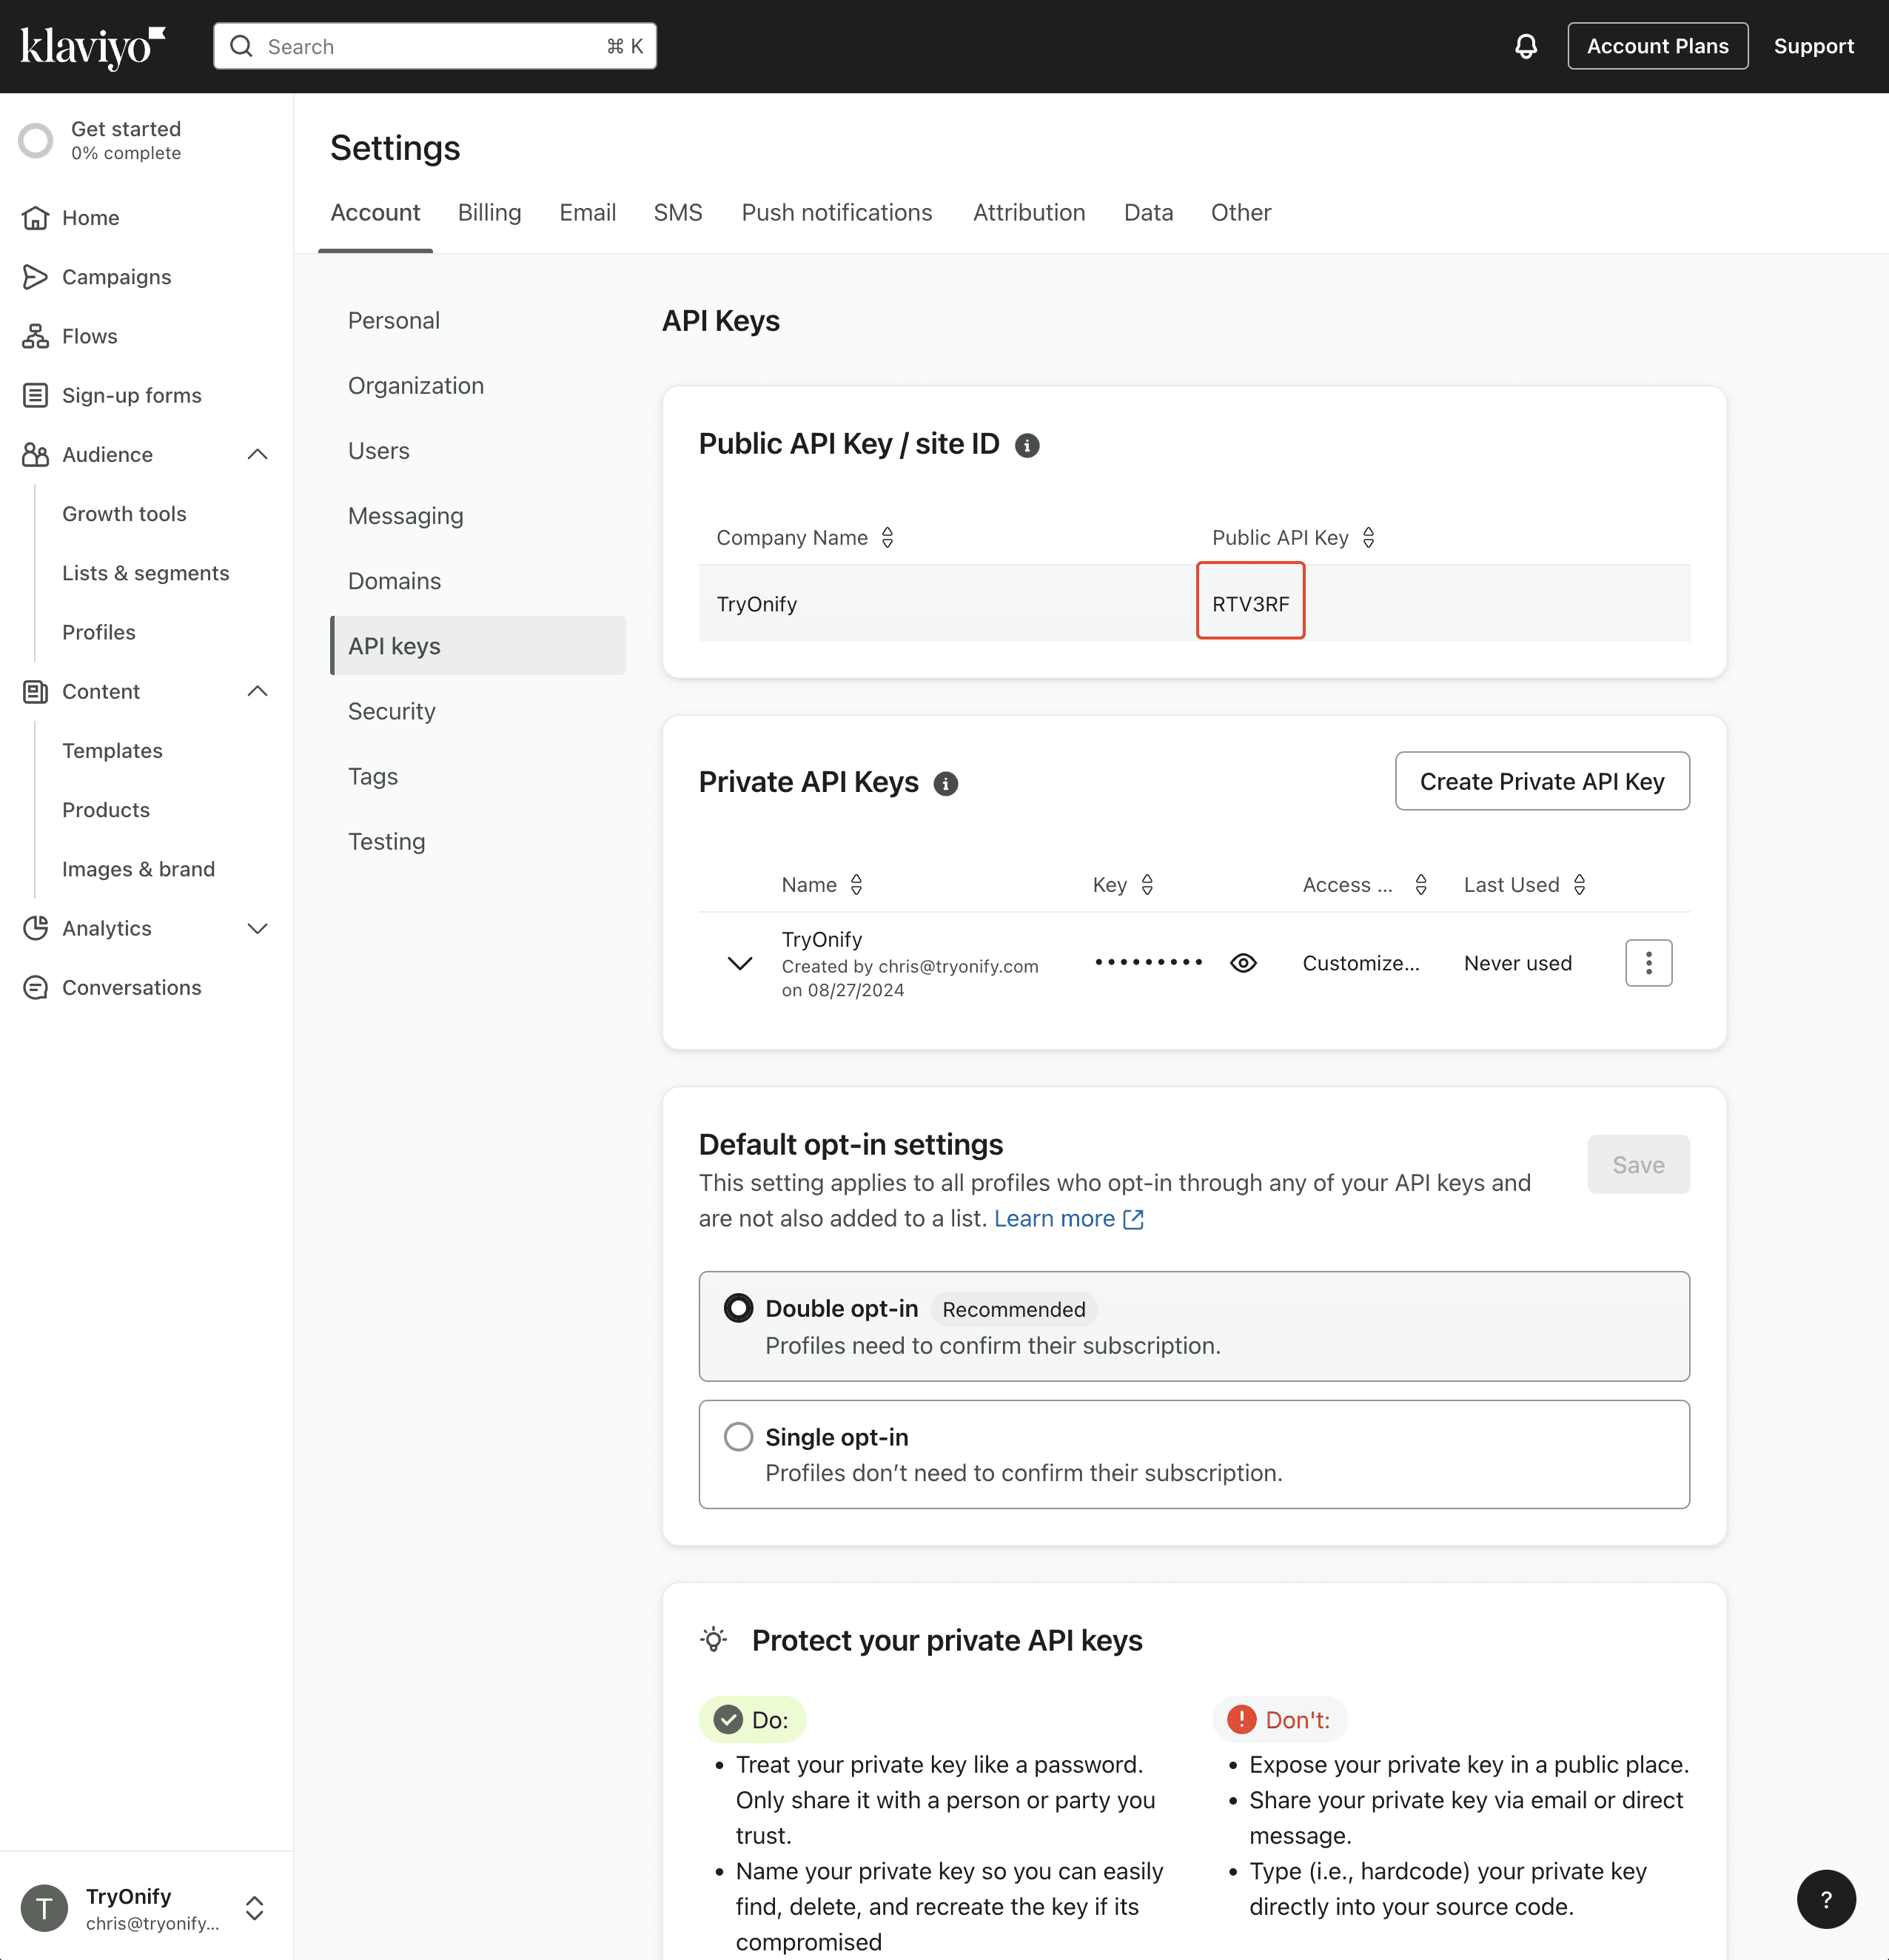
Hop on over back to the Settings page in Klaviyo and grab your Public API Key from the API keys section.
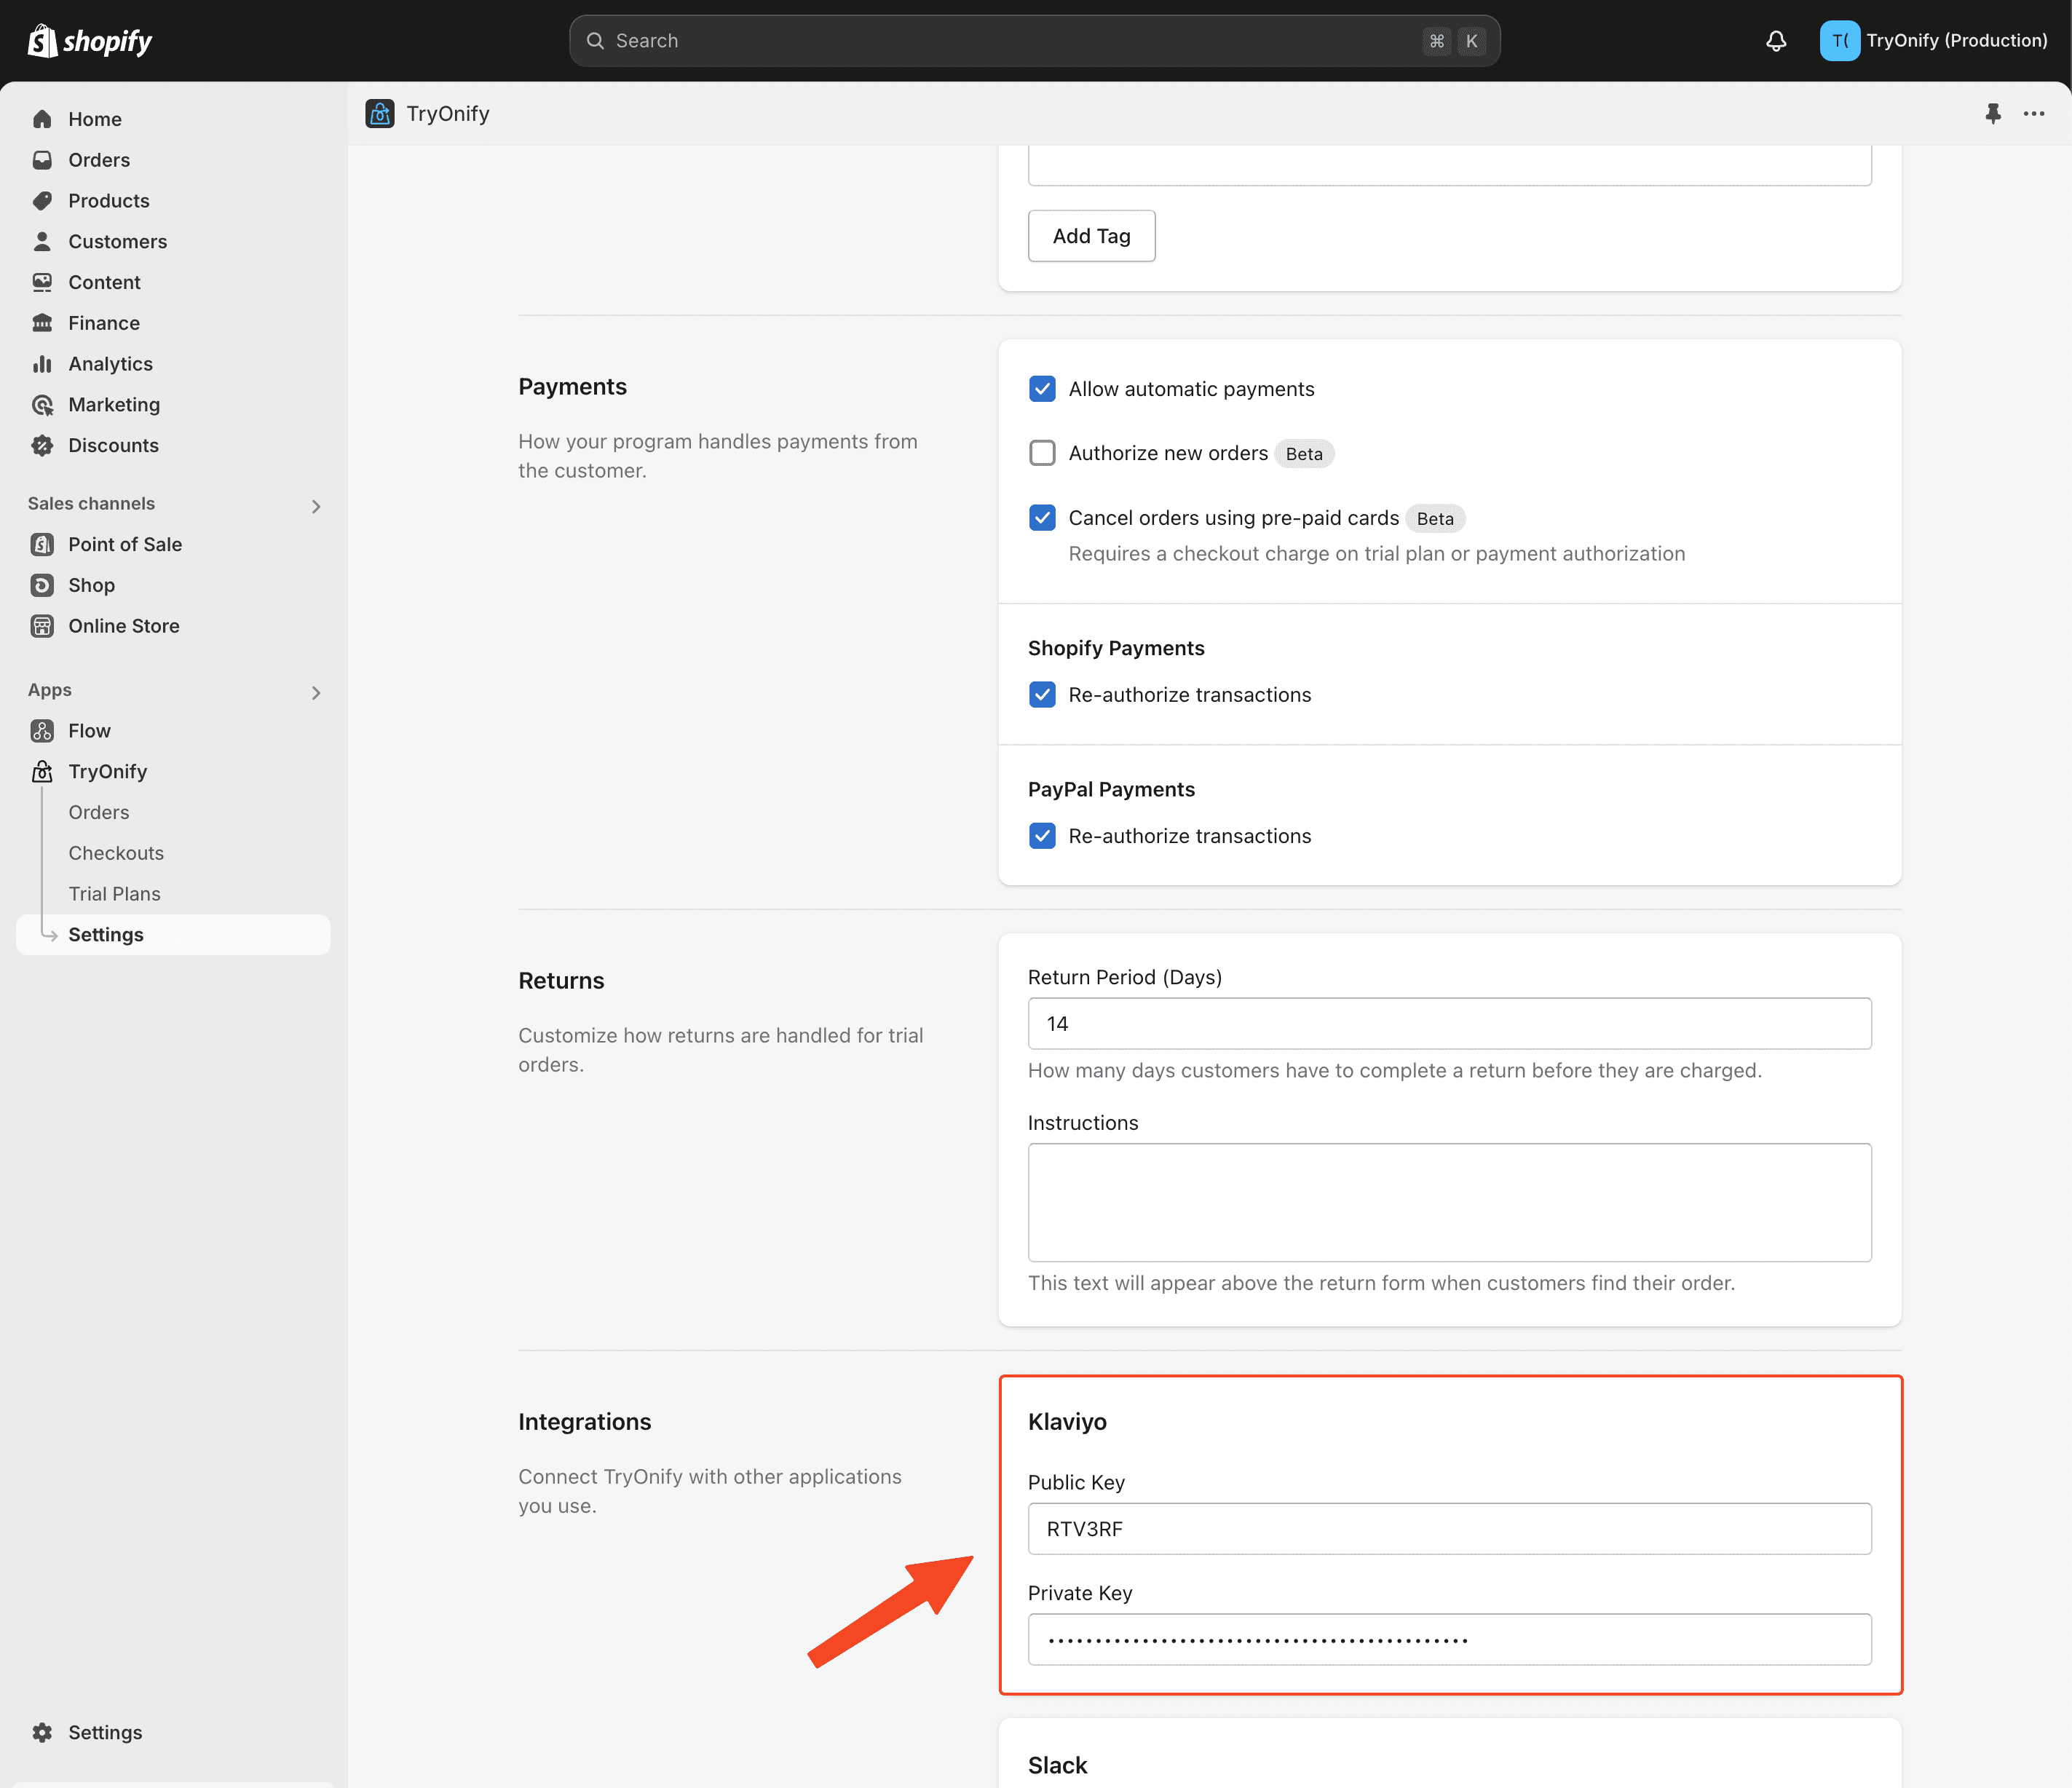
Paste the Public and Private Keys into the appropriate fields in the TryOnify app Settings. The Klaviyo Integration settings are at the bottom. Make sure to click "Save" at the top after inputting your keys.
Wohoo! You're halfway there. Now it's time to setup the email flows in Klaviyo. From the homepage, while logged in, click "Flows". Then click "Build your own".
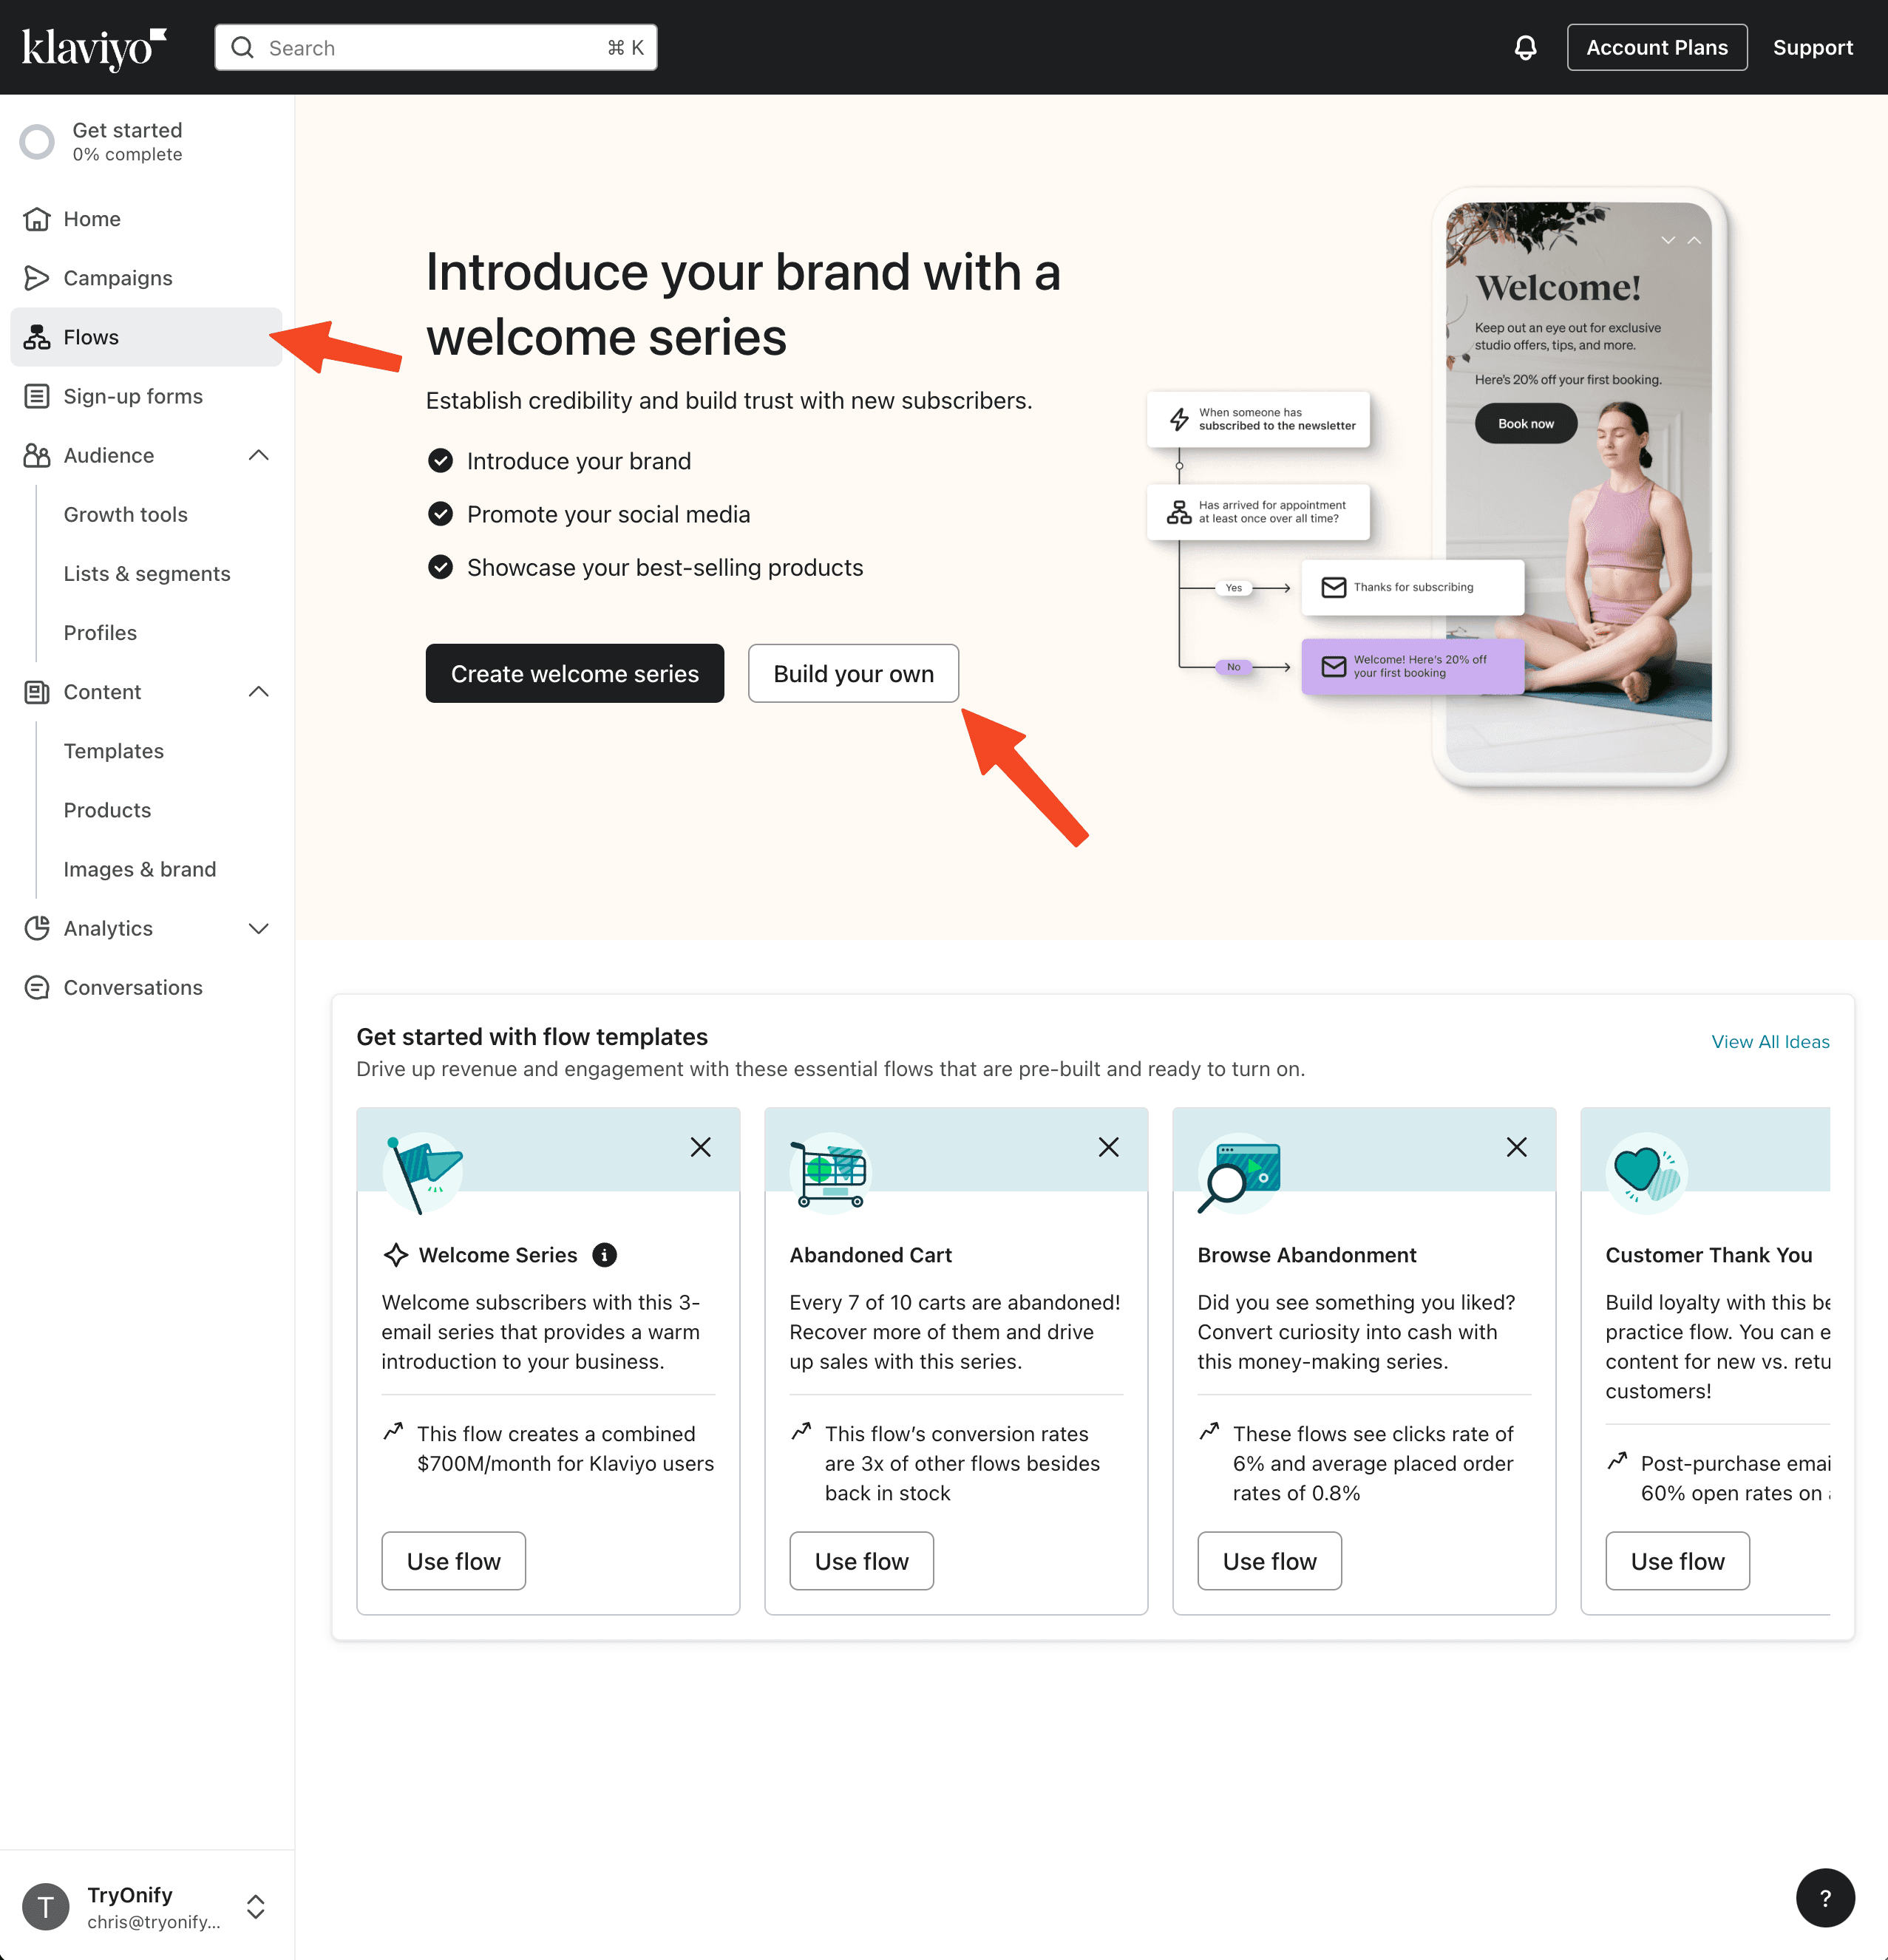
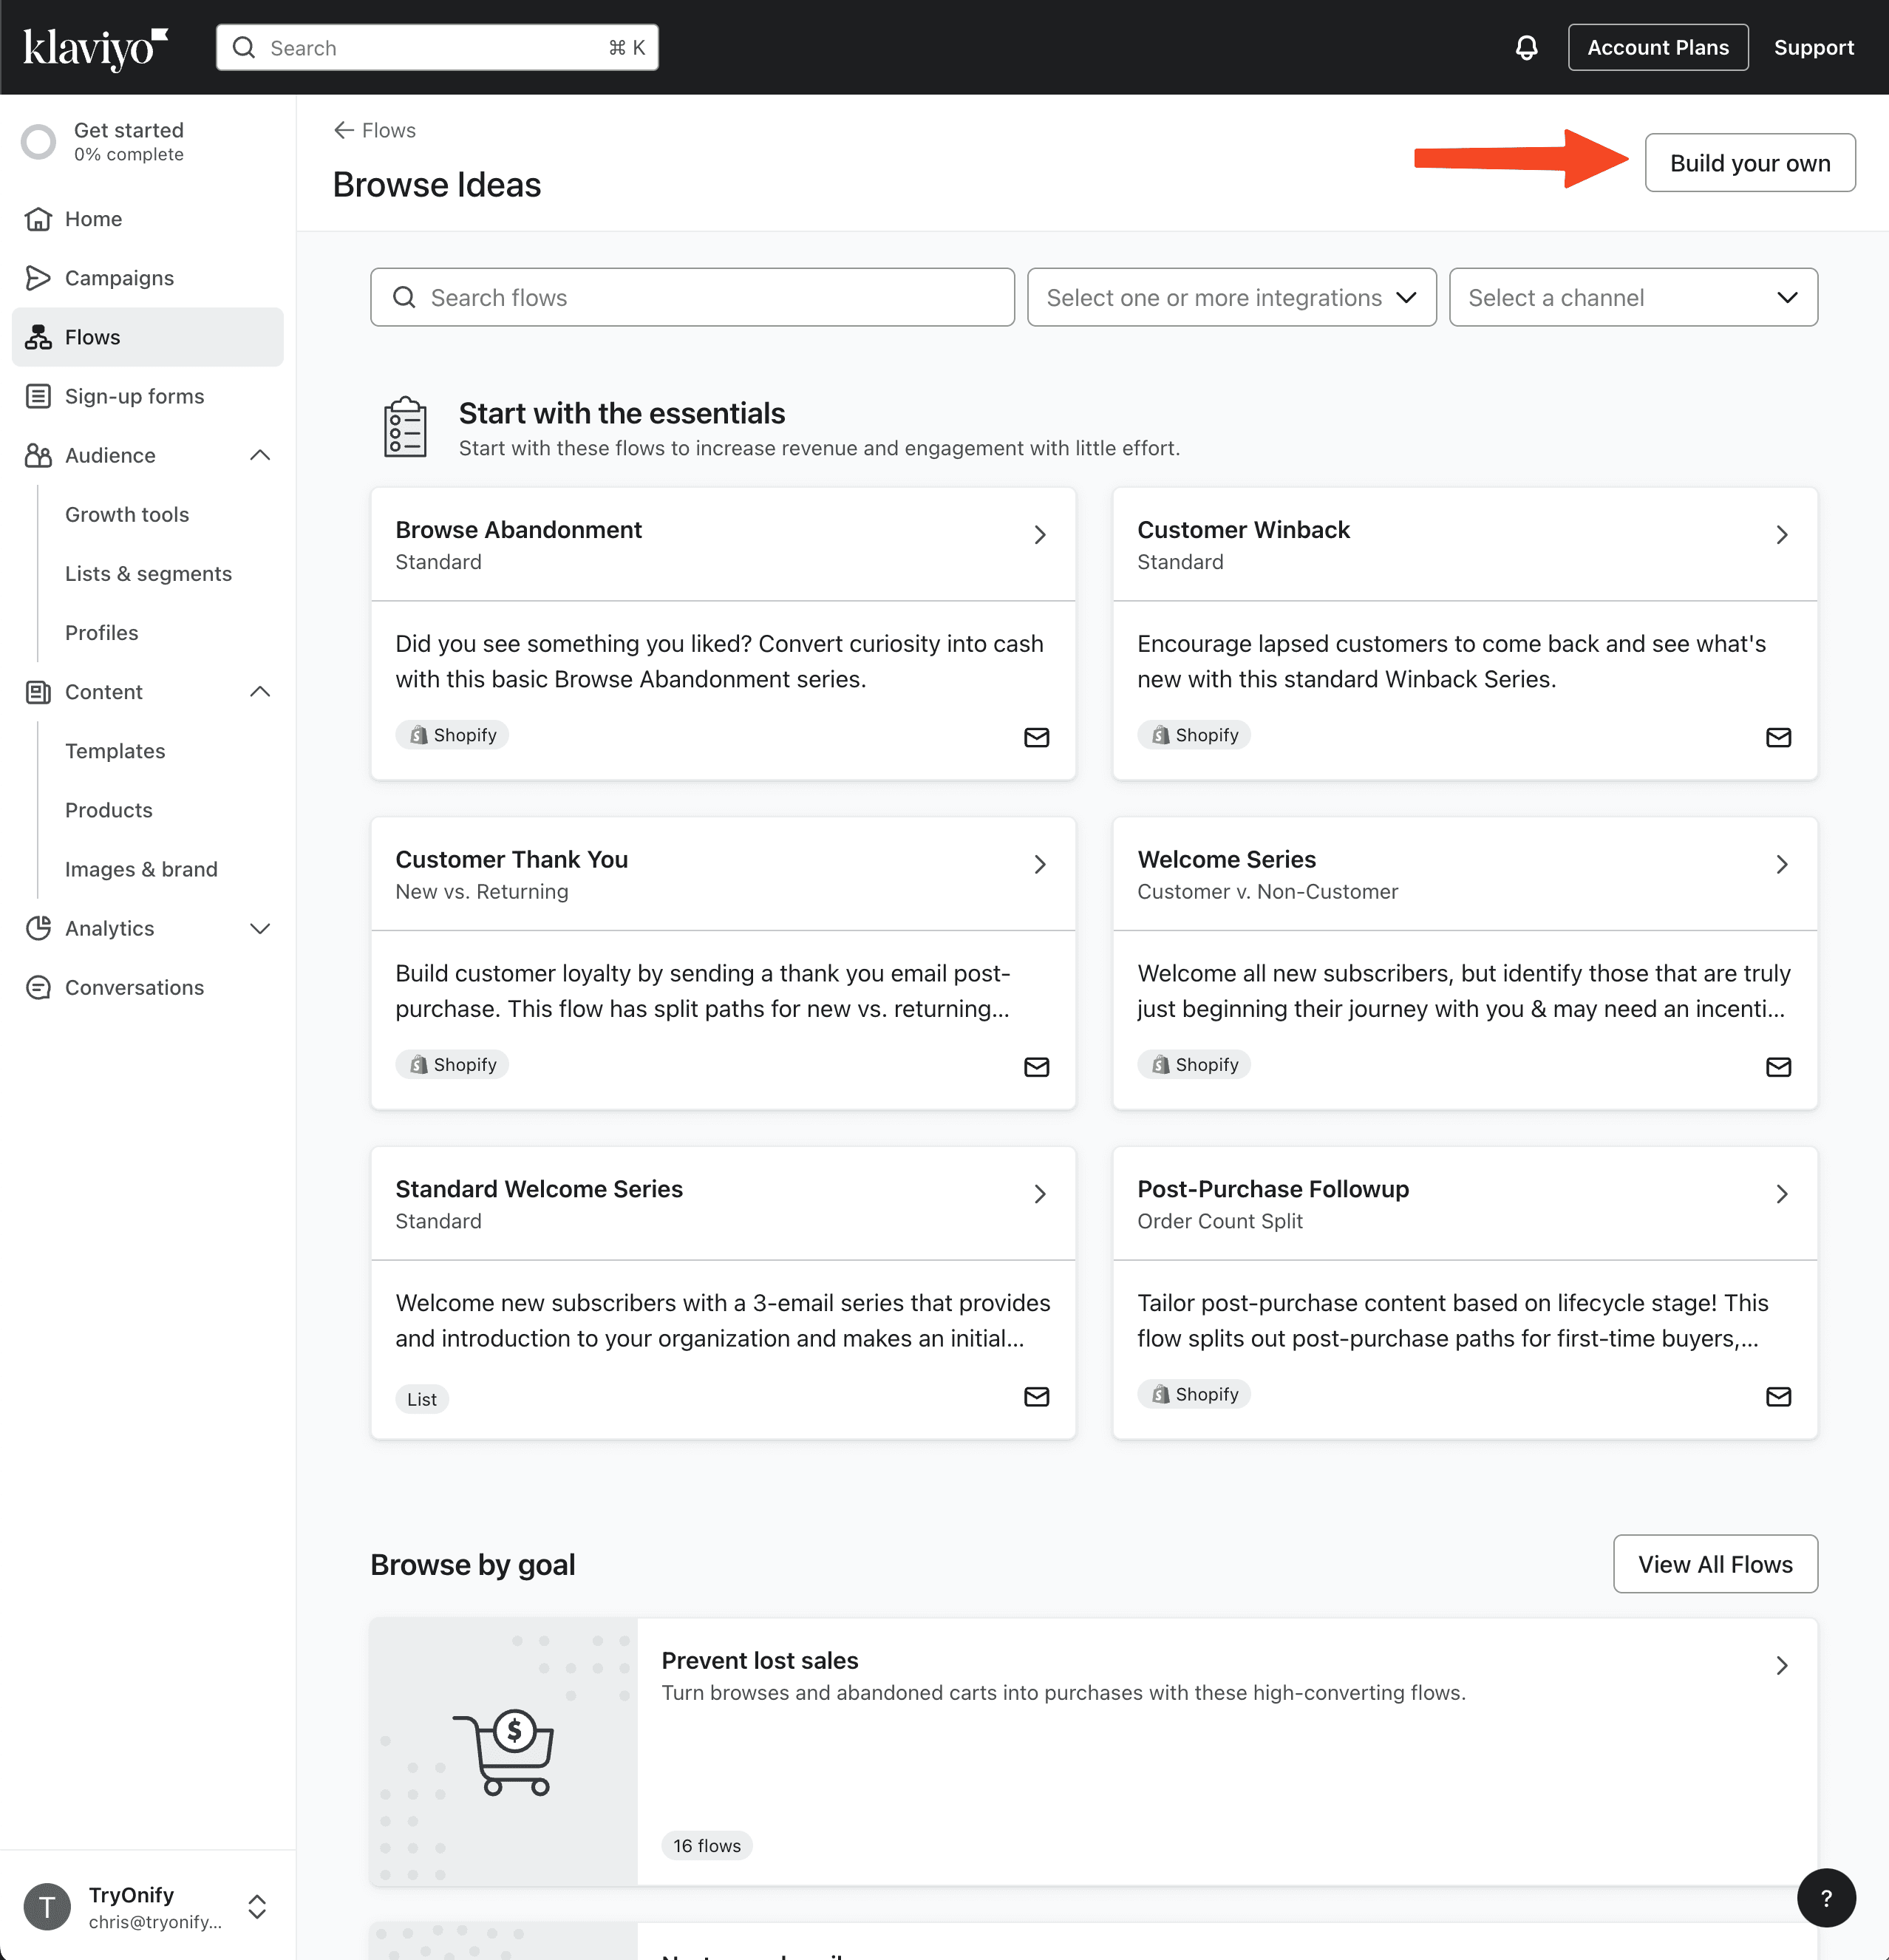
Once again, click "Build your own" in the top right corner.
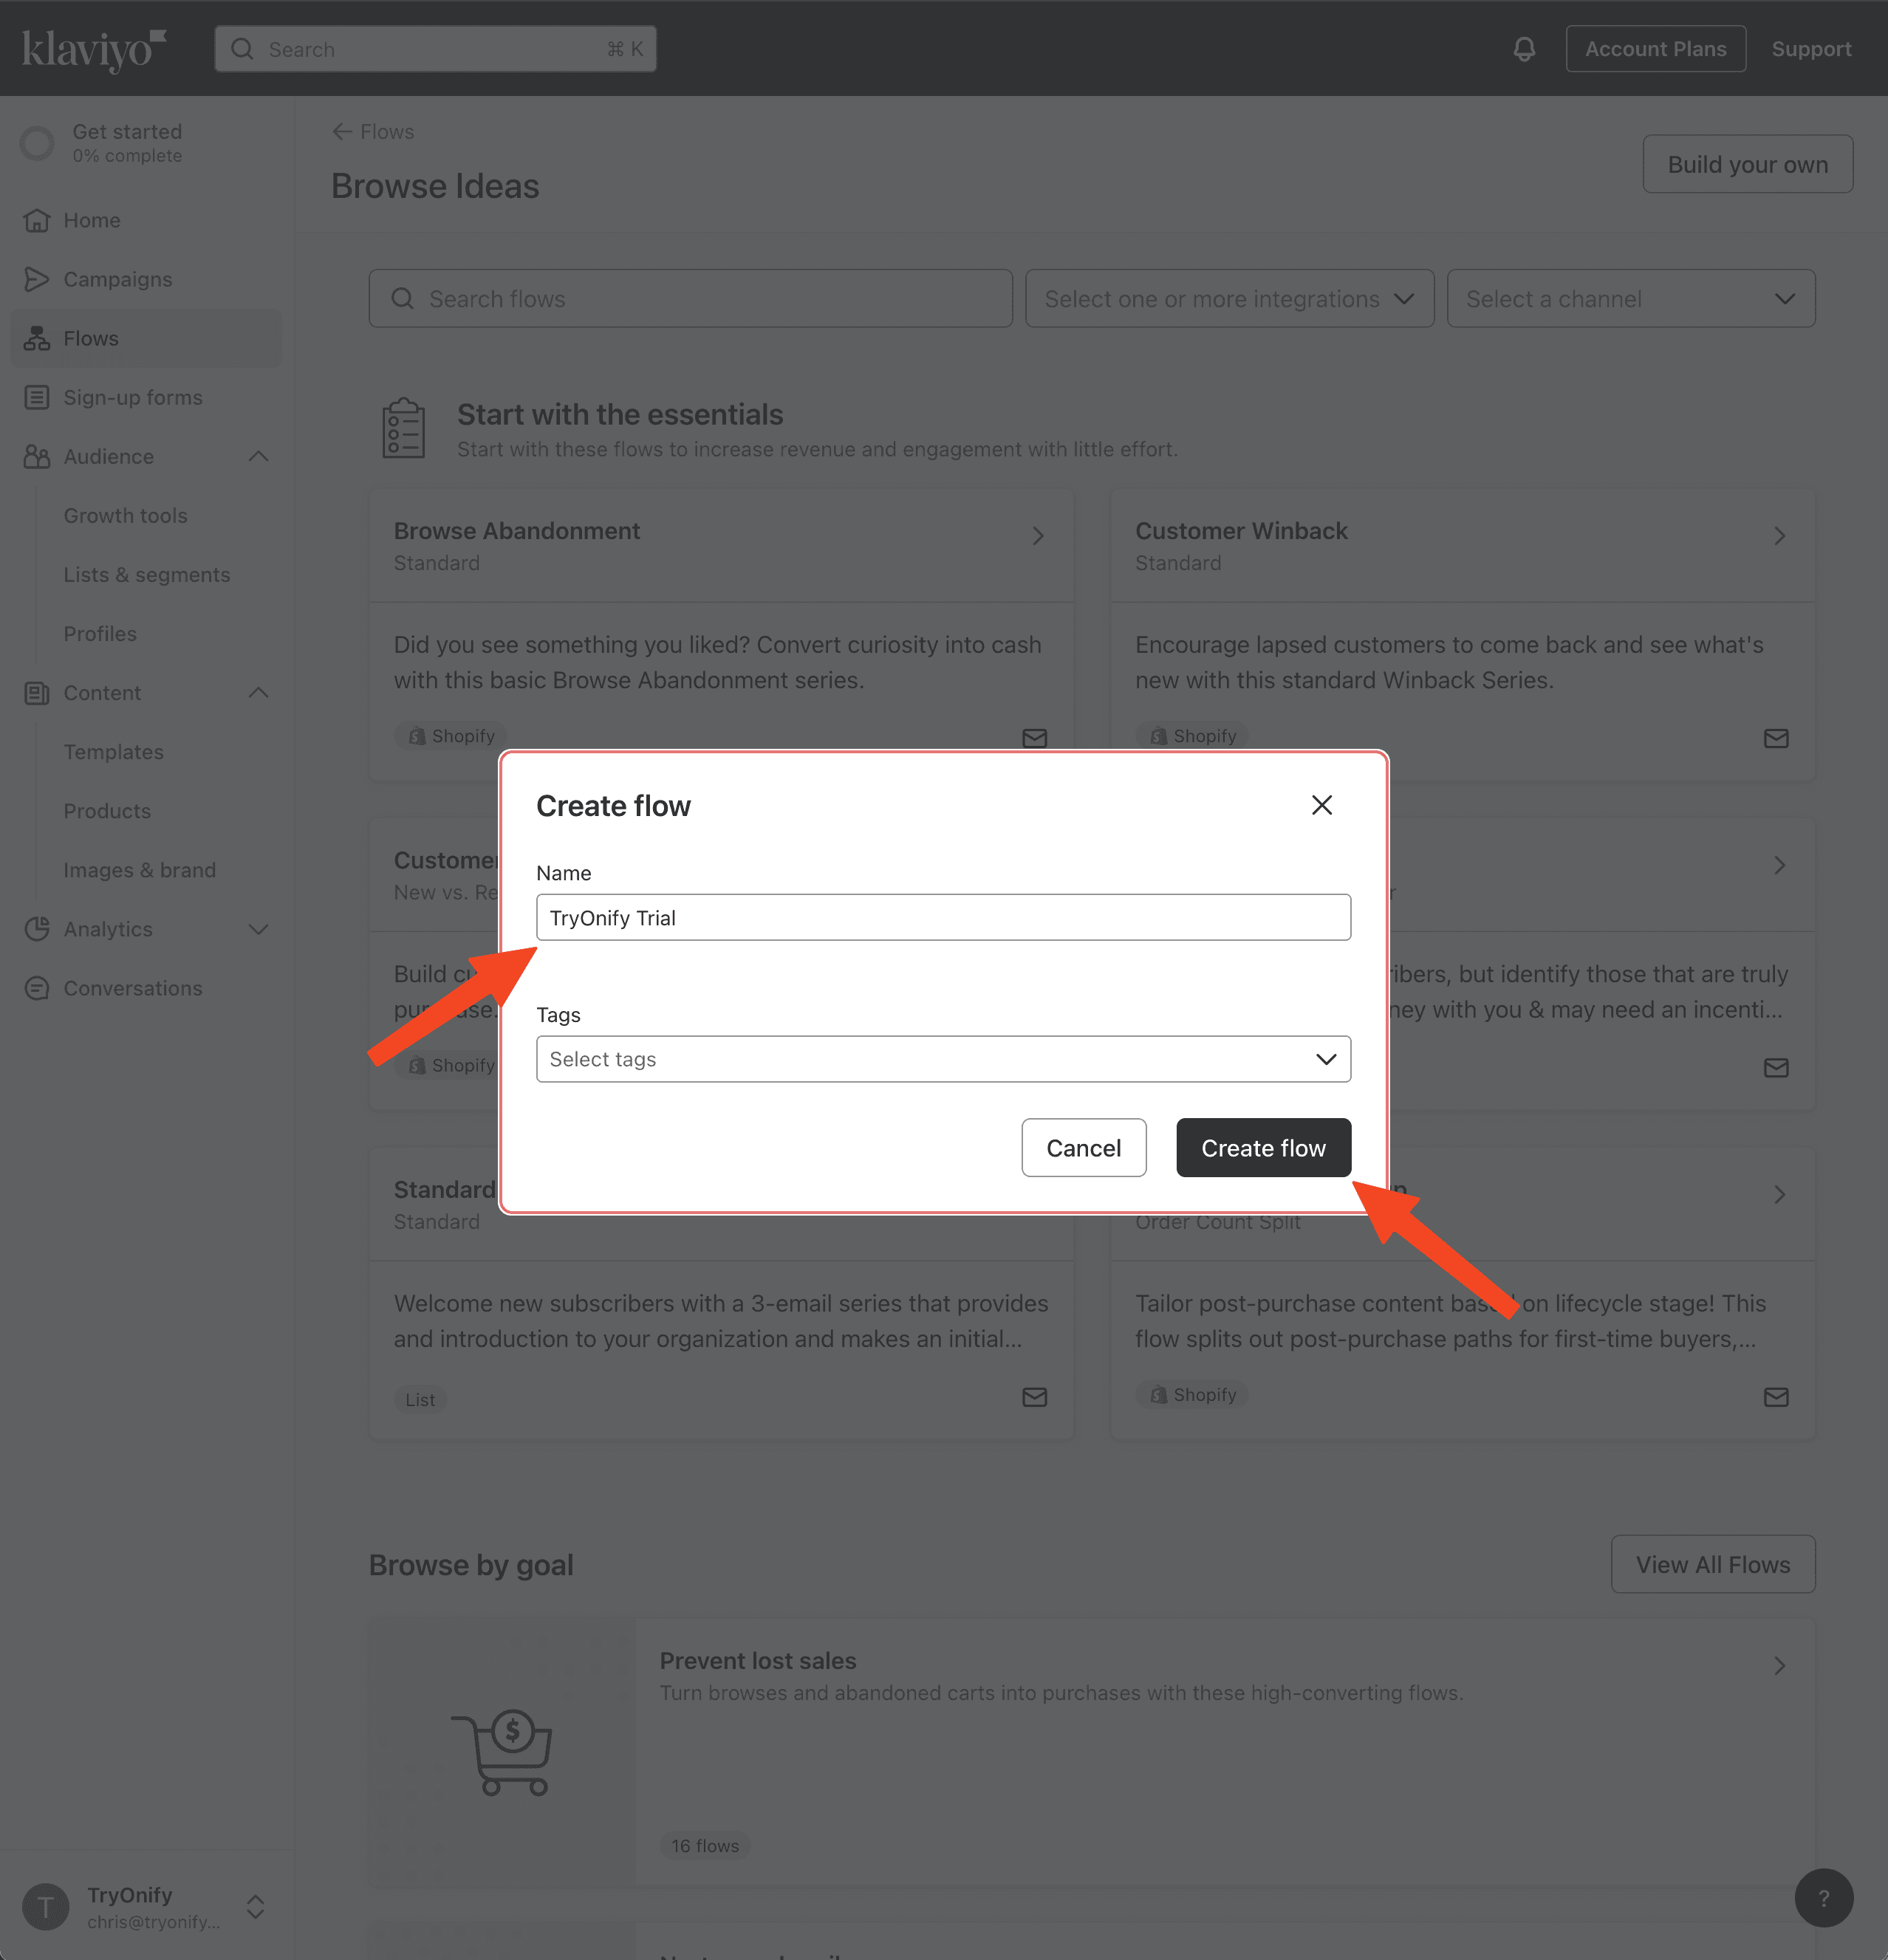
Here you can give your flow a name. Click "Create flow" to proceed.
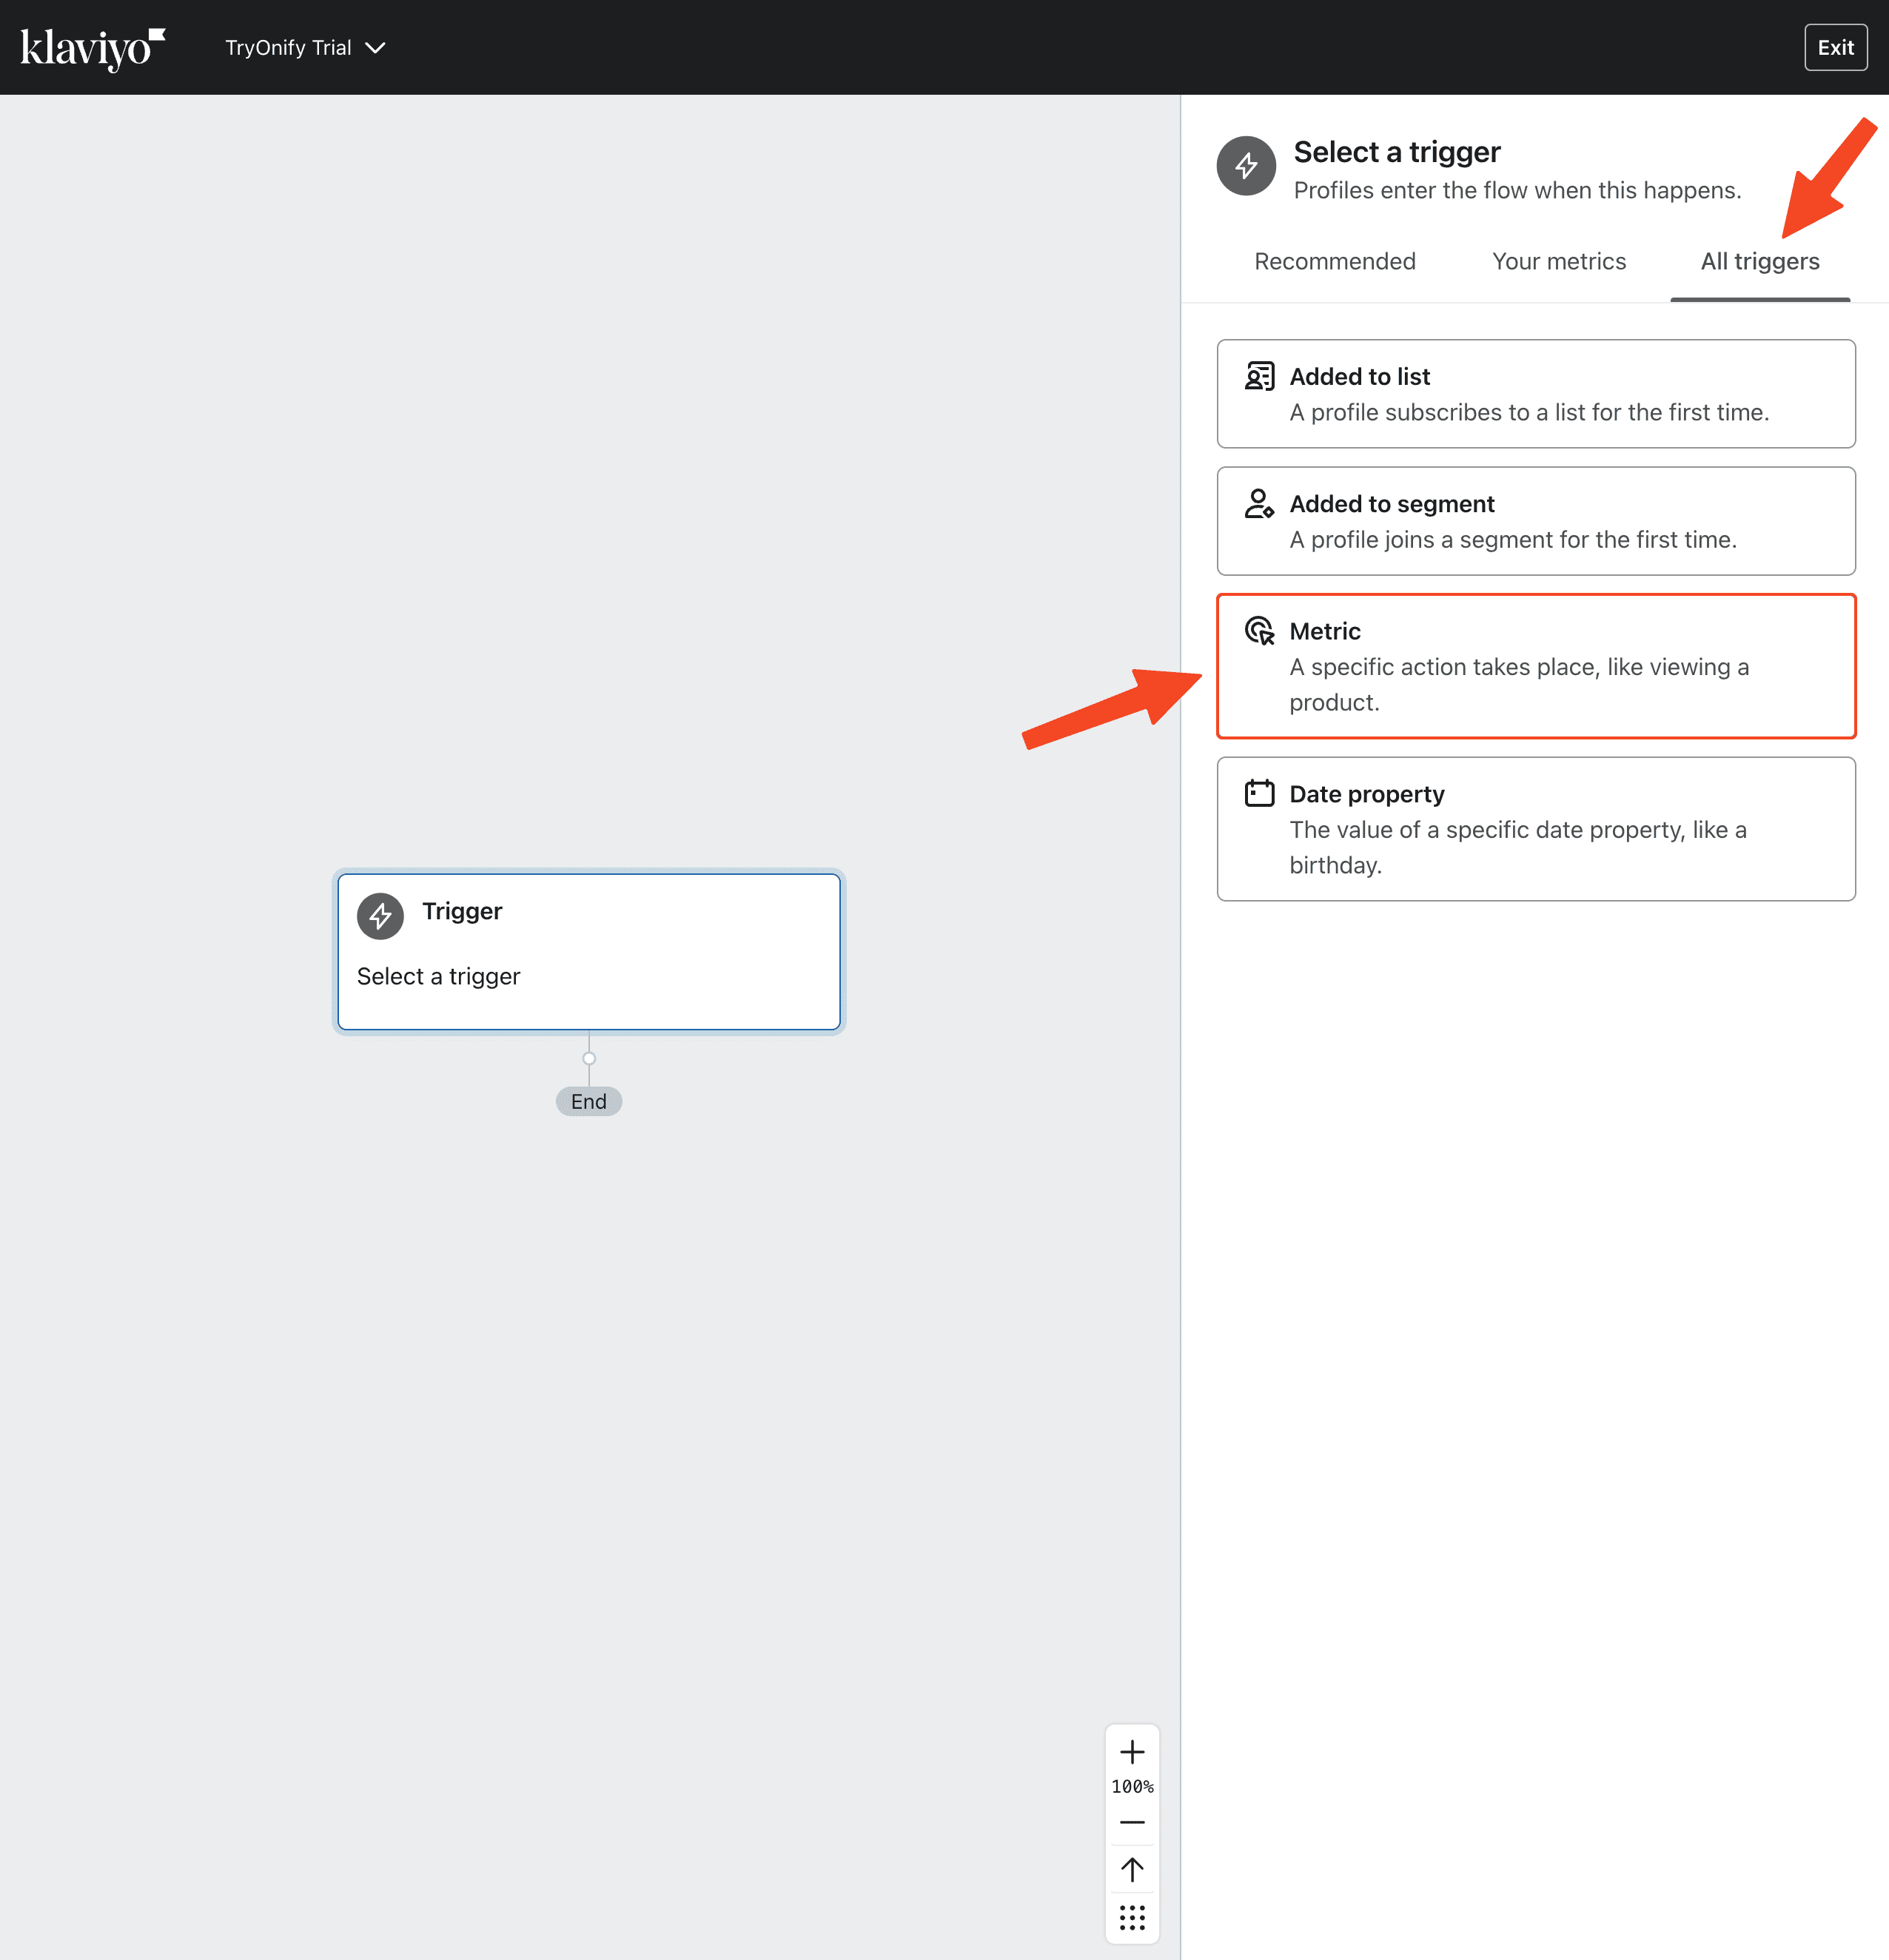
In the flow editor, switch to the "All triggers" tab on the right. Then click "Metric". It's important to note that until a TryOnify order is placed (after you connected TryOnify with Klaviyo), the Metric you're looking for will not appear. Once a TryOnify order comes through, you will see "TryOnify Order Created". Click that and then hit "Save" at the bottom.
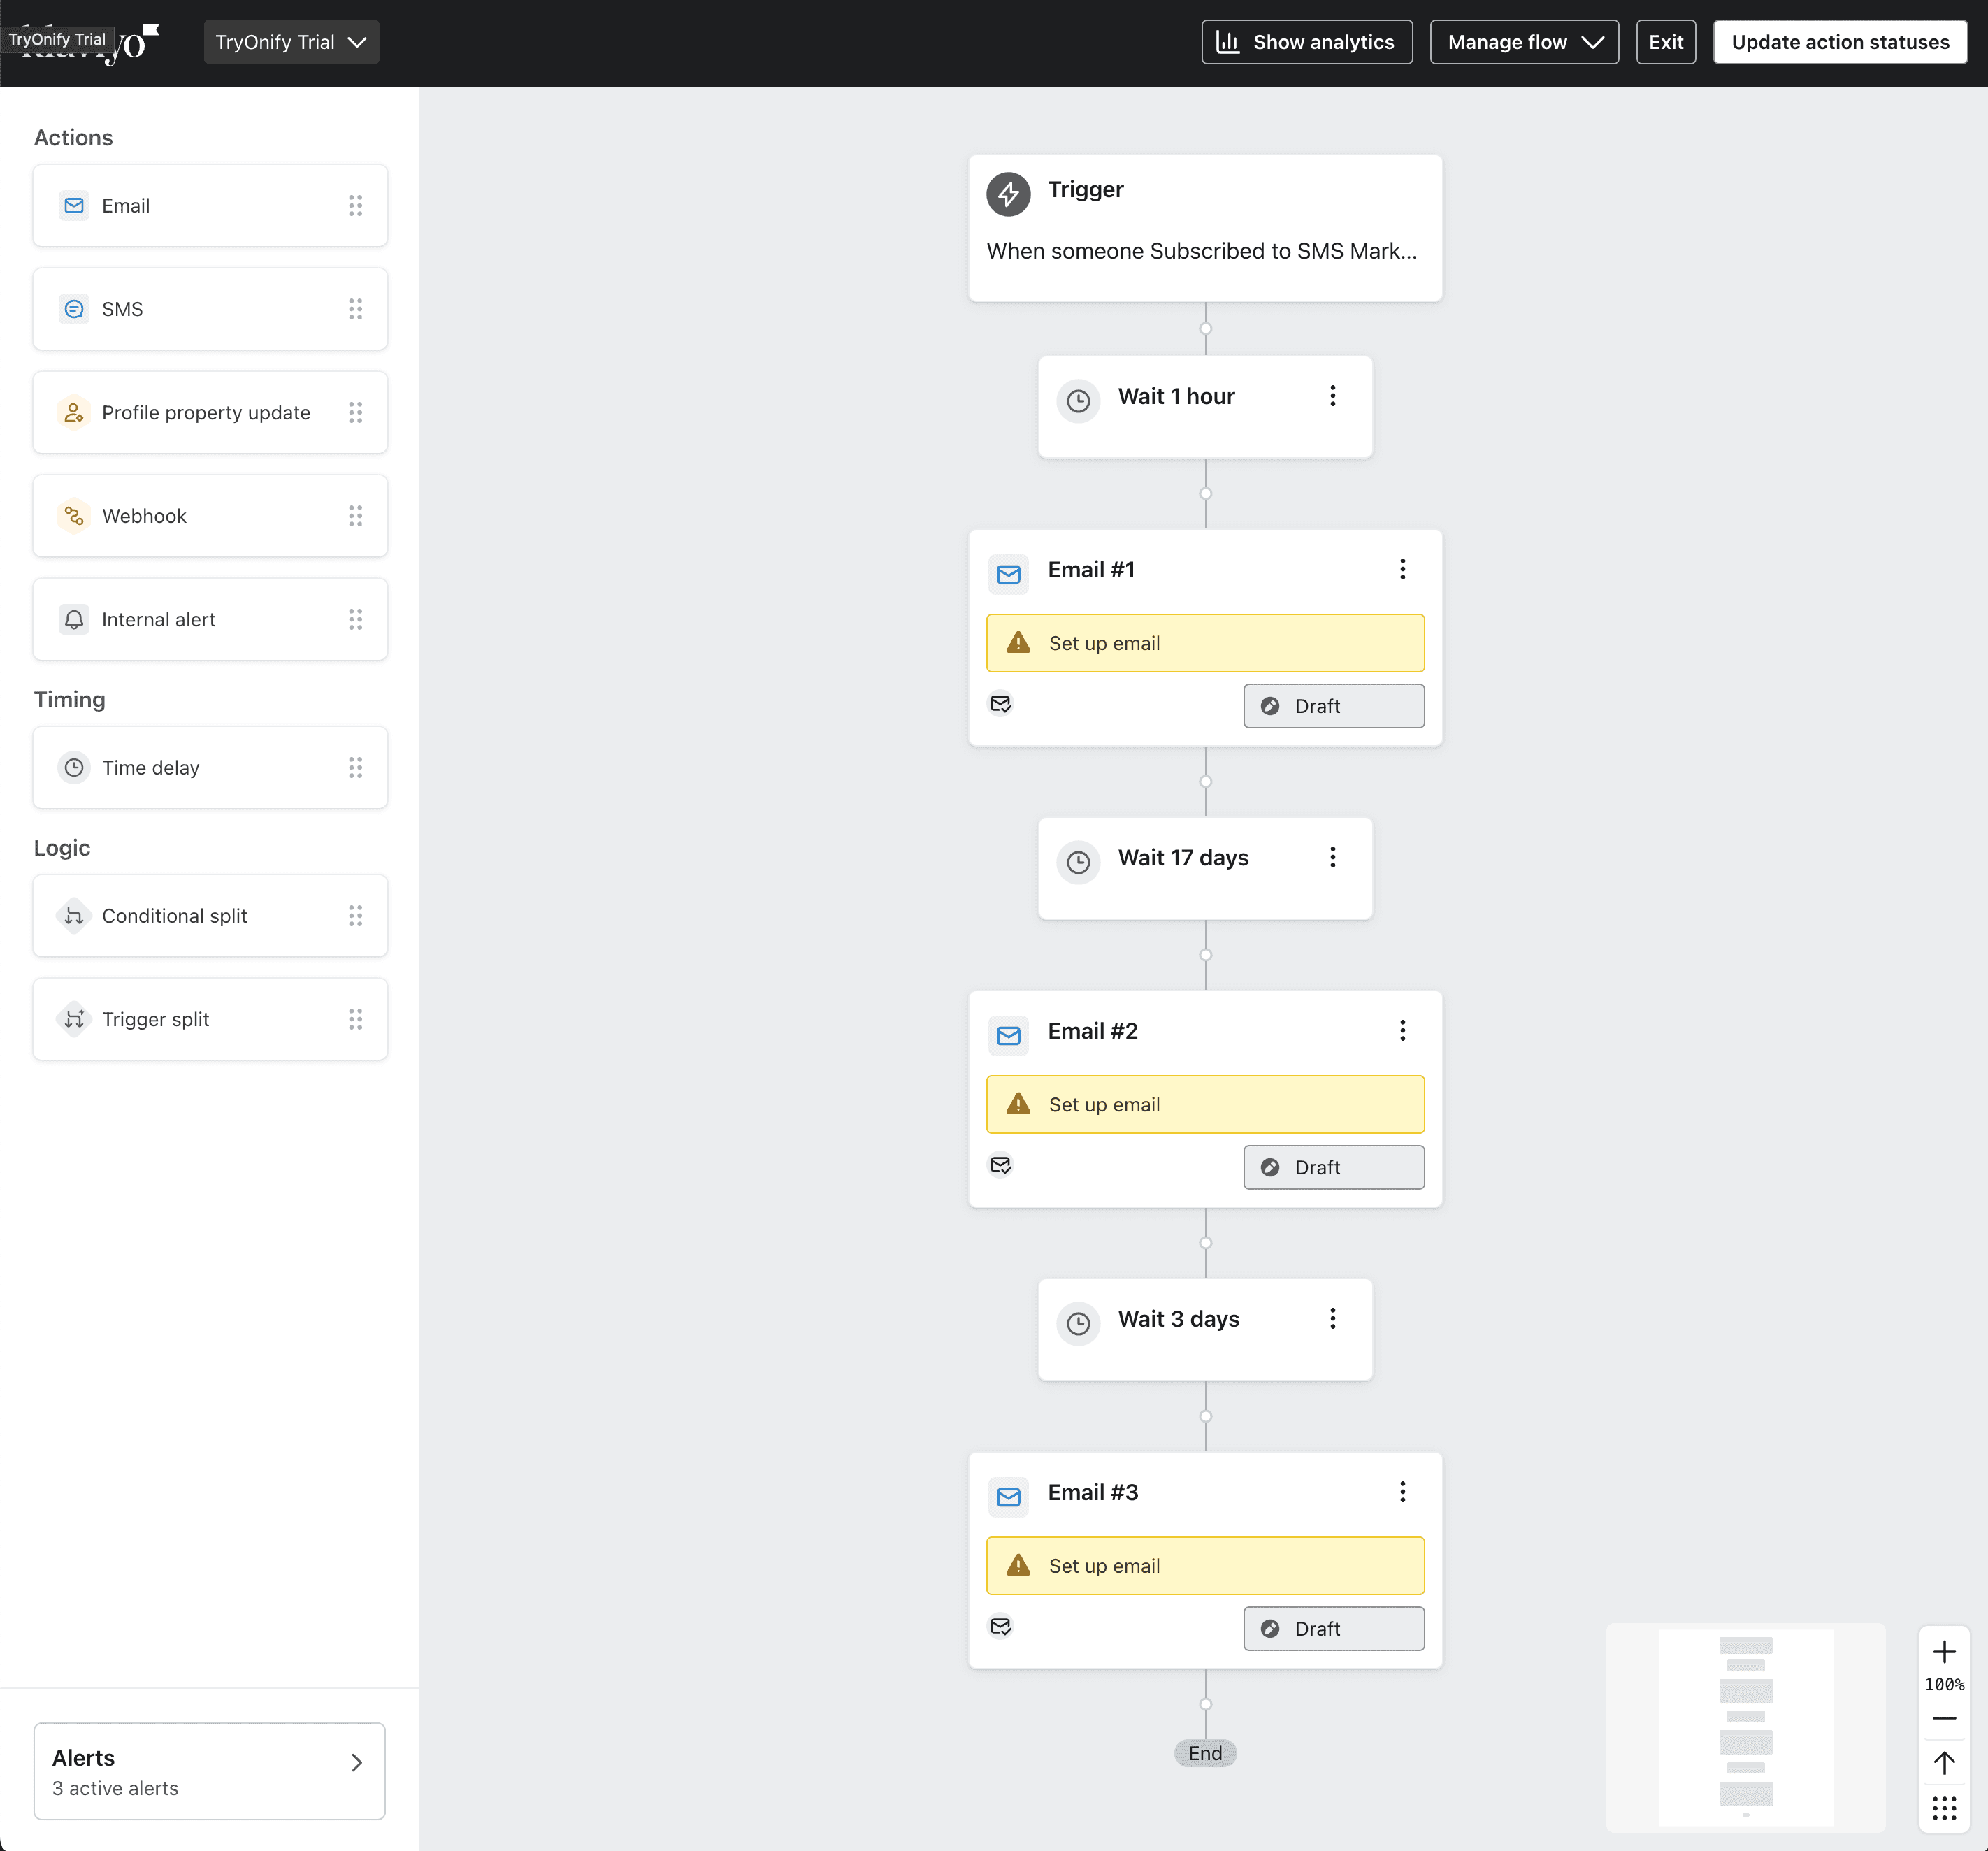
Next, we're going to setup our recommended email flow consisting of a 3 email series. This series will be triggered from the "TryOnify Order Created" event. Here's an overview of the 3 emails 👇
Welcome to Your Trial - Contains instructions and trial details (1 - 24 hours after TryOnify order placed)
Trial Ending Soon Warning (3 days before trial ends)
Last Day of Trial Warning (1 day before trial ends)
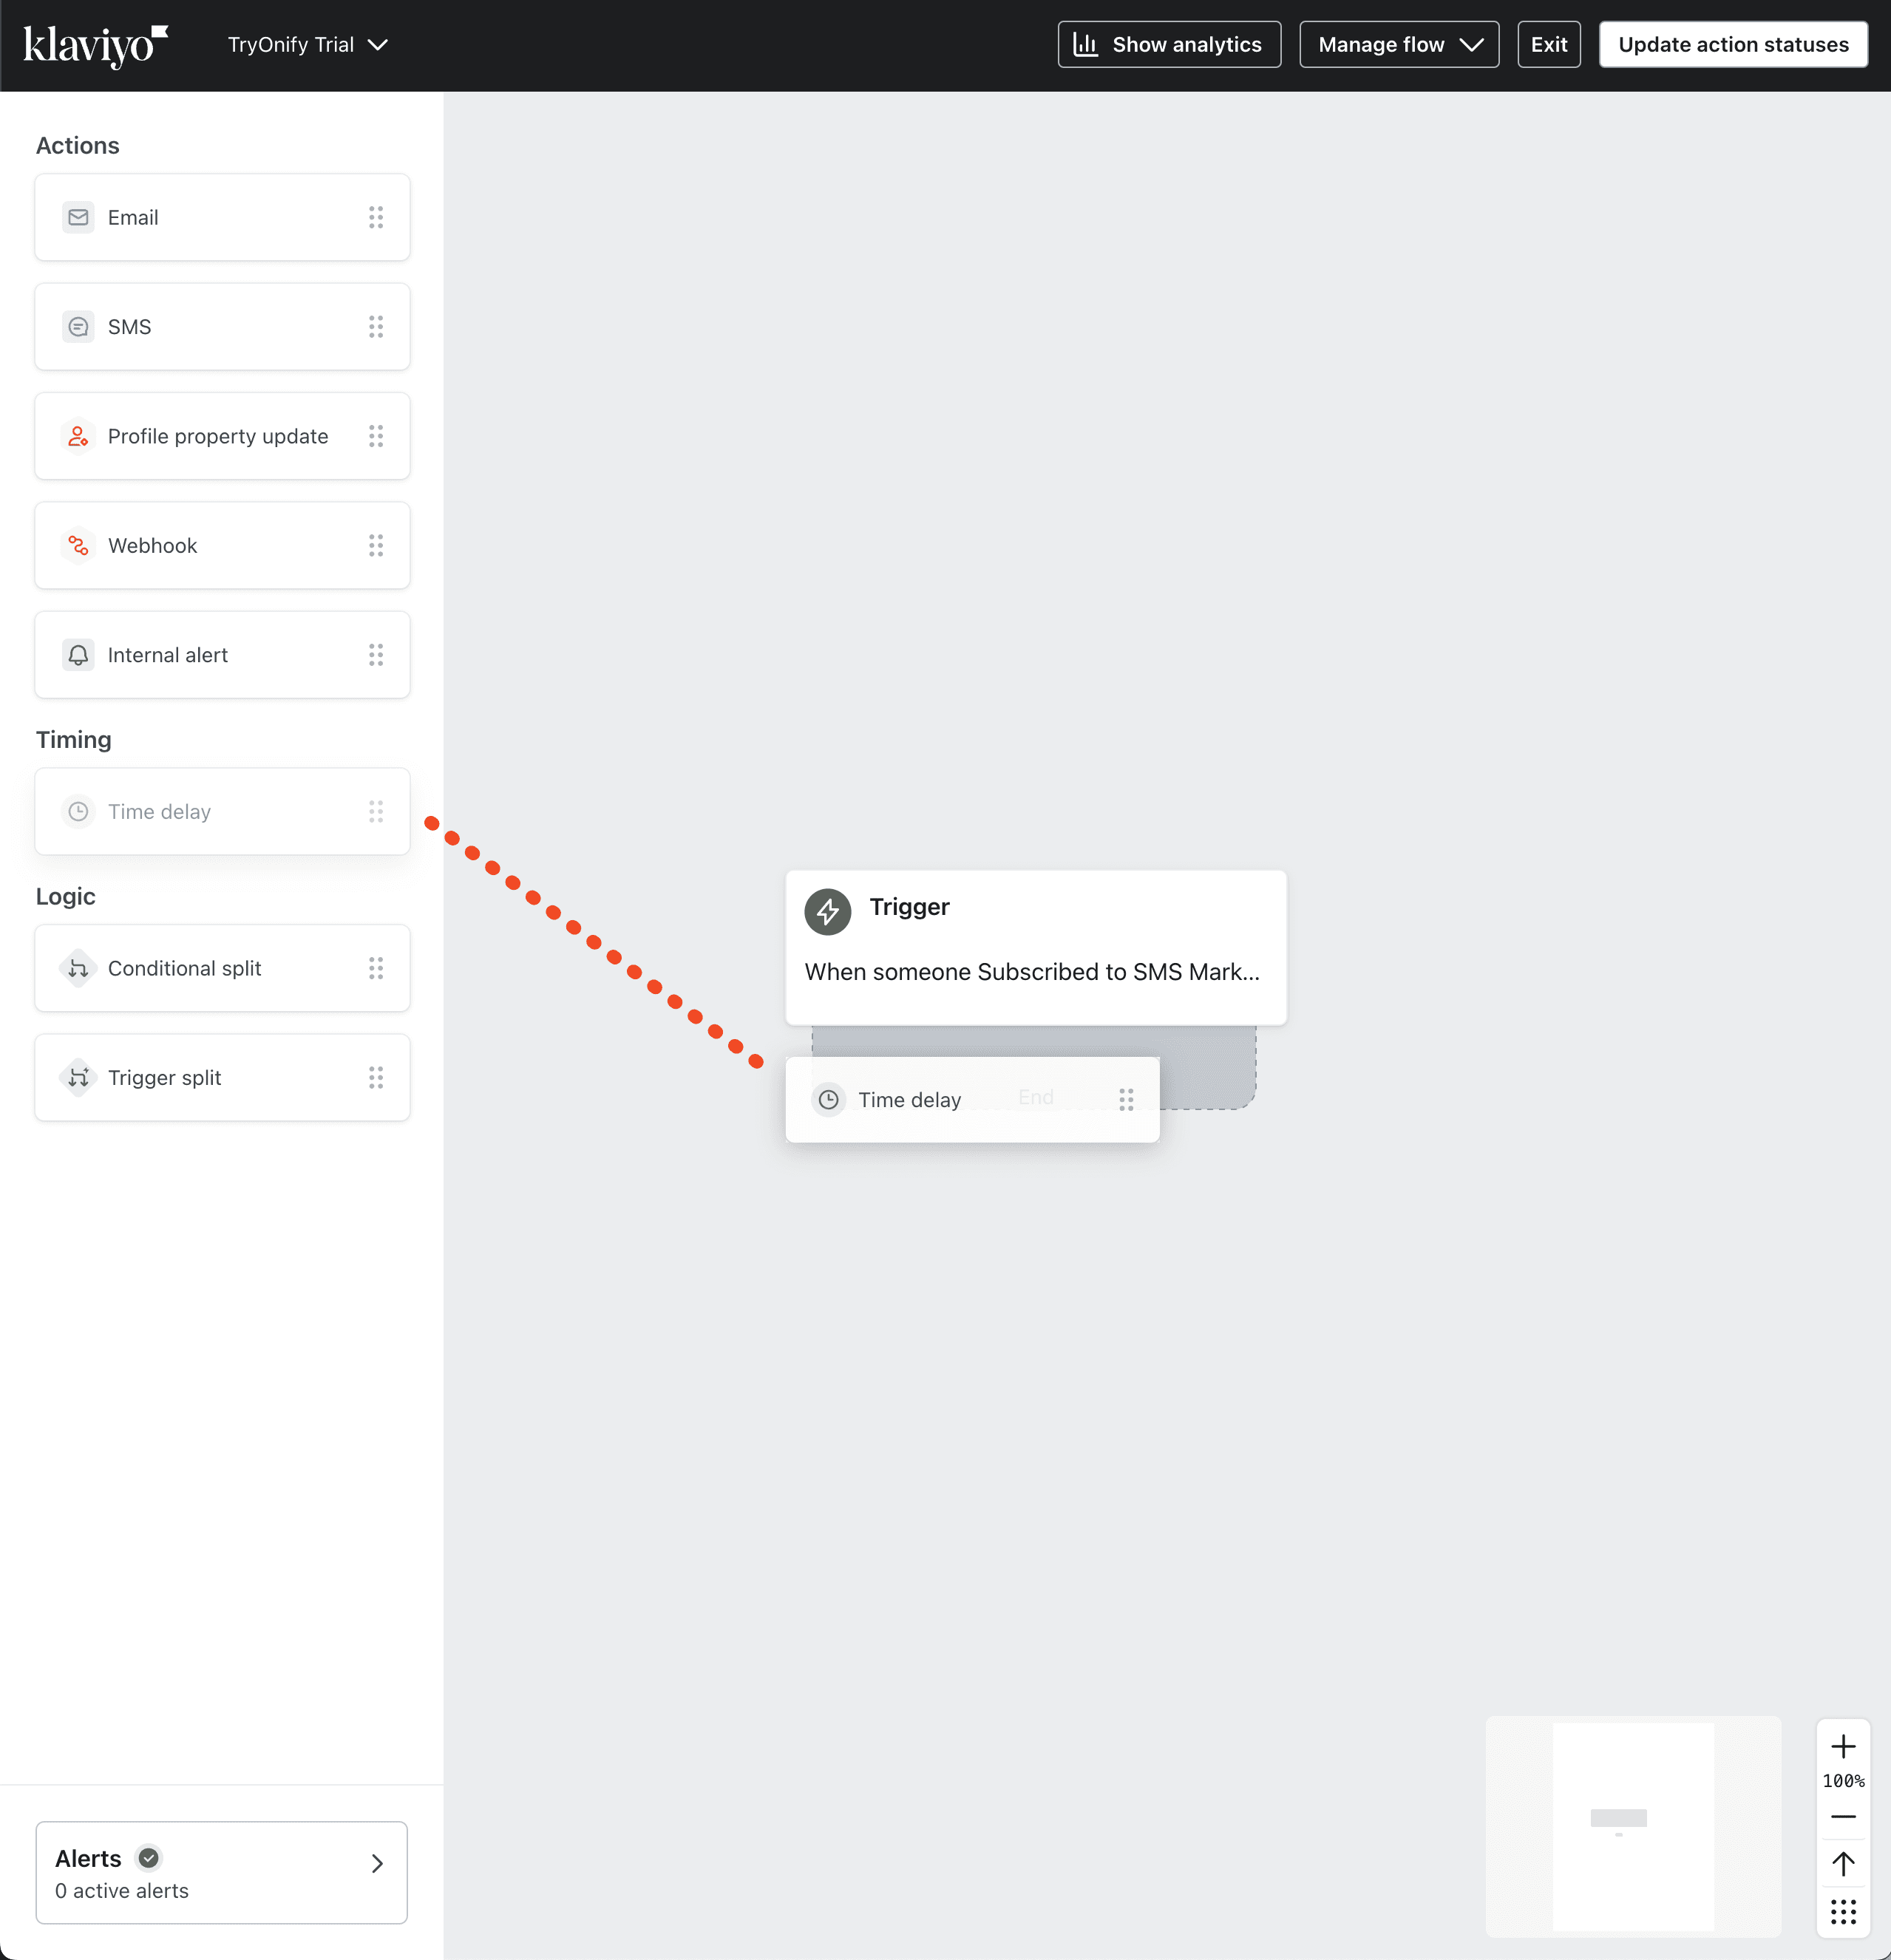
On the left hand side, click and hold the "Time delay" block and drag it below your Trigger.
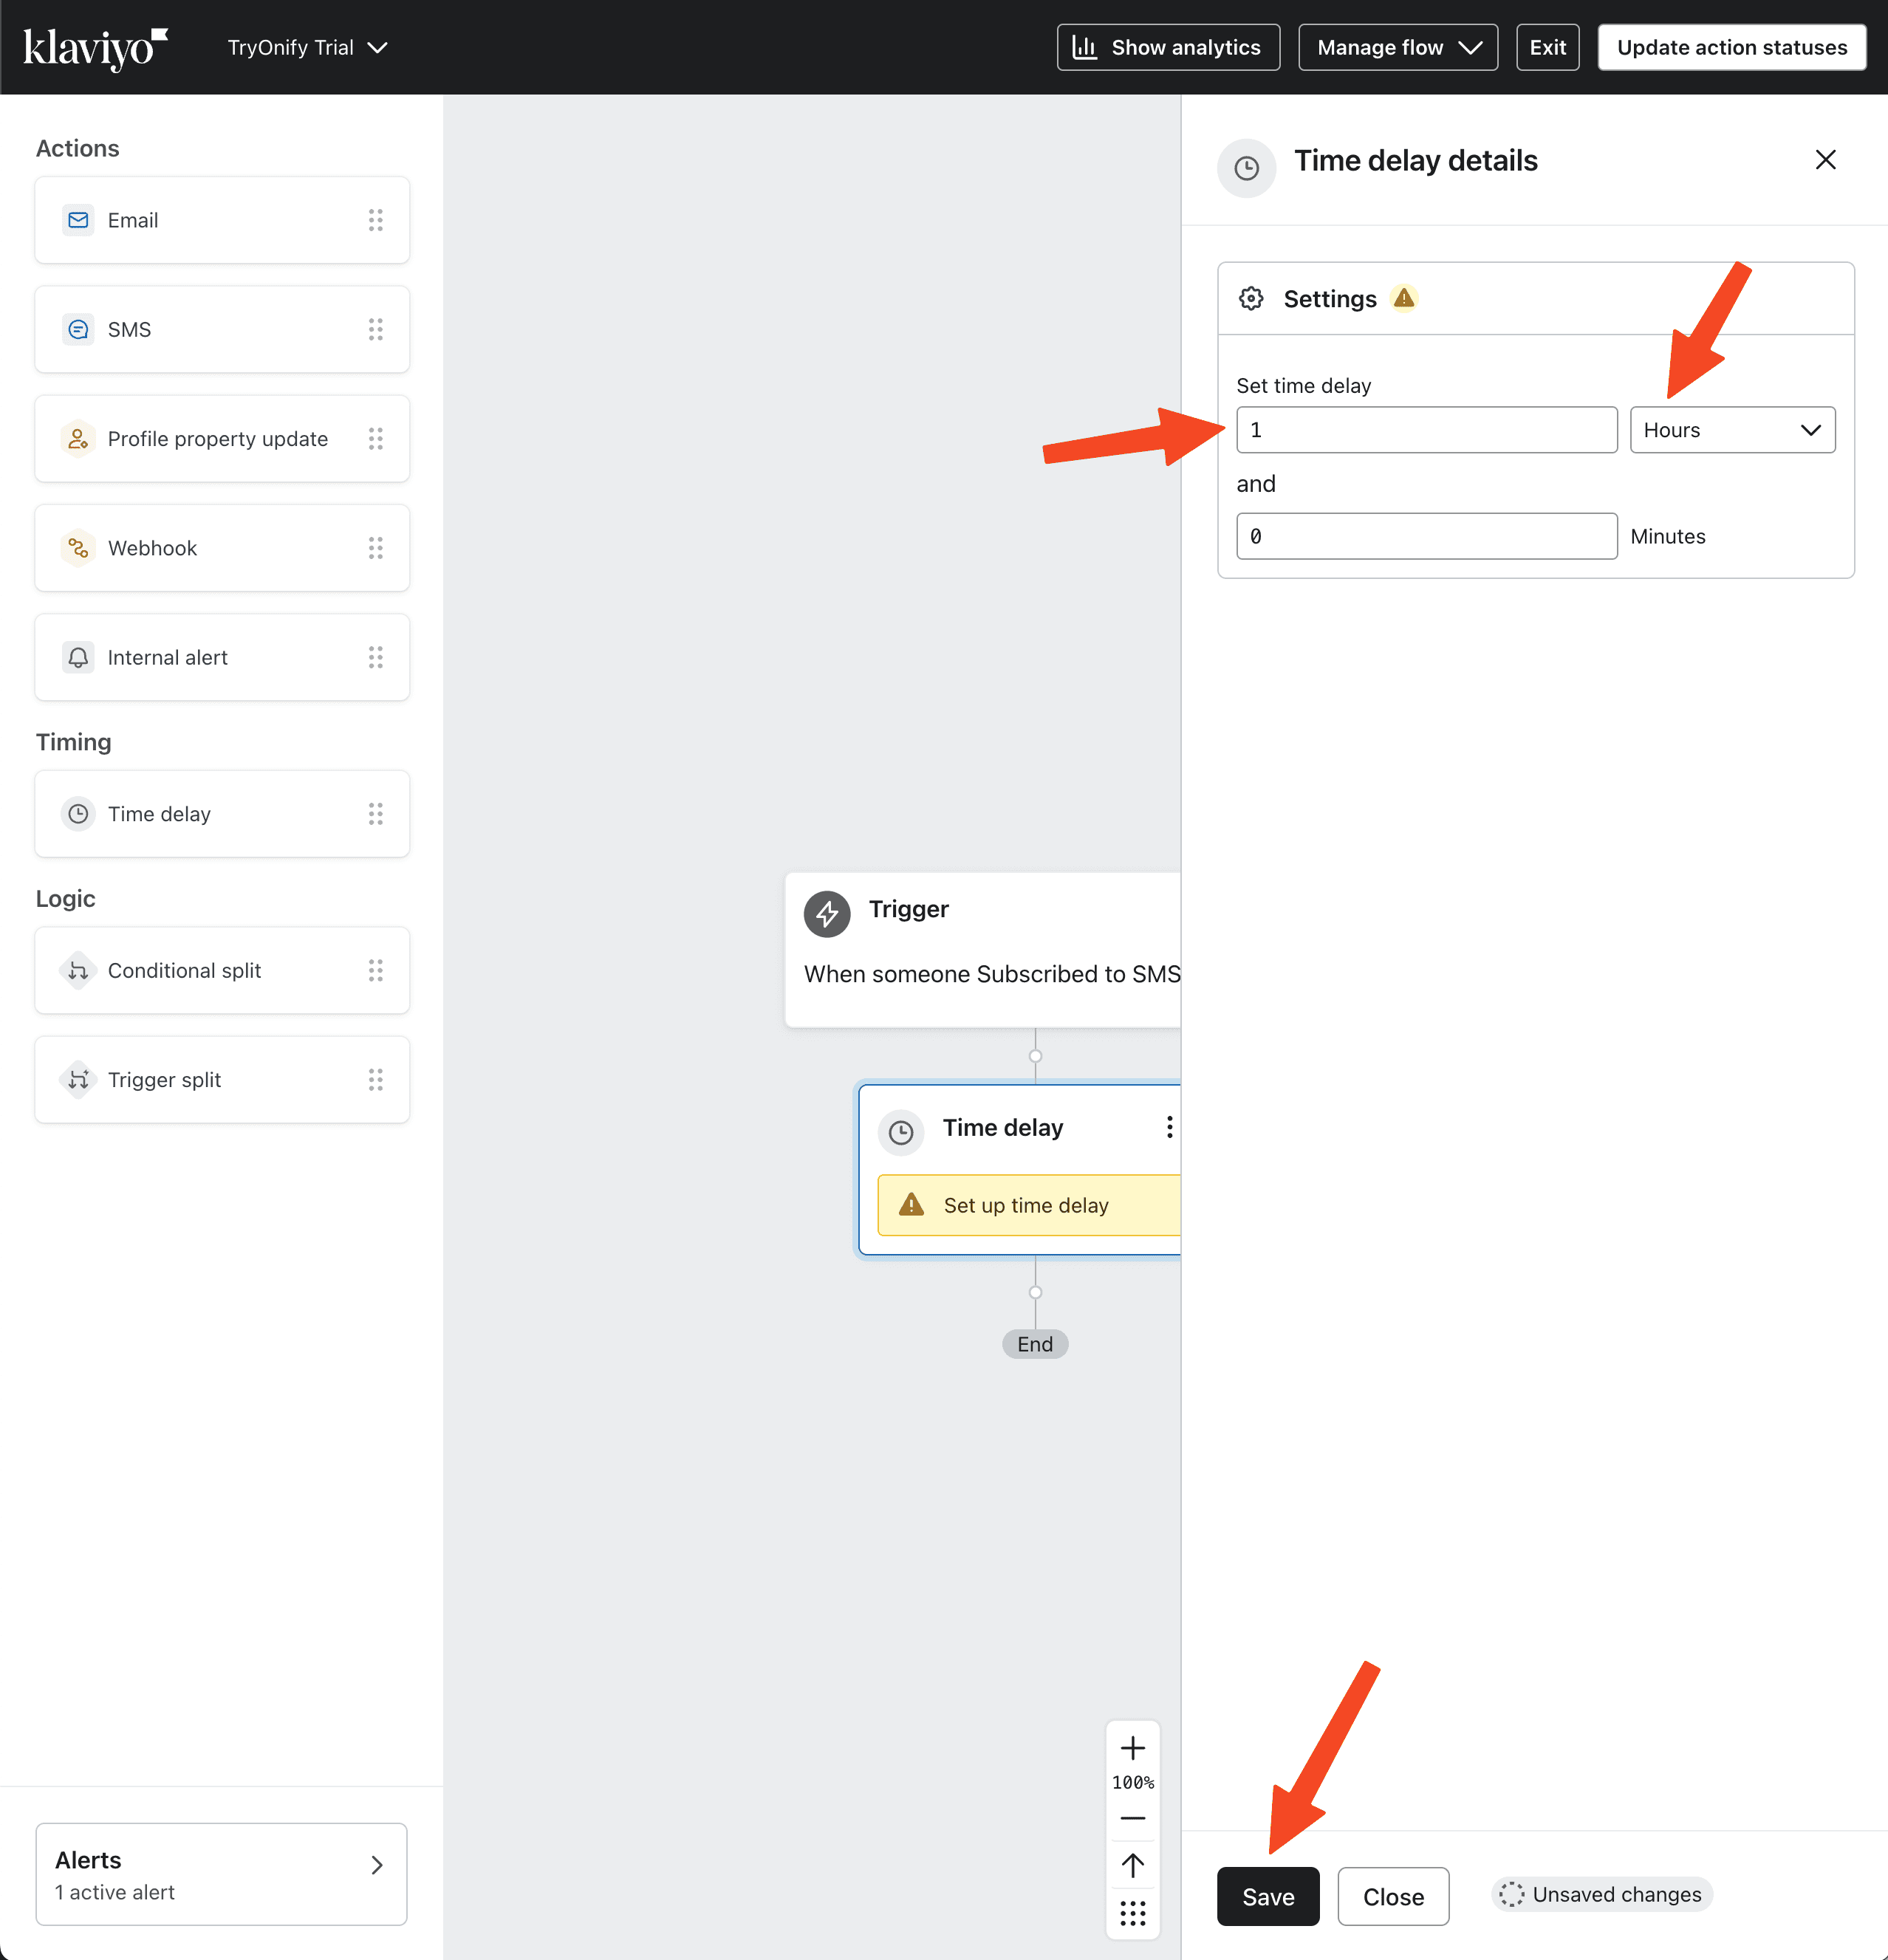
Set the delay to however long you want. Per our recommendation above, we suggest doing 1 - 24 hour(s). Click "Save" at the bottom when you're done.
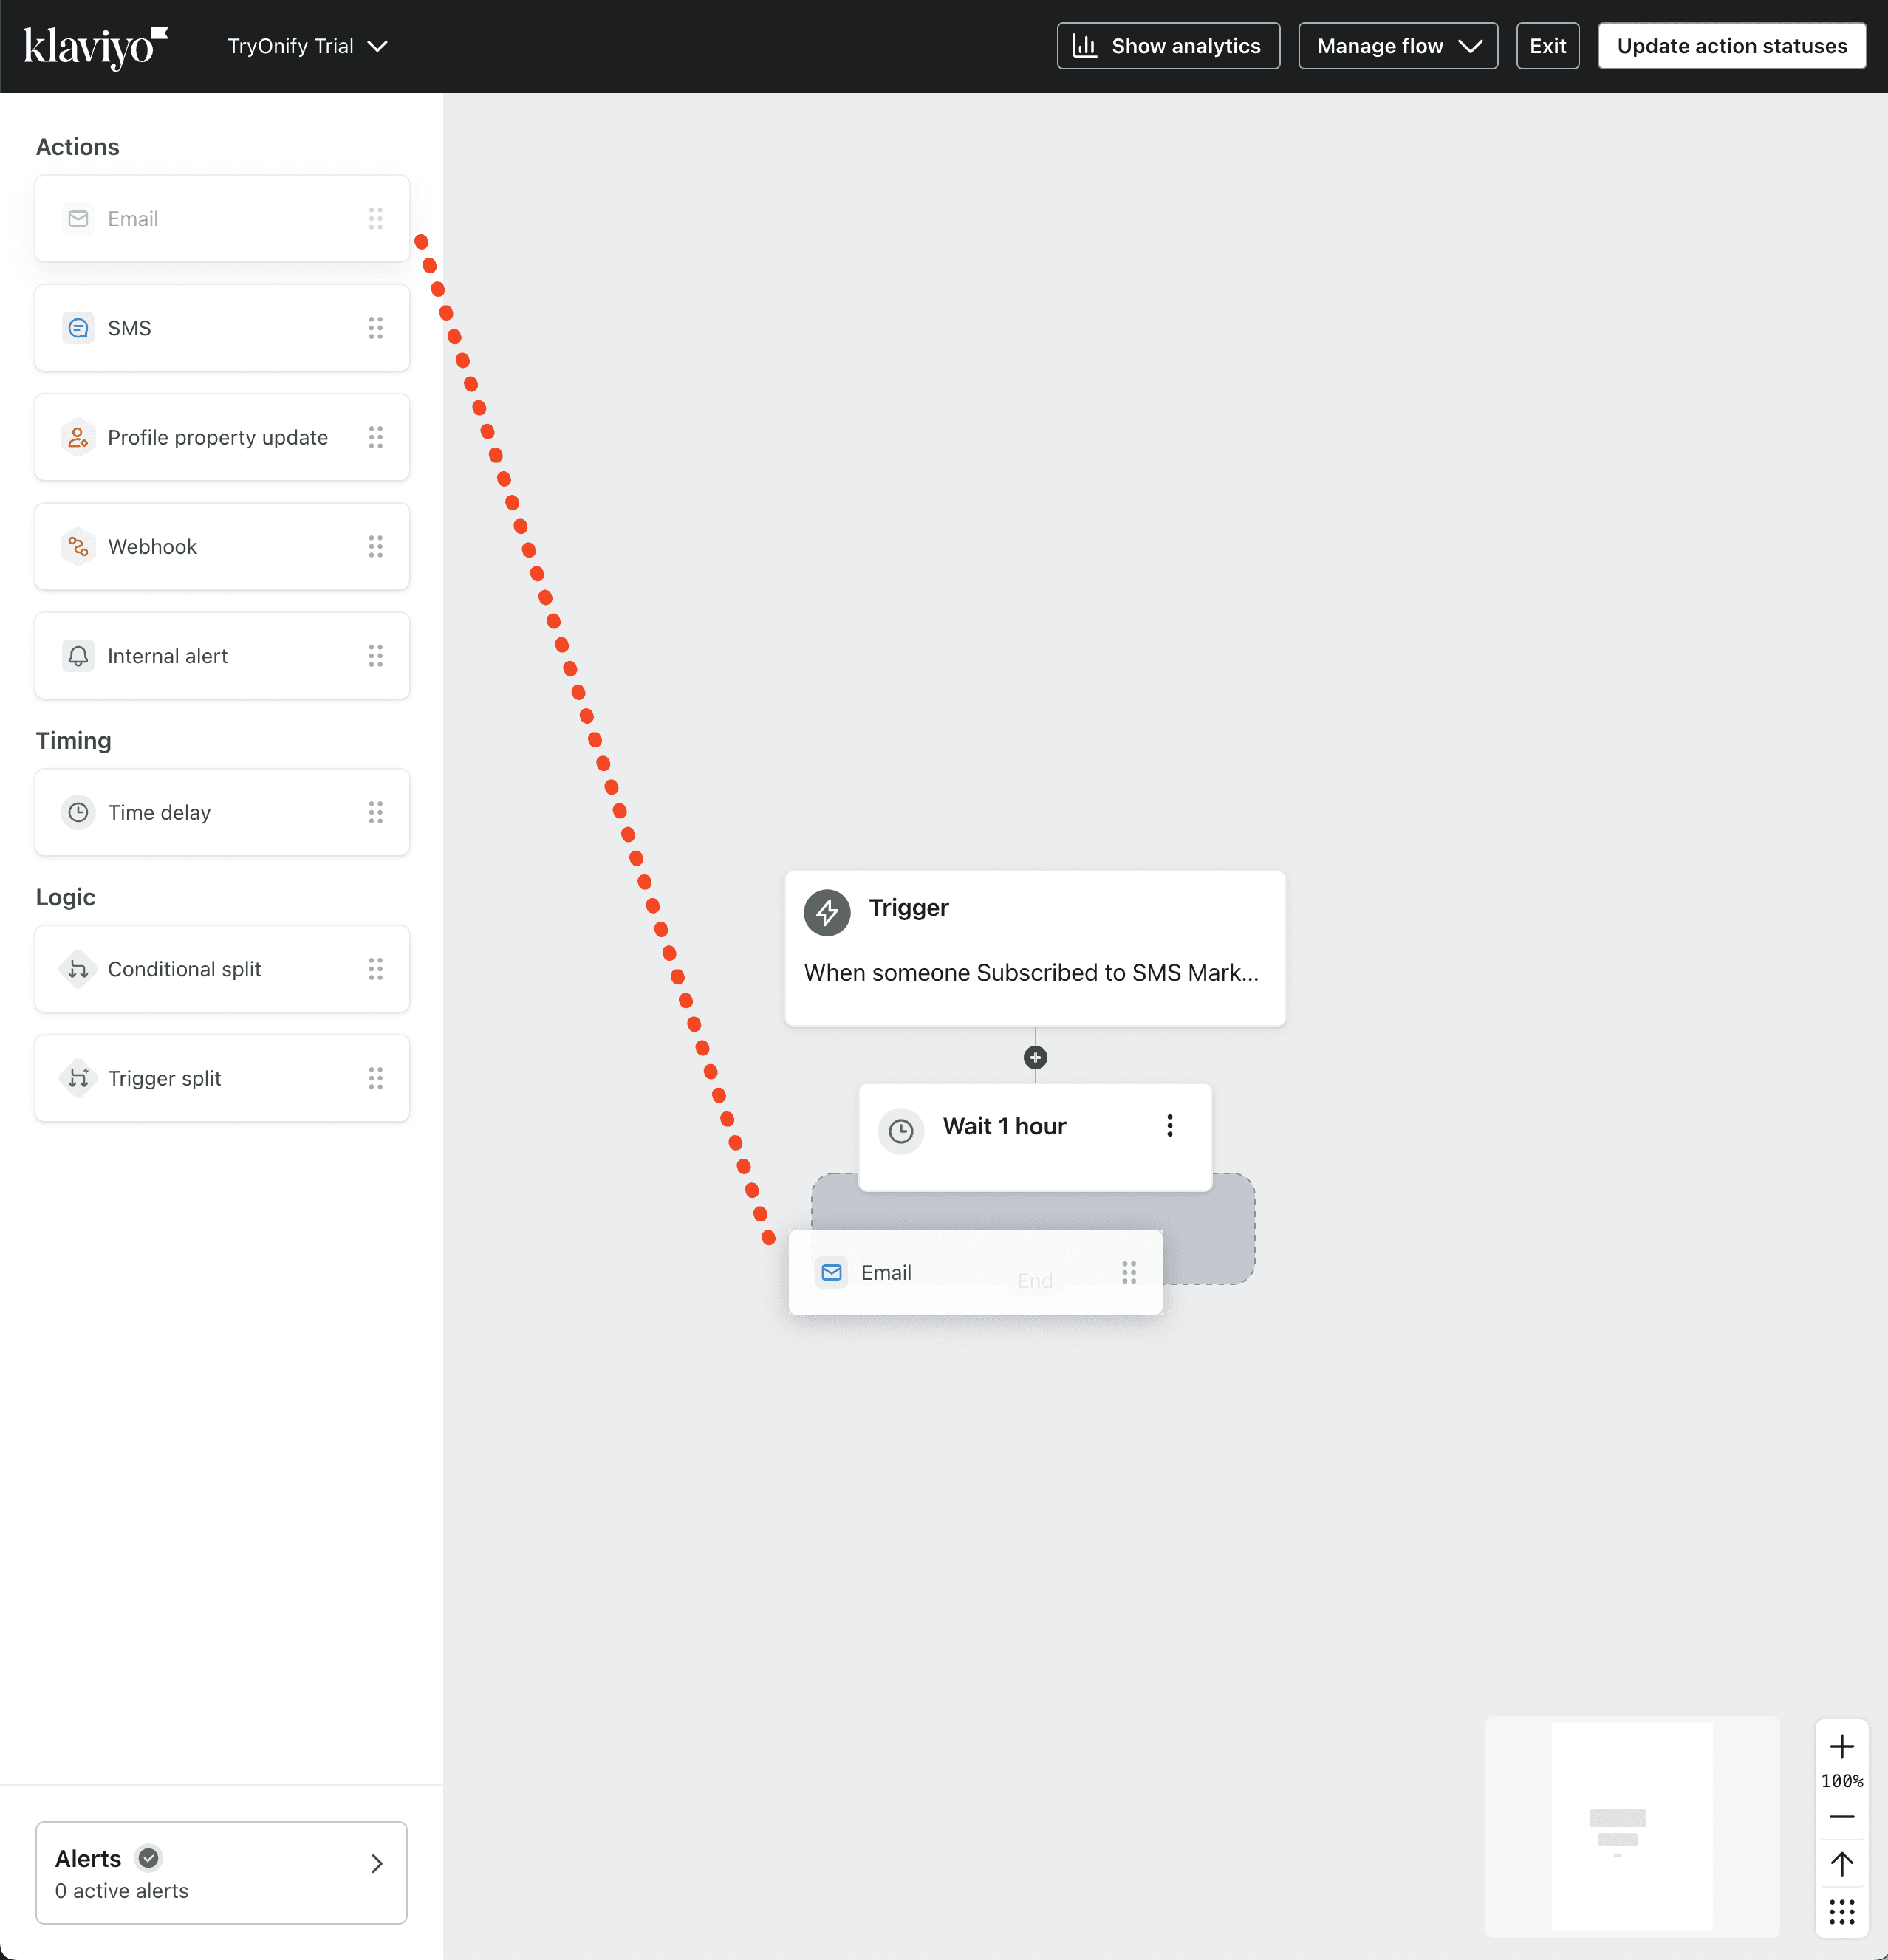
Next, drag an "Email" block from the left menu and place it below the "Time delay" you just added to your flow.
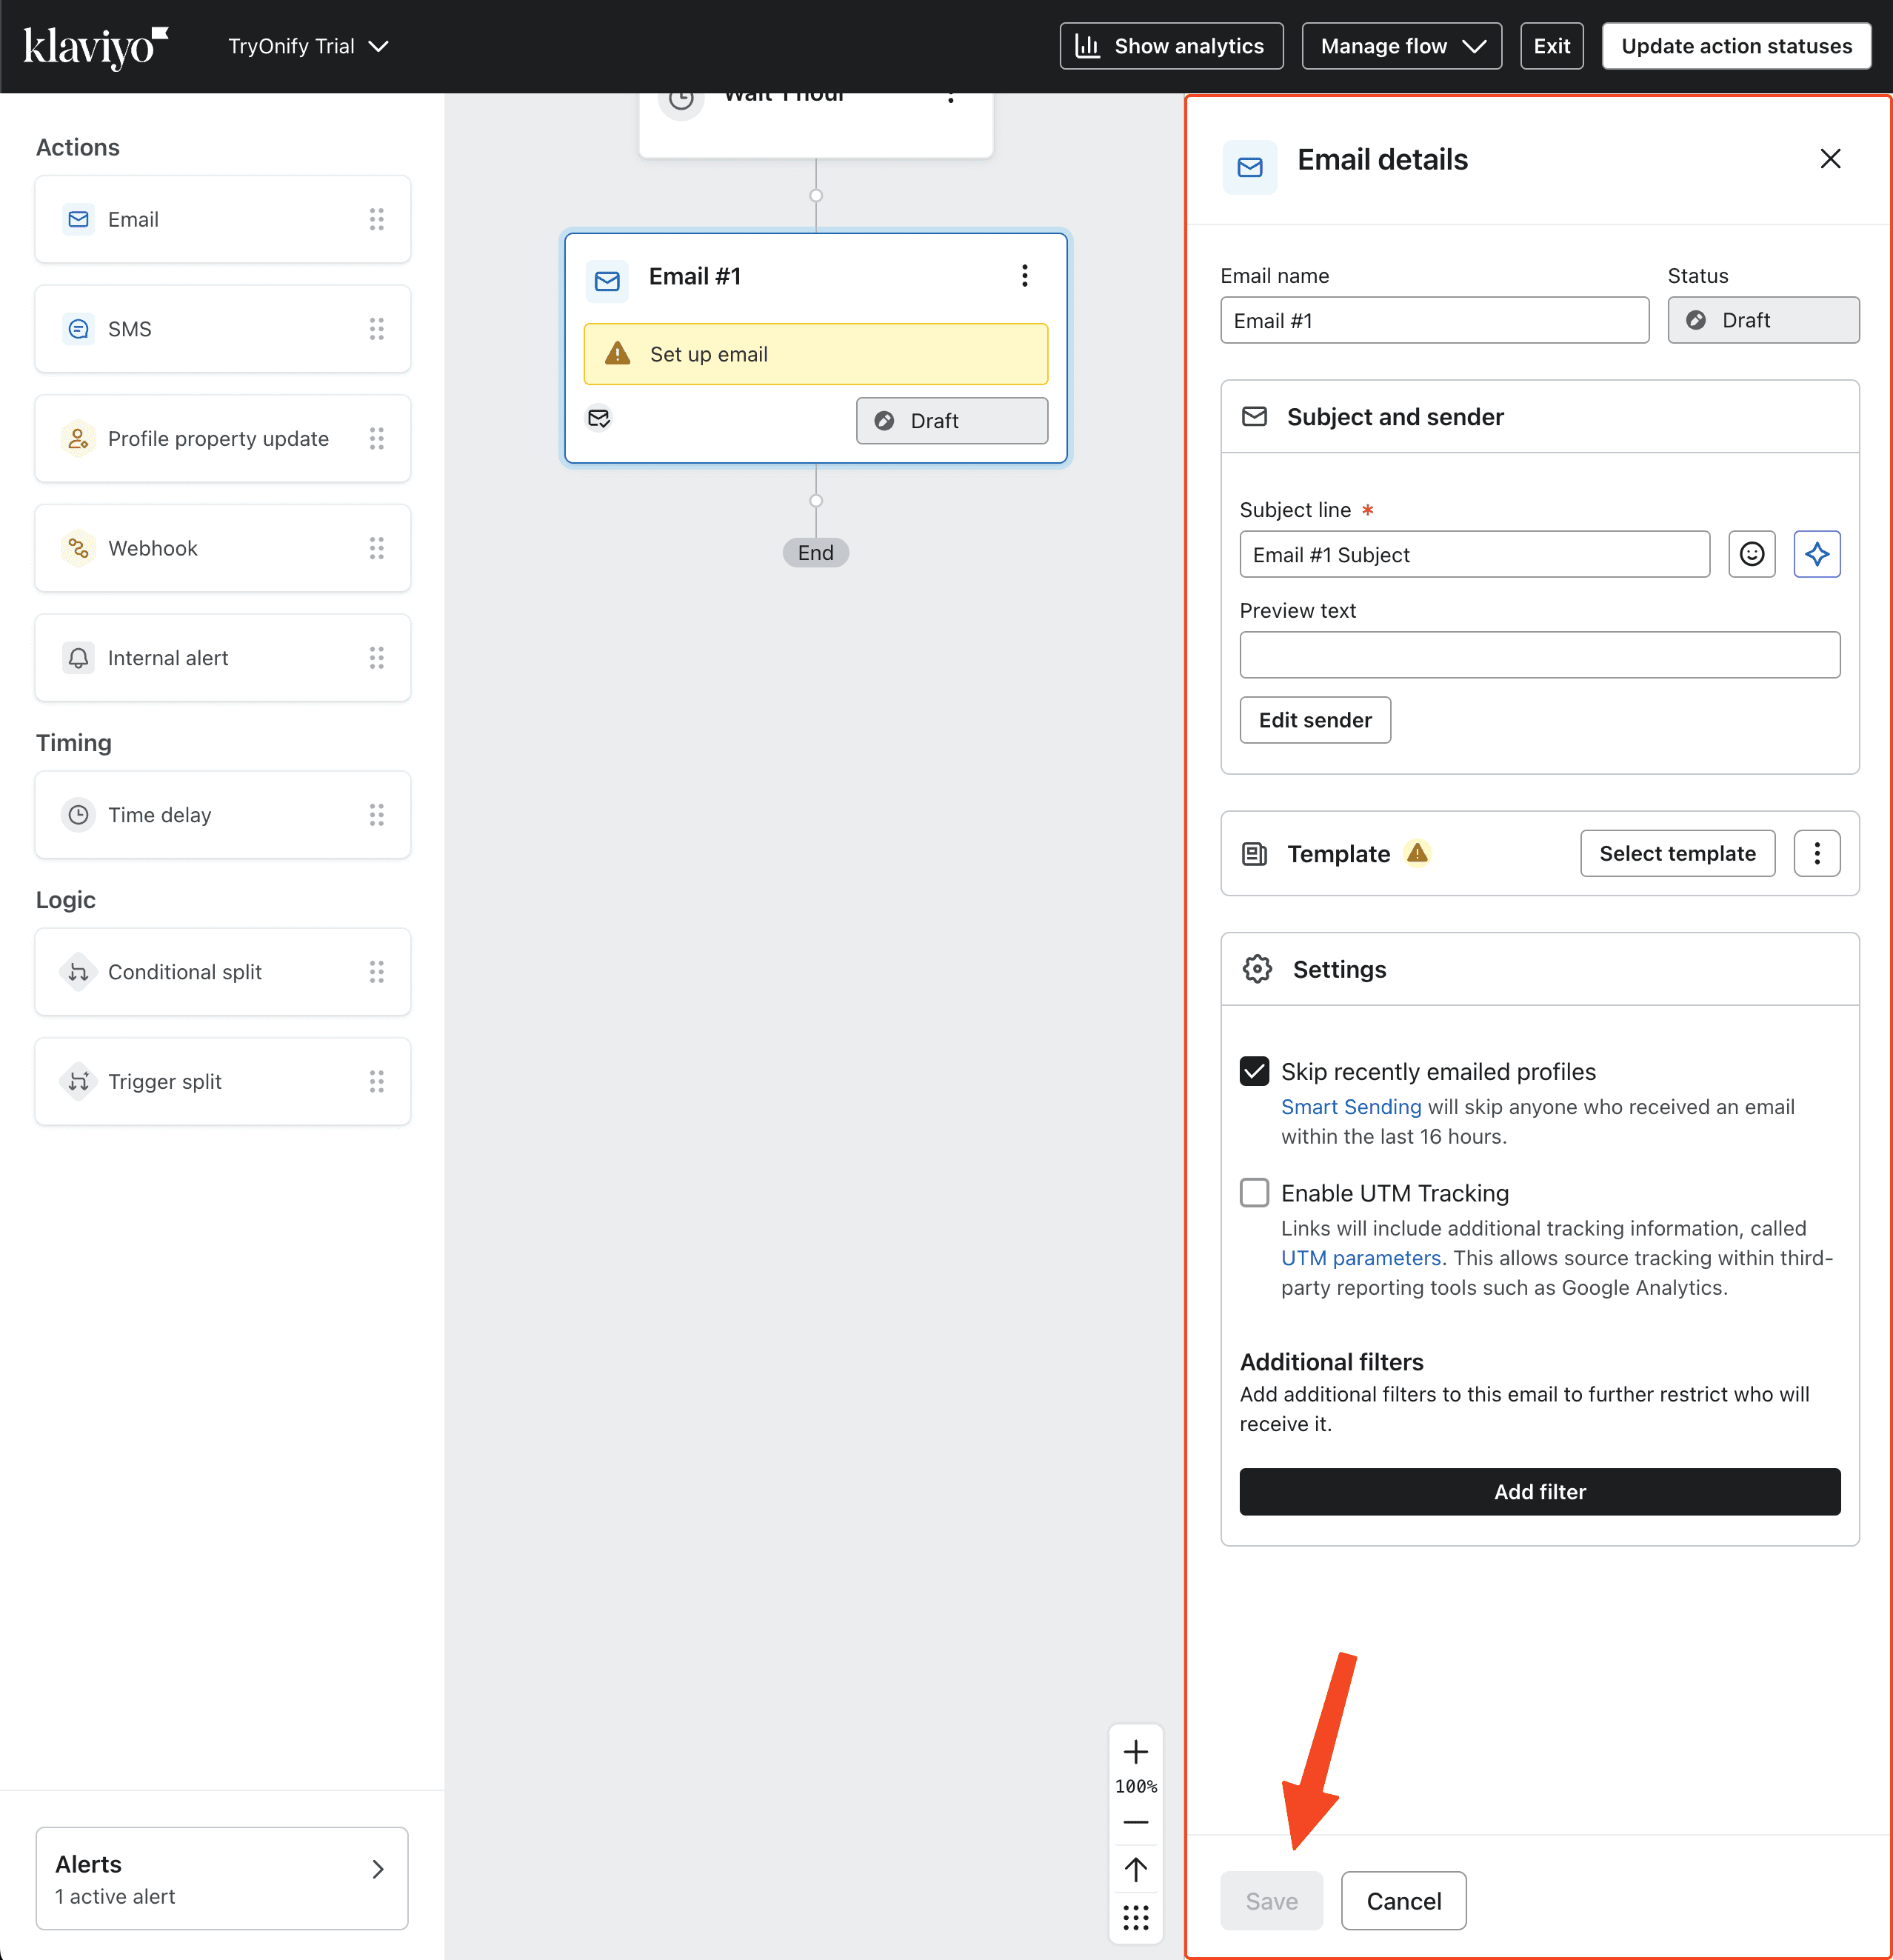
After placing the "Email" action in your flow, you'll see options for configuring the content of this email. We recommend including a full breakdown of your trial instructions with the trial length, return instructions and any other terms and conditions you want the customer to be aware of. Click "Save" at the bottom to finalize your changes.
Repeat steps 13 - 16 for email #2 and #3. Email #2 should have a time delay of your trial length minus 4 days. So if your trial length is 21 days, set the time delay to 17 days for your 3 day warning email. You might be wondering why we recommend 4 days for a 3 day warning. That is because the customer will get charged on the 3rd and final day. 4 days will allow the customer to be reminded 3 full days before they get charged.
The content for email #2 should include your 3 day warning, return instructions and possibly an offer to extend their trial if you want the customer to have more time. This can look something like "Reply to this email to request a trial extension if you need more time". If you decide to offer this, we have a way for you to change the charge dates for a trial. Just check out our article on "Changing charge dates". It's also important to note that some customers may have already returned their items when they receive this email. You may want to start your emails with something like "If you have already returned your order or your order has been cancelled, please disregard this email".
Similarly, email #3 should include your last day warning, return instructions and possibly an offer to extend the customer's trial. Again, it's important to note that some customers may have already returned their items when they receive this email. See the above paragraph for copy suggestions.
Once you're finished creating your flow, it should look something like this (minus the incomplete fields) 👇