Activating TryOnify
Now that you have setup your first Trial Plan and added Products to it, let's install the TryOnify widget on the Product Detail Page (PDP).
The TryOnify widget will allow users to see the Try Before You Buy payment option and select it before adding the product to their cart.
Since this will involve tweaking your store's theme, we highly recommend backing up the theme just in case.
There are a few ways to activate TryOnify. We'll go through each method in detail below.
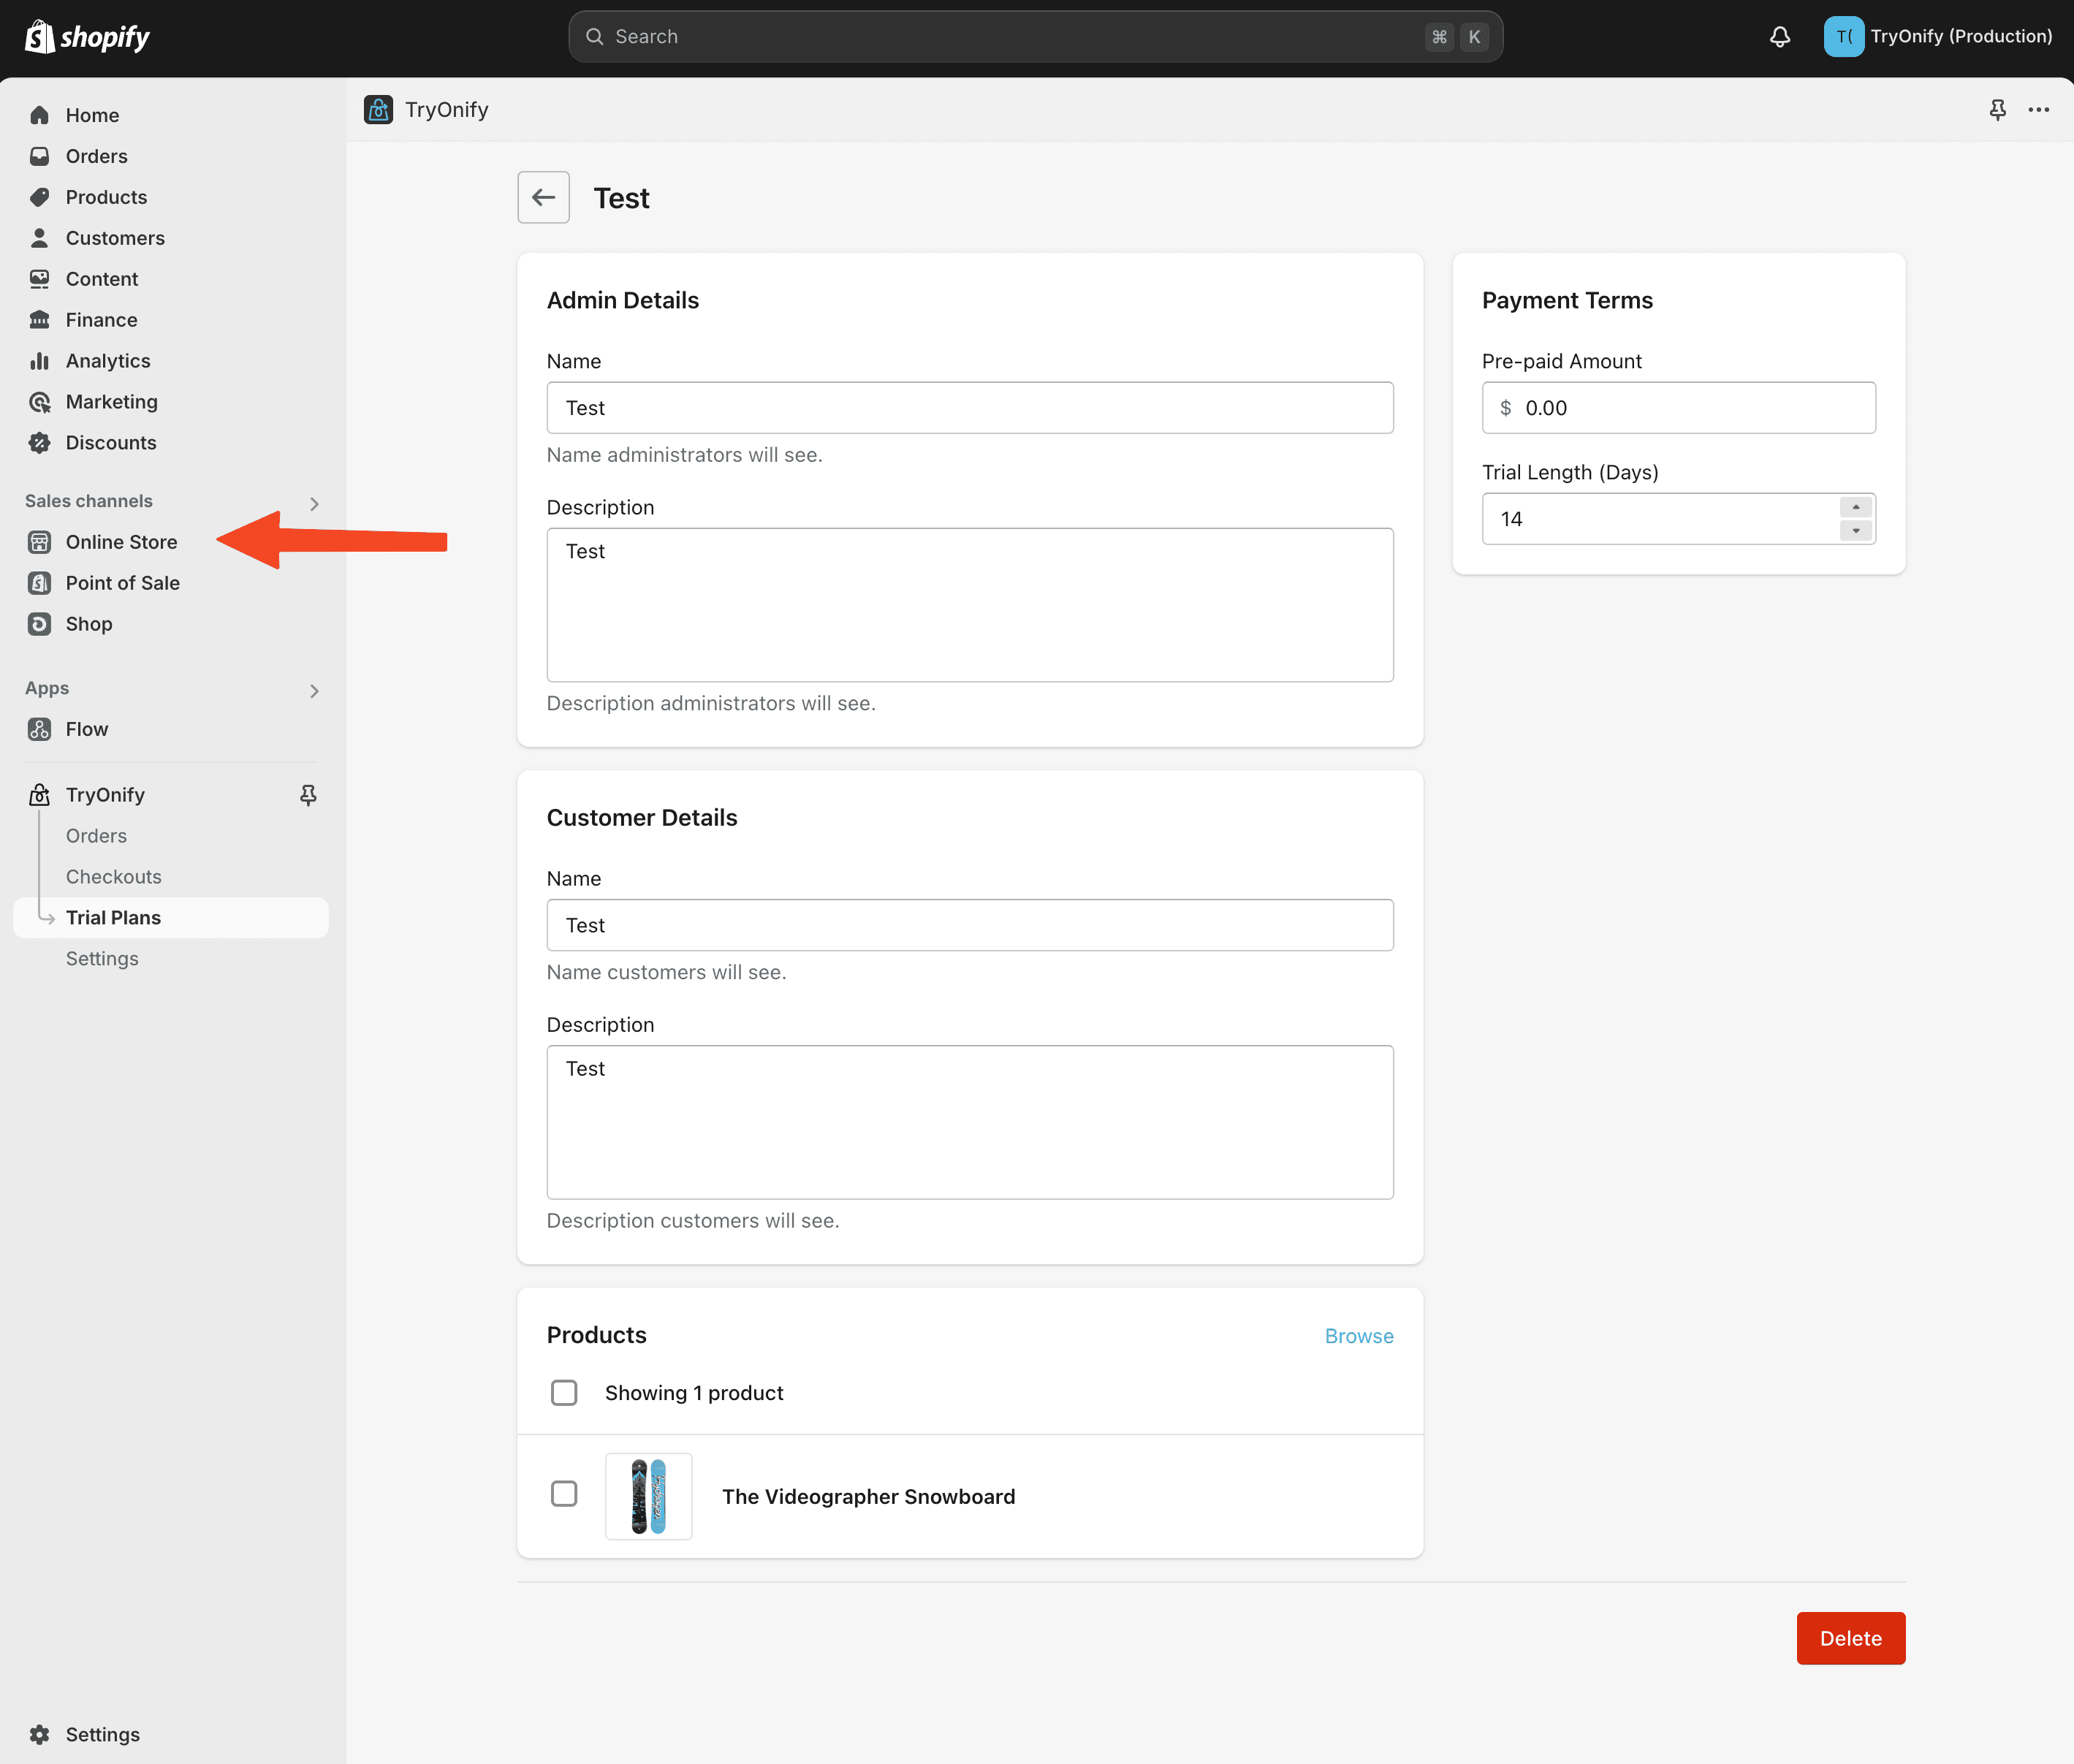
First, you'll want to click on "Online Store" in Shopify Admin.
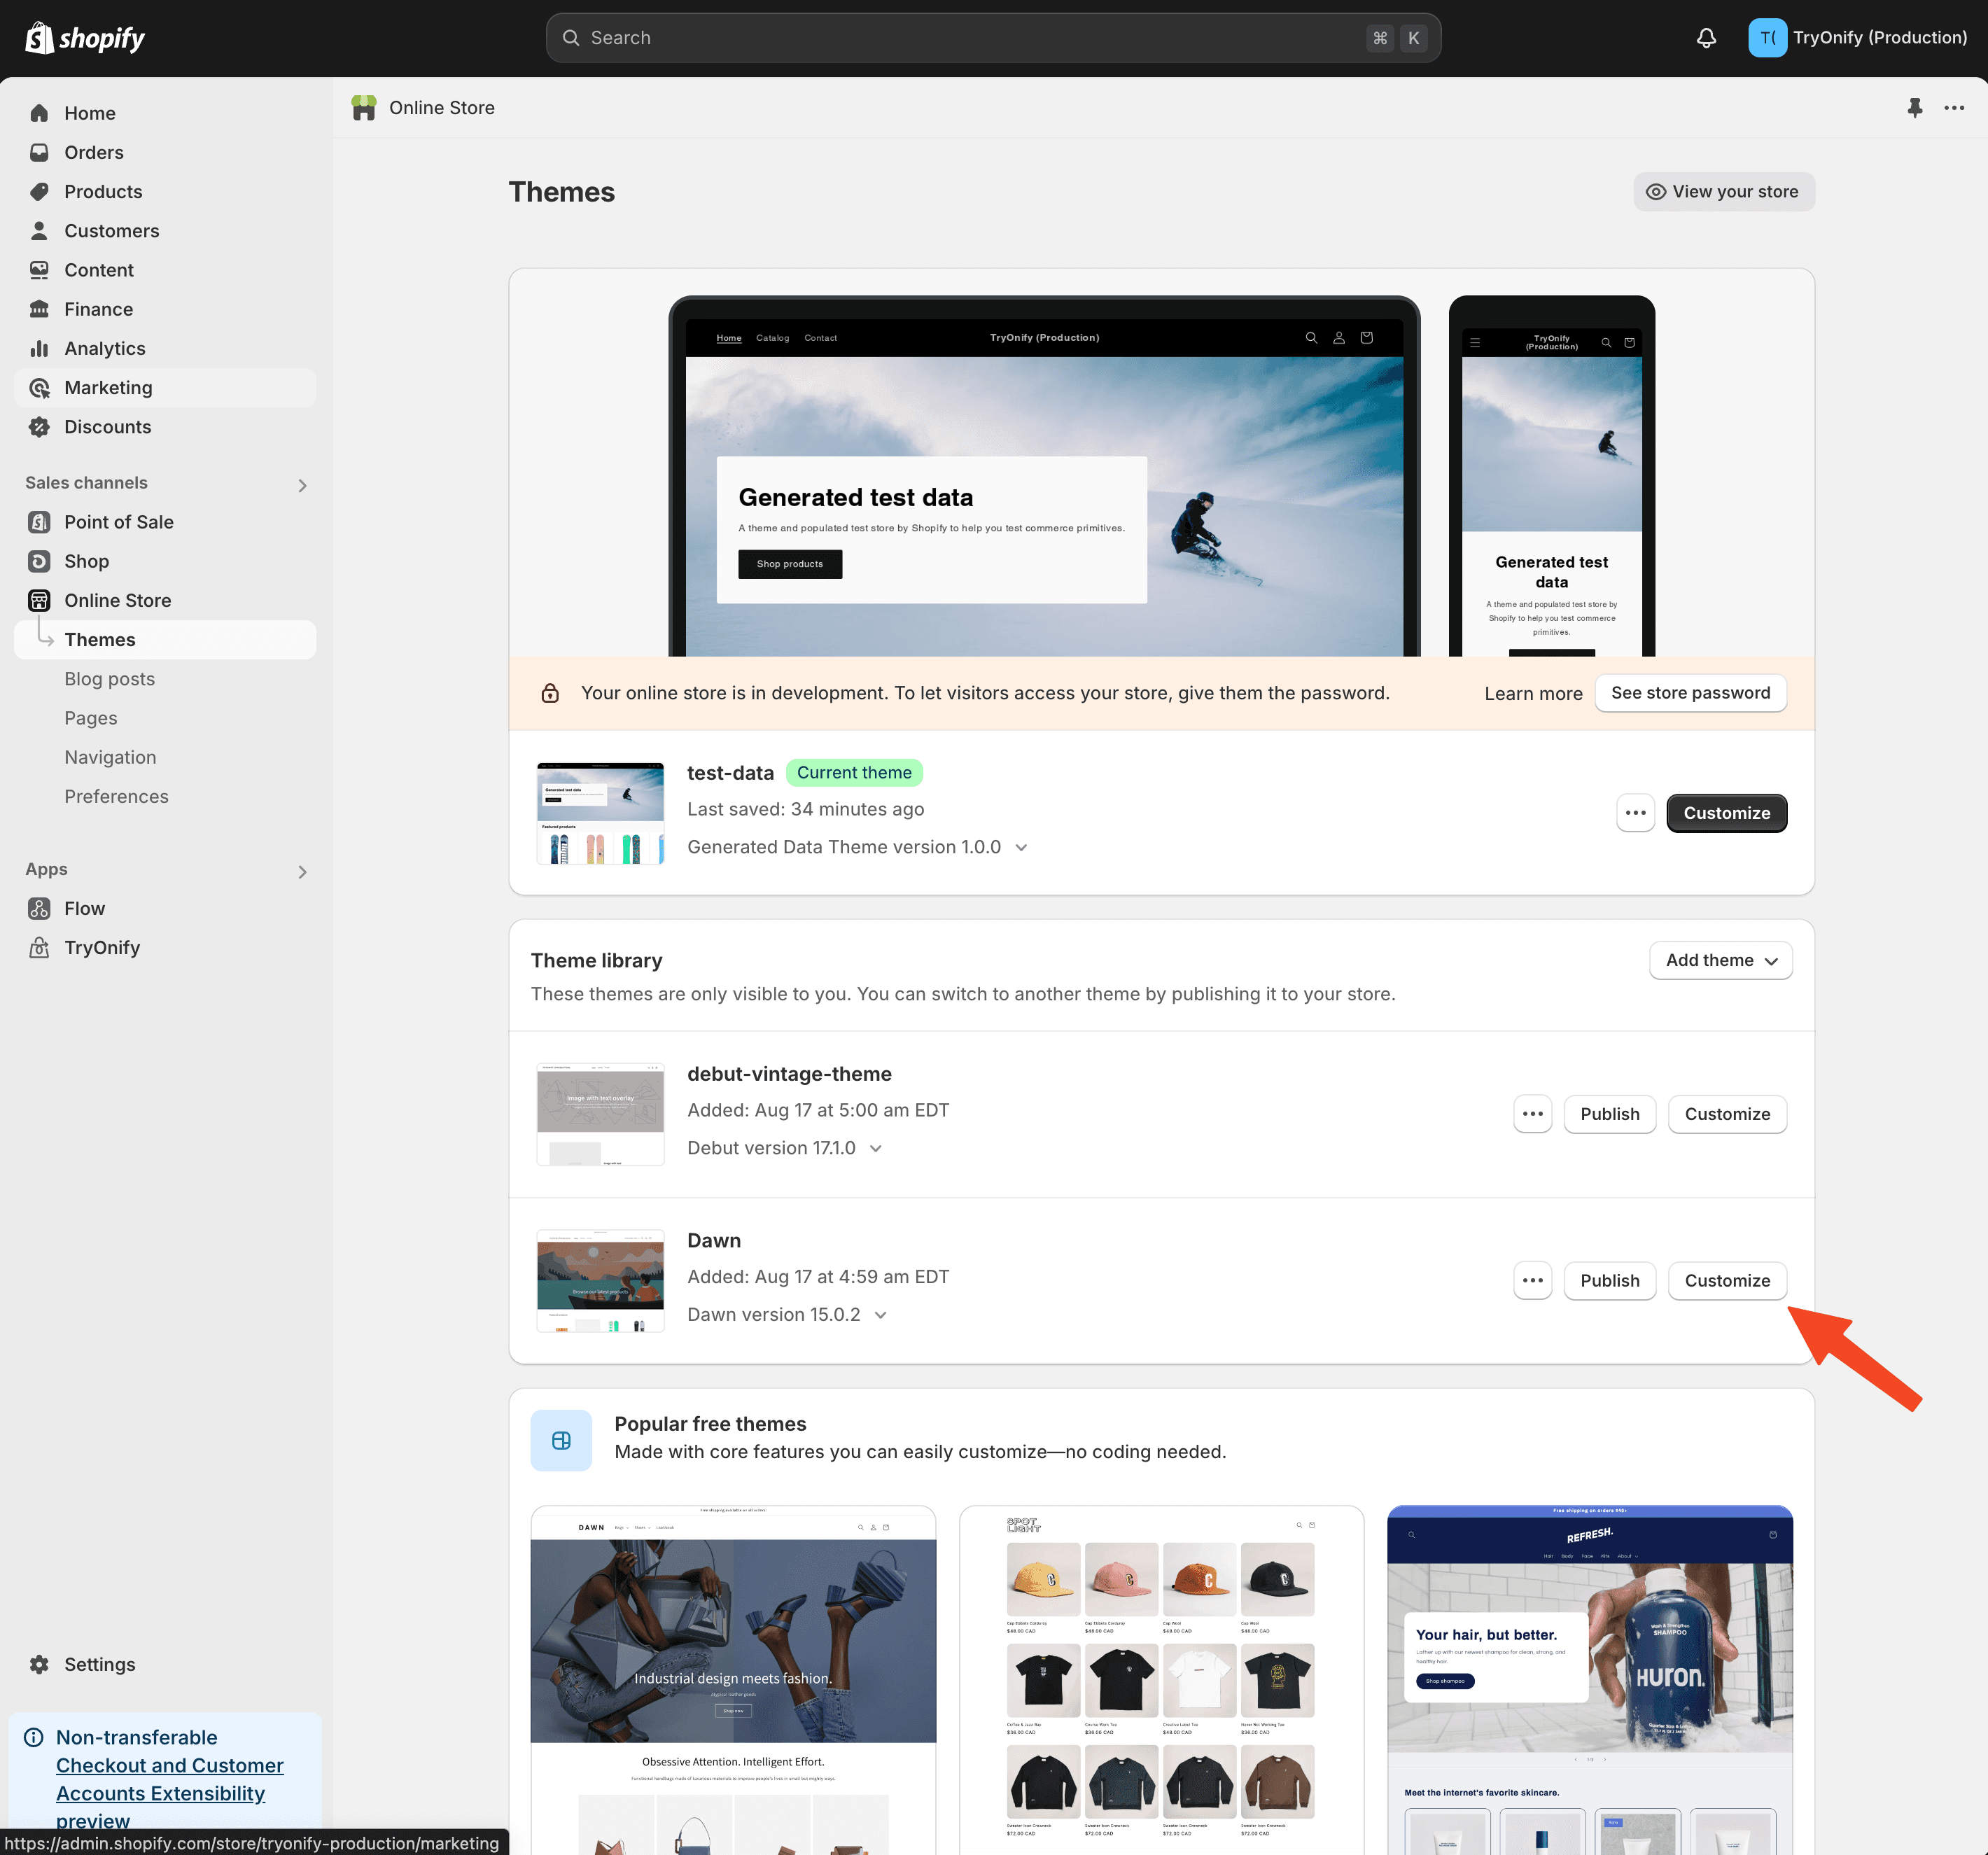
After clicking "Online Store", you should be automatically directed to Themes. Click "Customize" on the theme you want to use TryOnify with. If you don't already have a theme, we recommend starting with the Dawn theme.
Theme Block Installation
Block based themes are the easiest way to start using TryOnify on your store.
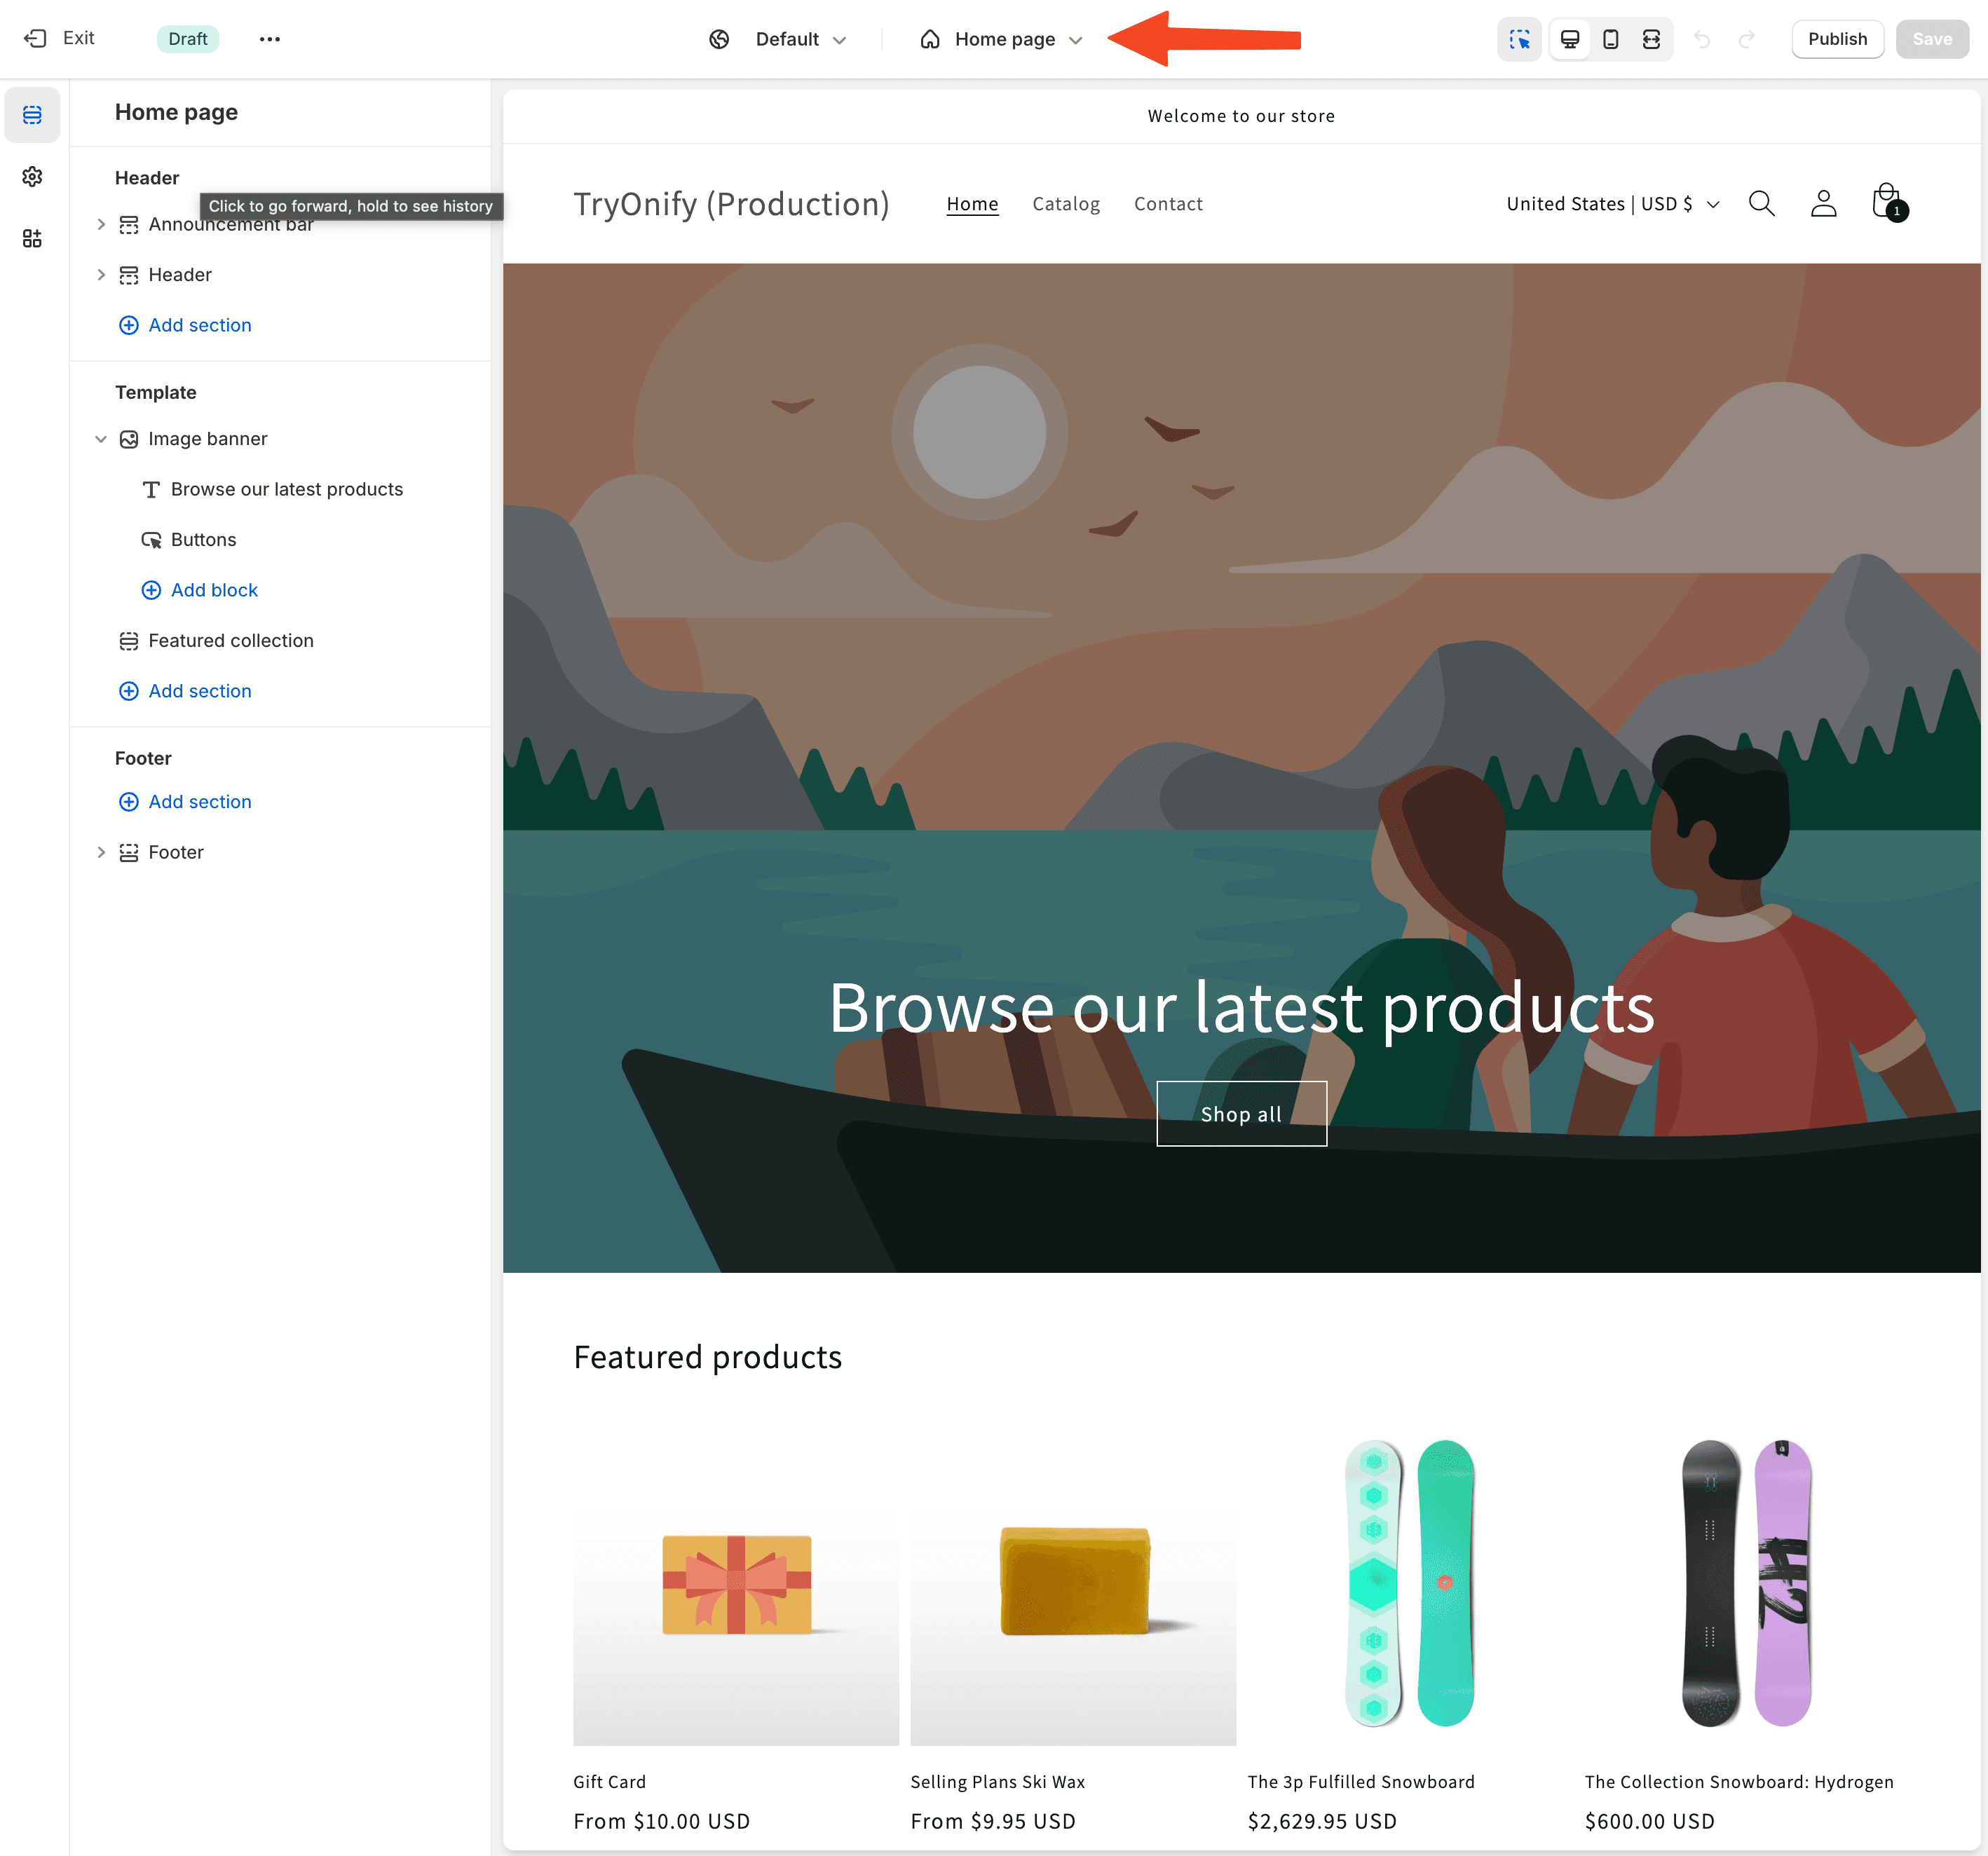
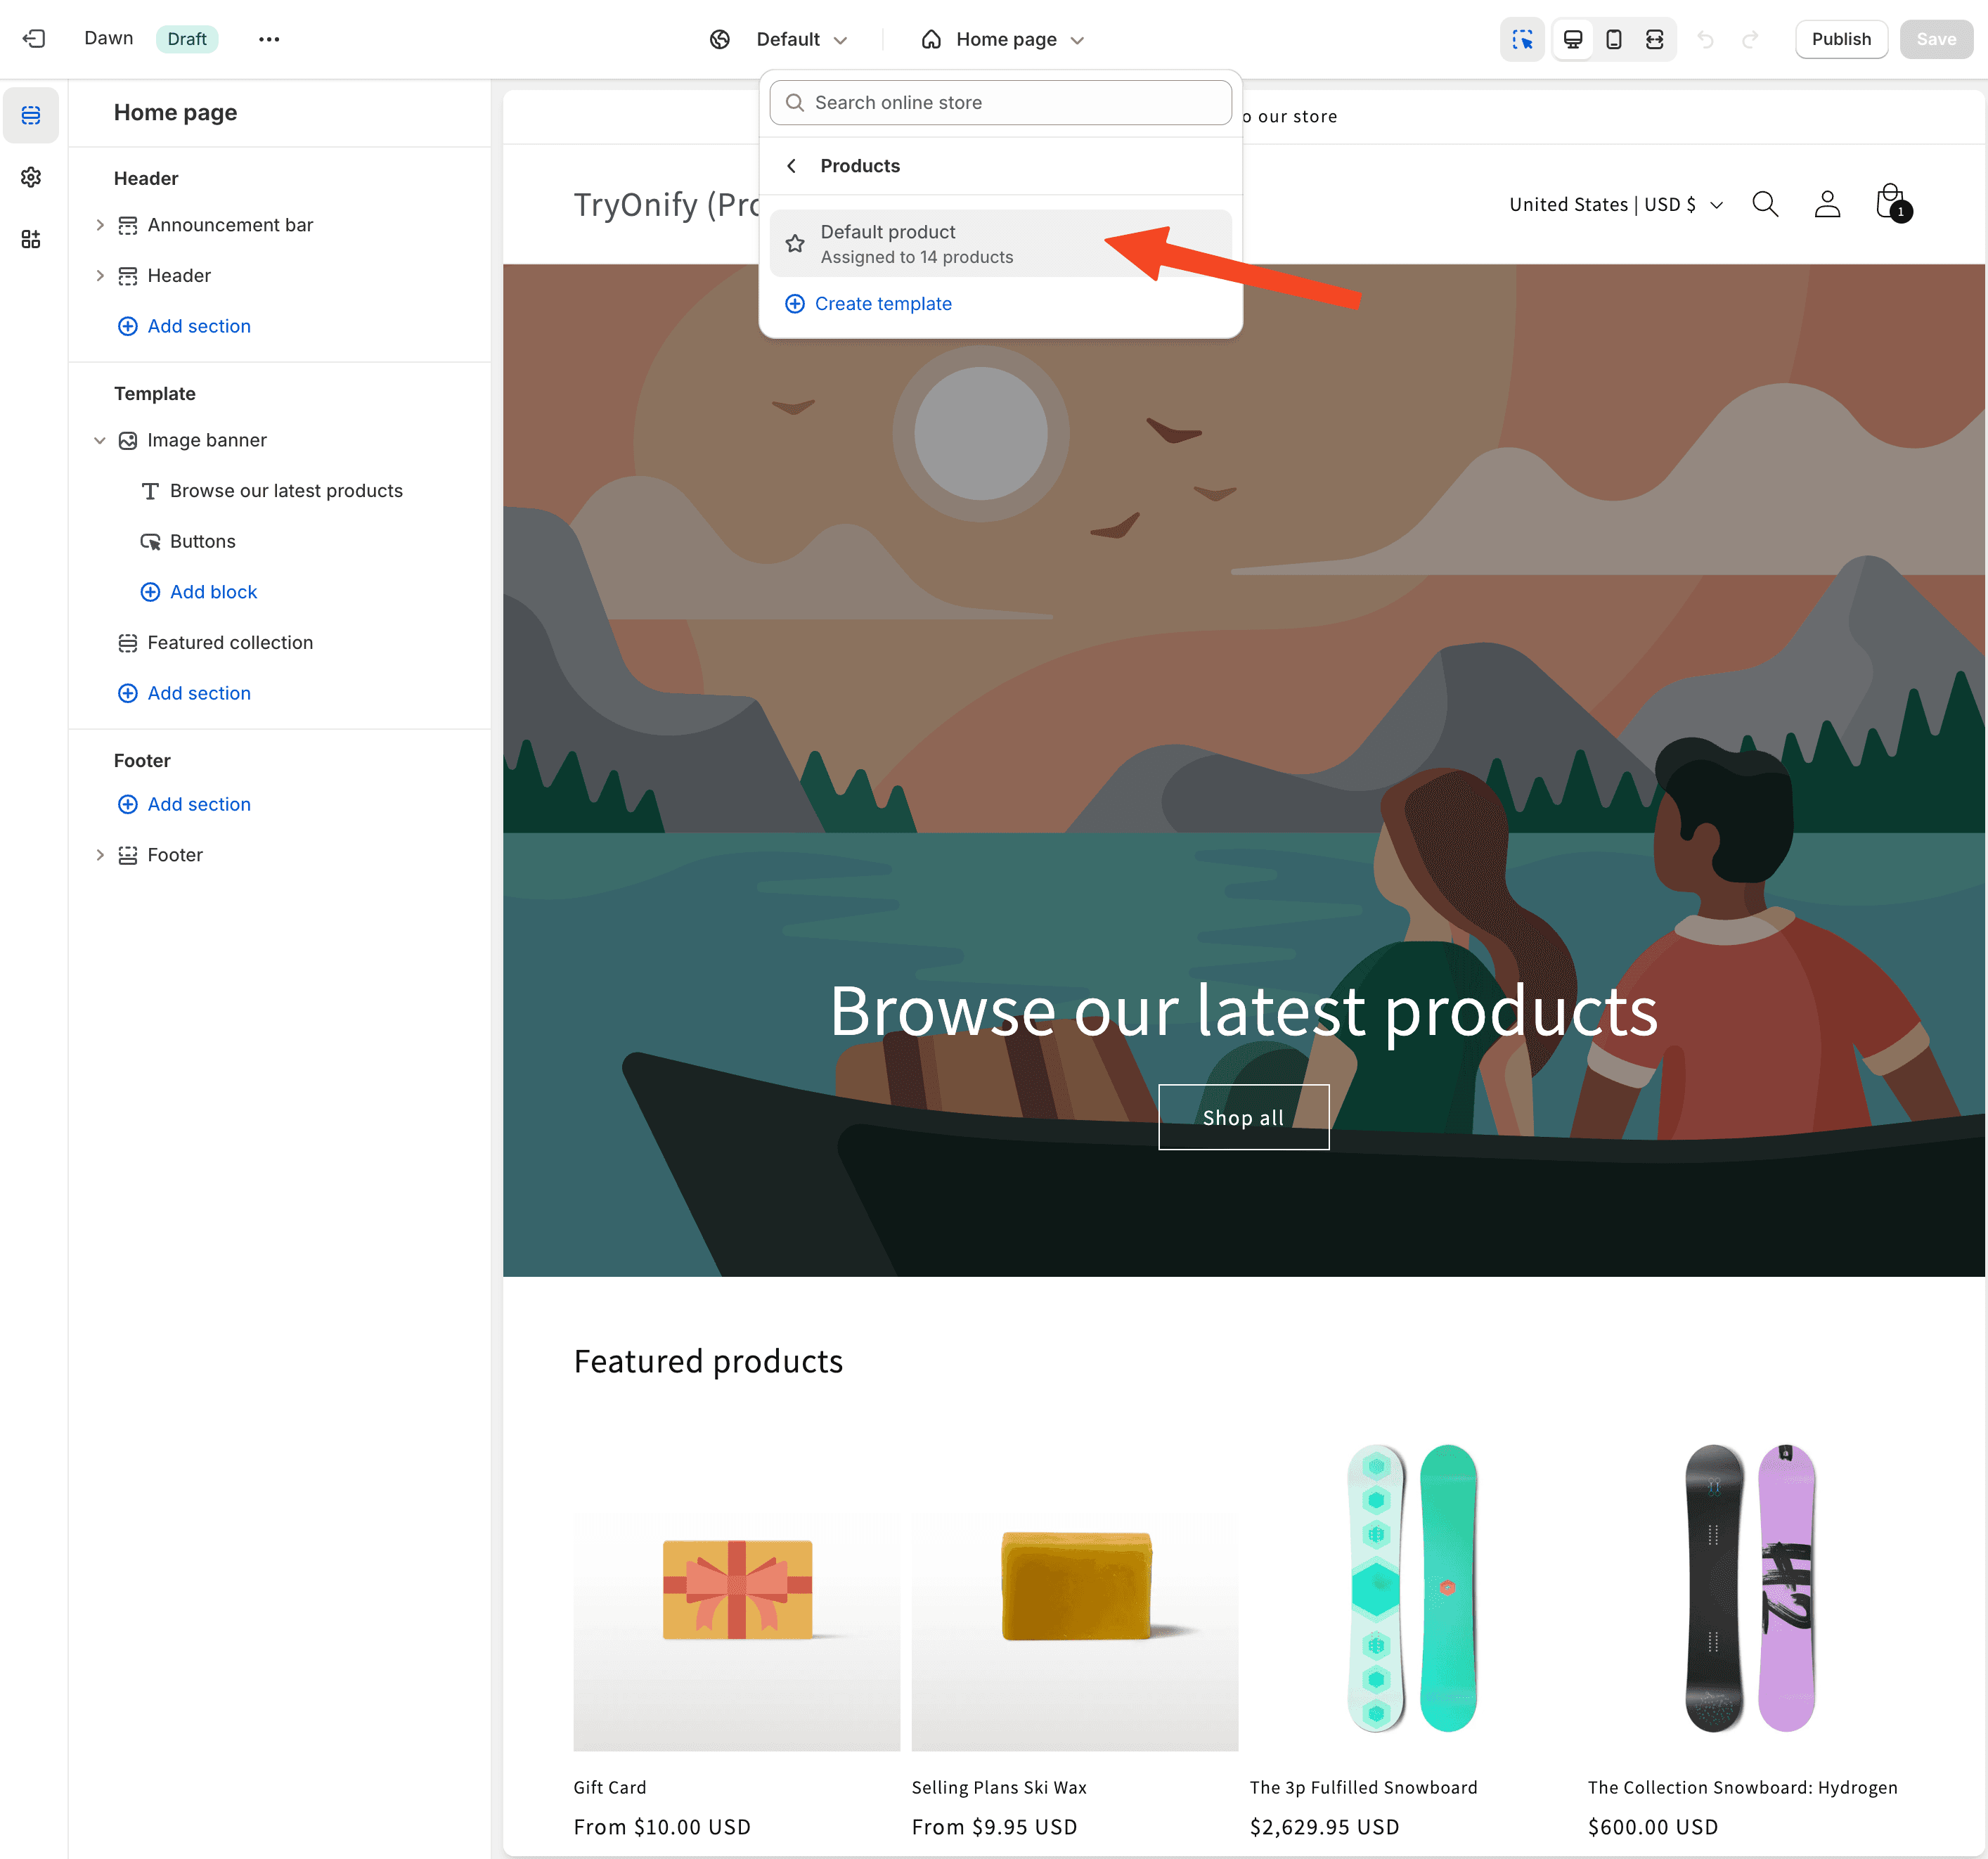
Once you've clicked "Customize" on the theme you want to use, click the dropdown at the middle-top of the theme editor. It should say "Home page" by default.
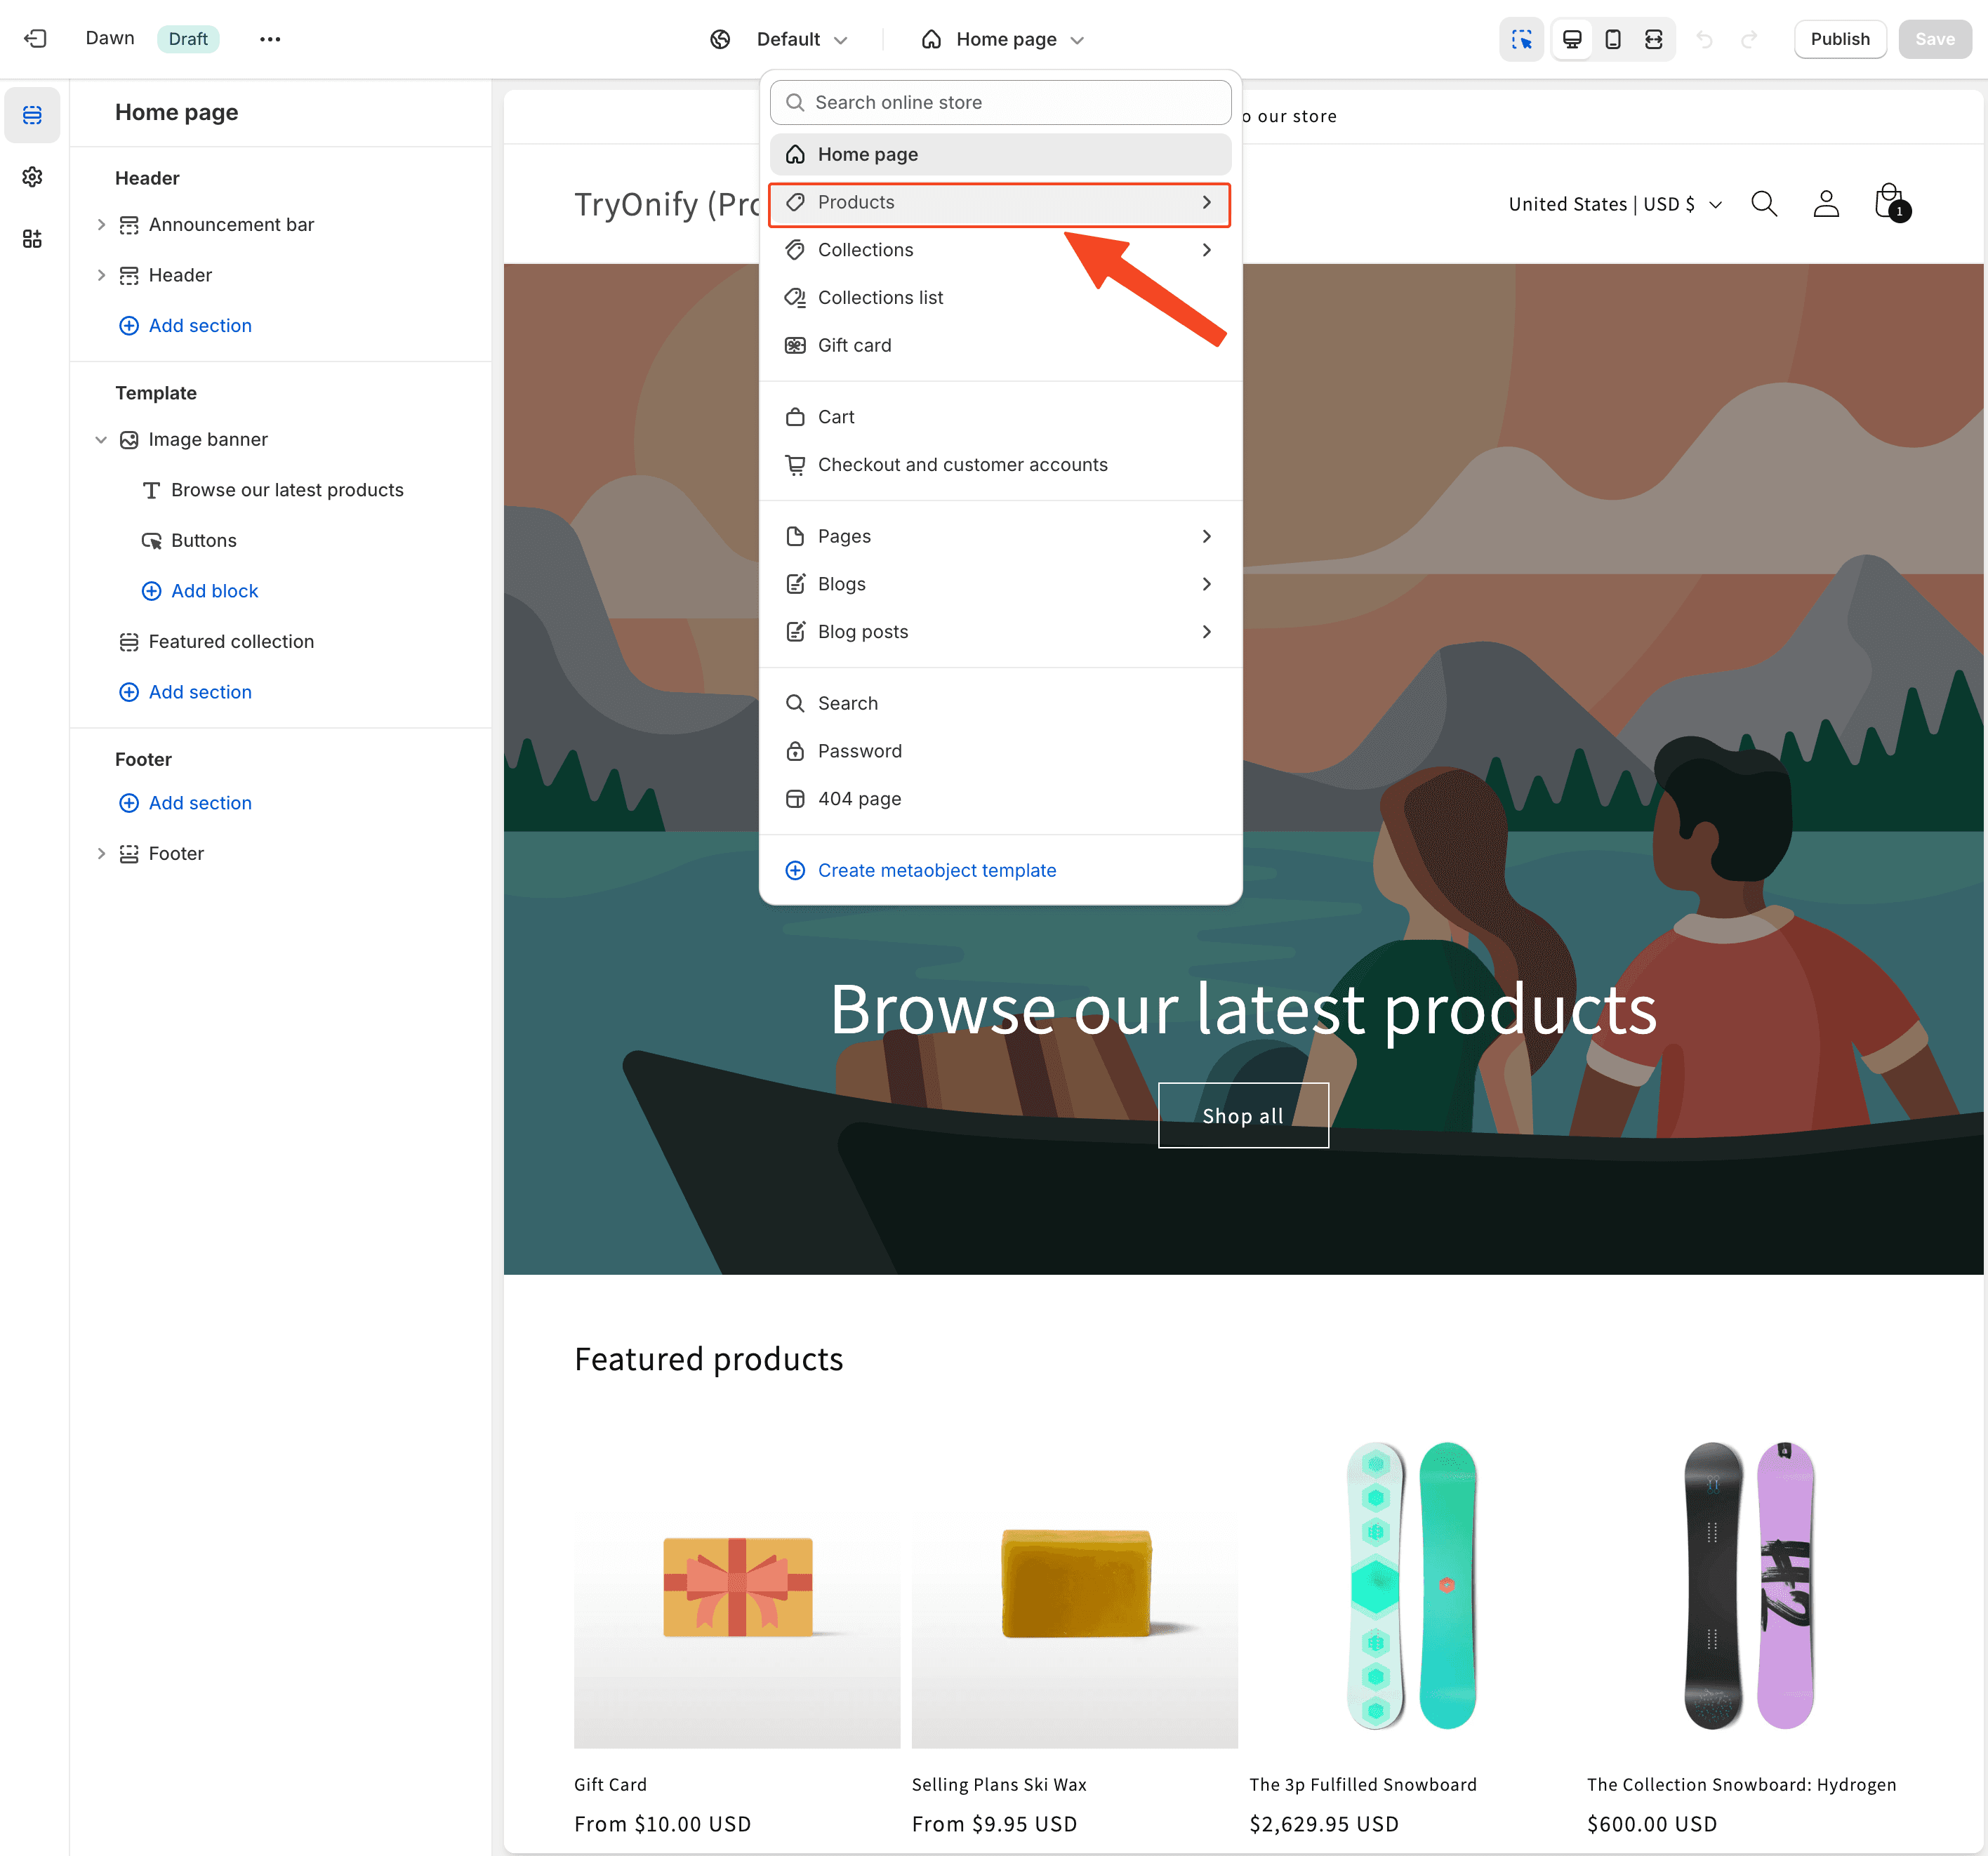
A dropdown should open allowing you to select "Products".
Finally, you can select the specific product template you want to use TryOnify with. In this example, we'll use the "Default product" template. Even though it says the template is assigned to multiple products, your Try Before You Buy payment option should only show for the products you added to your Trial Plan in the previous step.
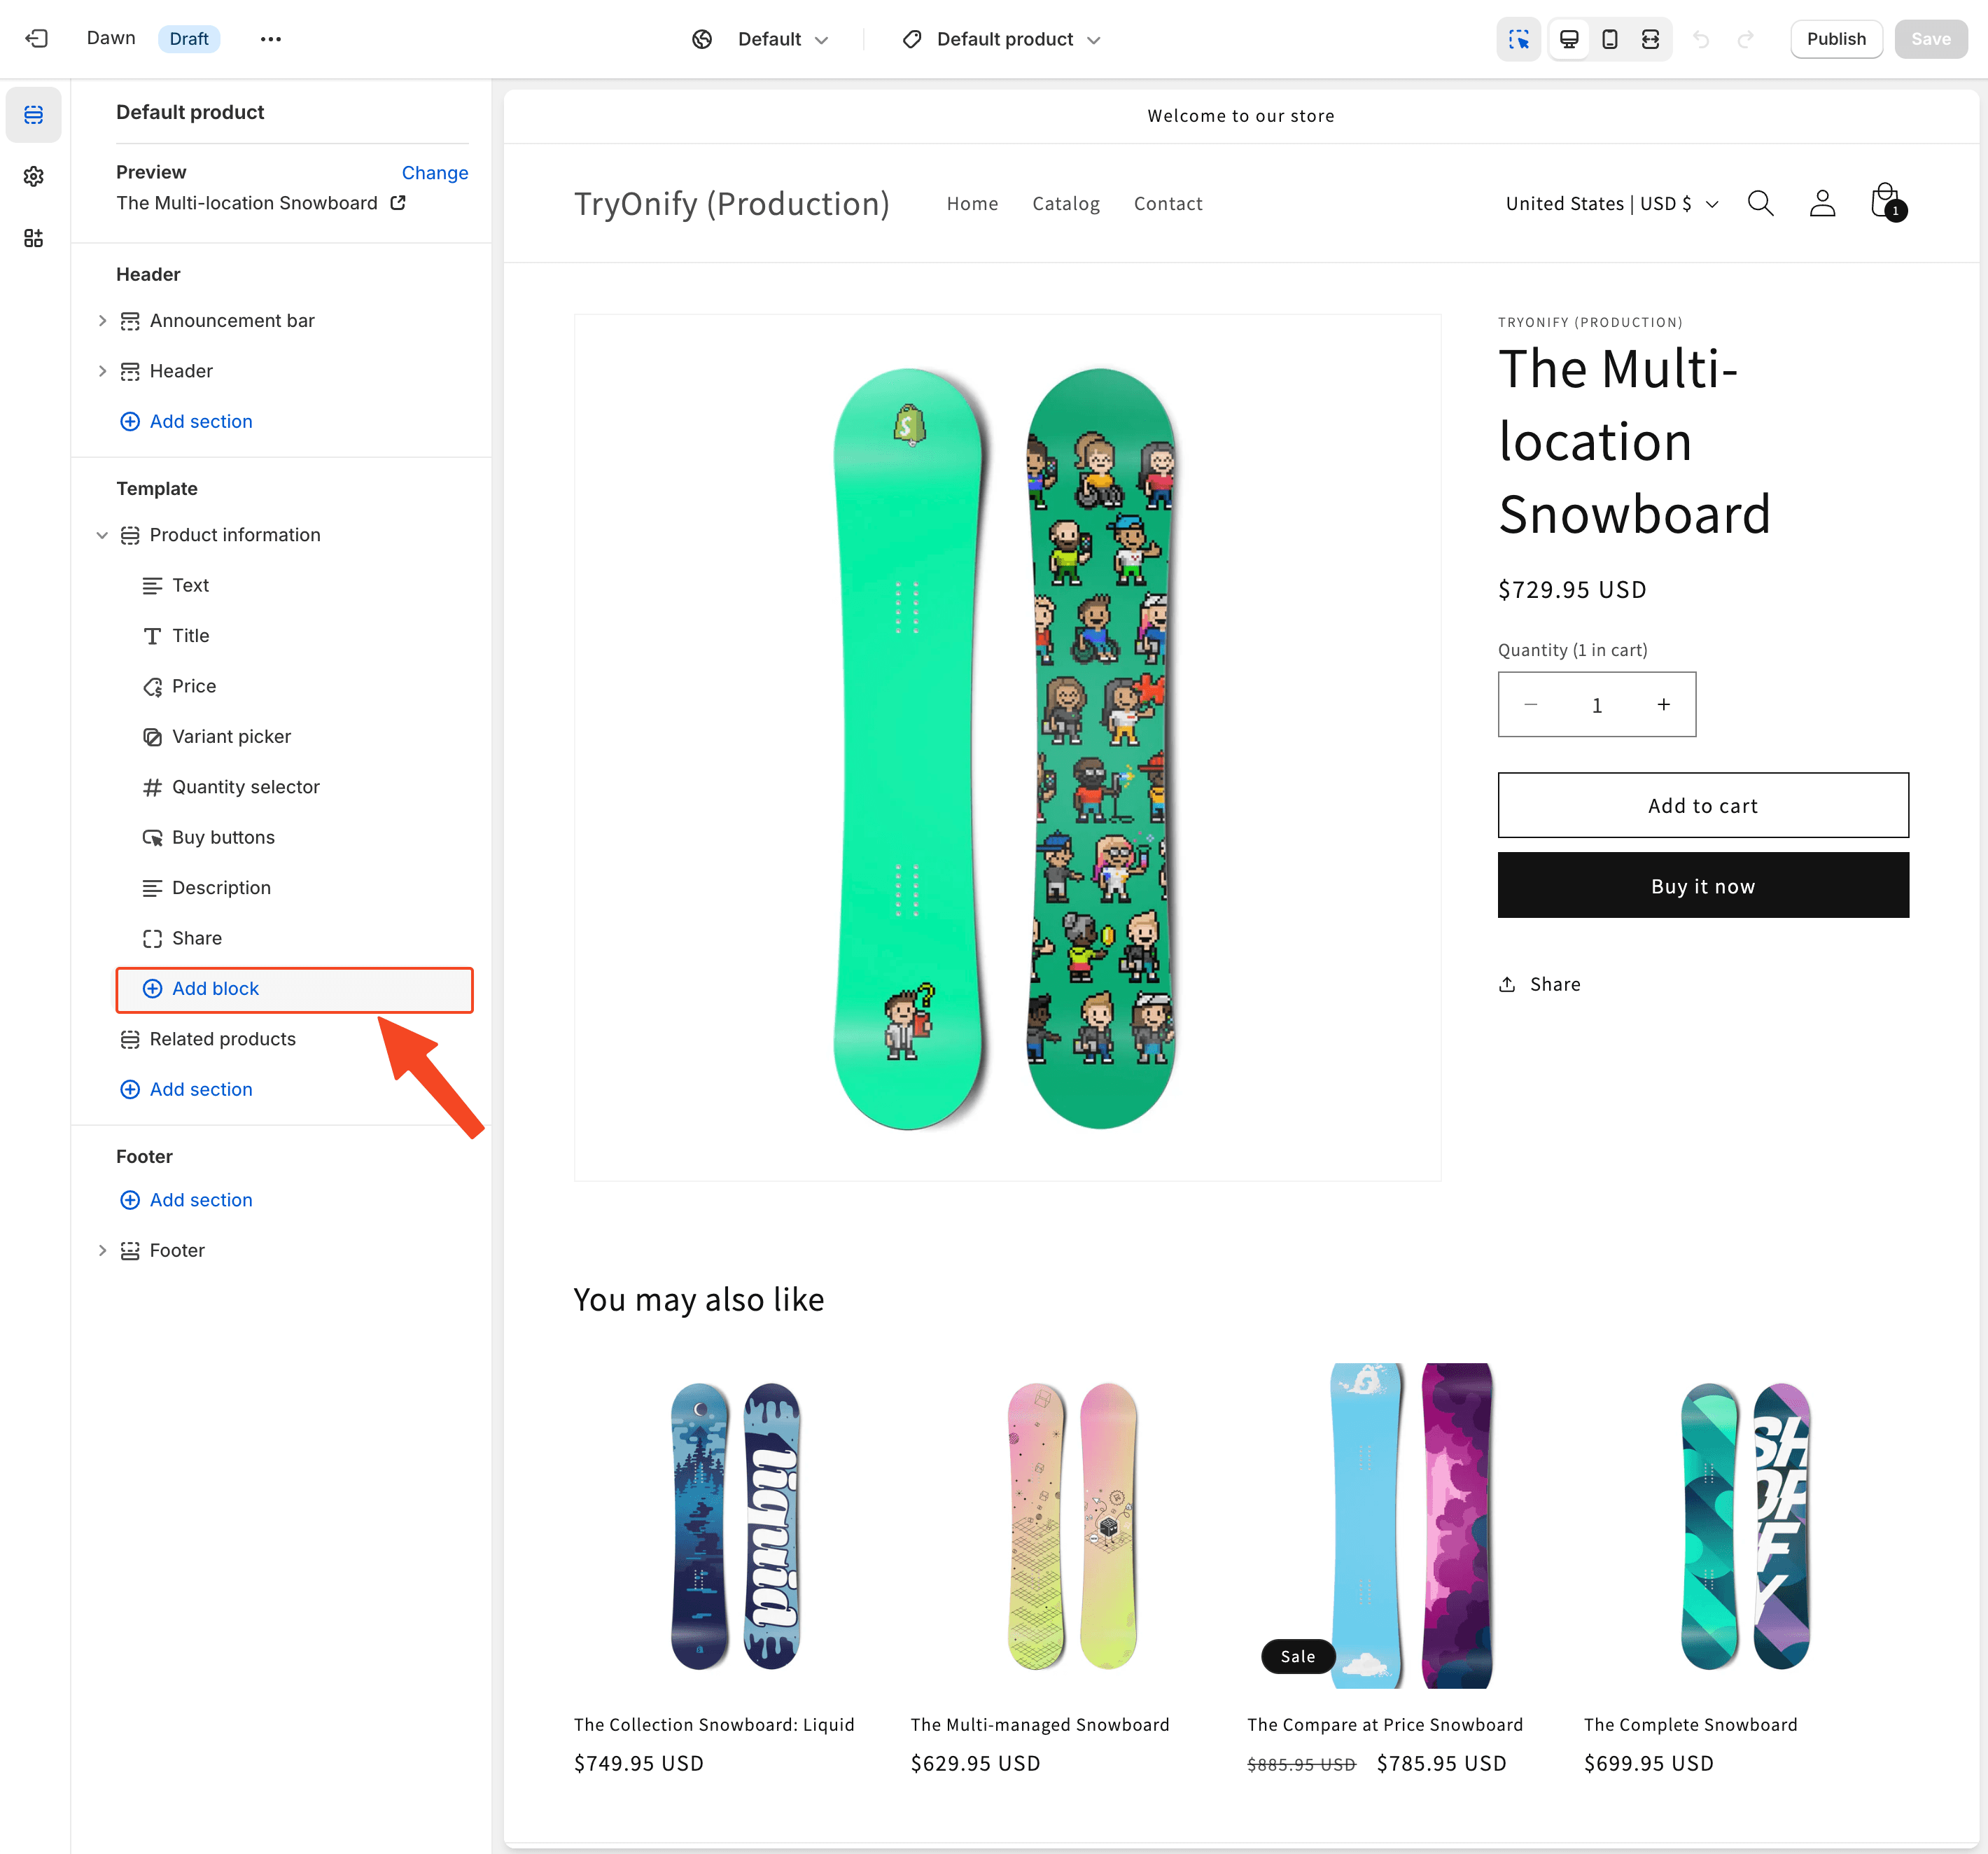
Before we proceed any further, check to see that you have the "Add block" option. If you don't see this, skip to the App Embed Installation section below. If you do see "Add block", go ahead and click it.
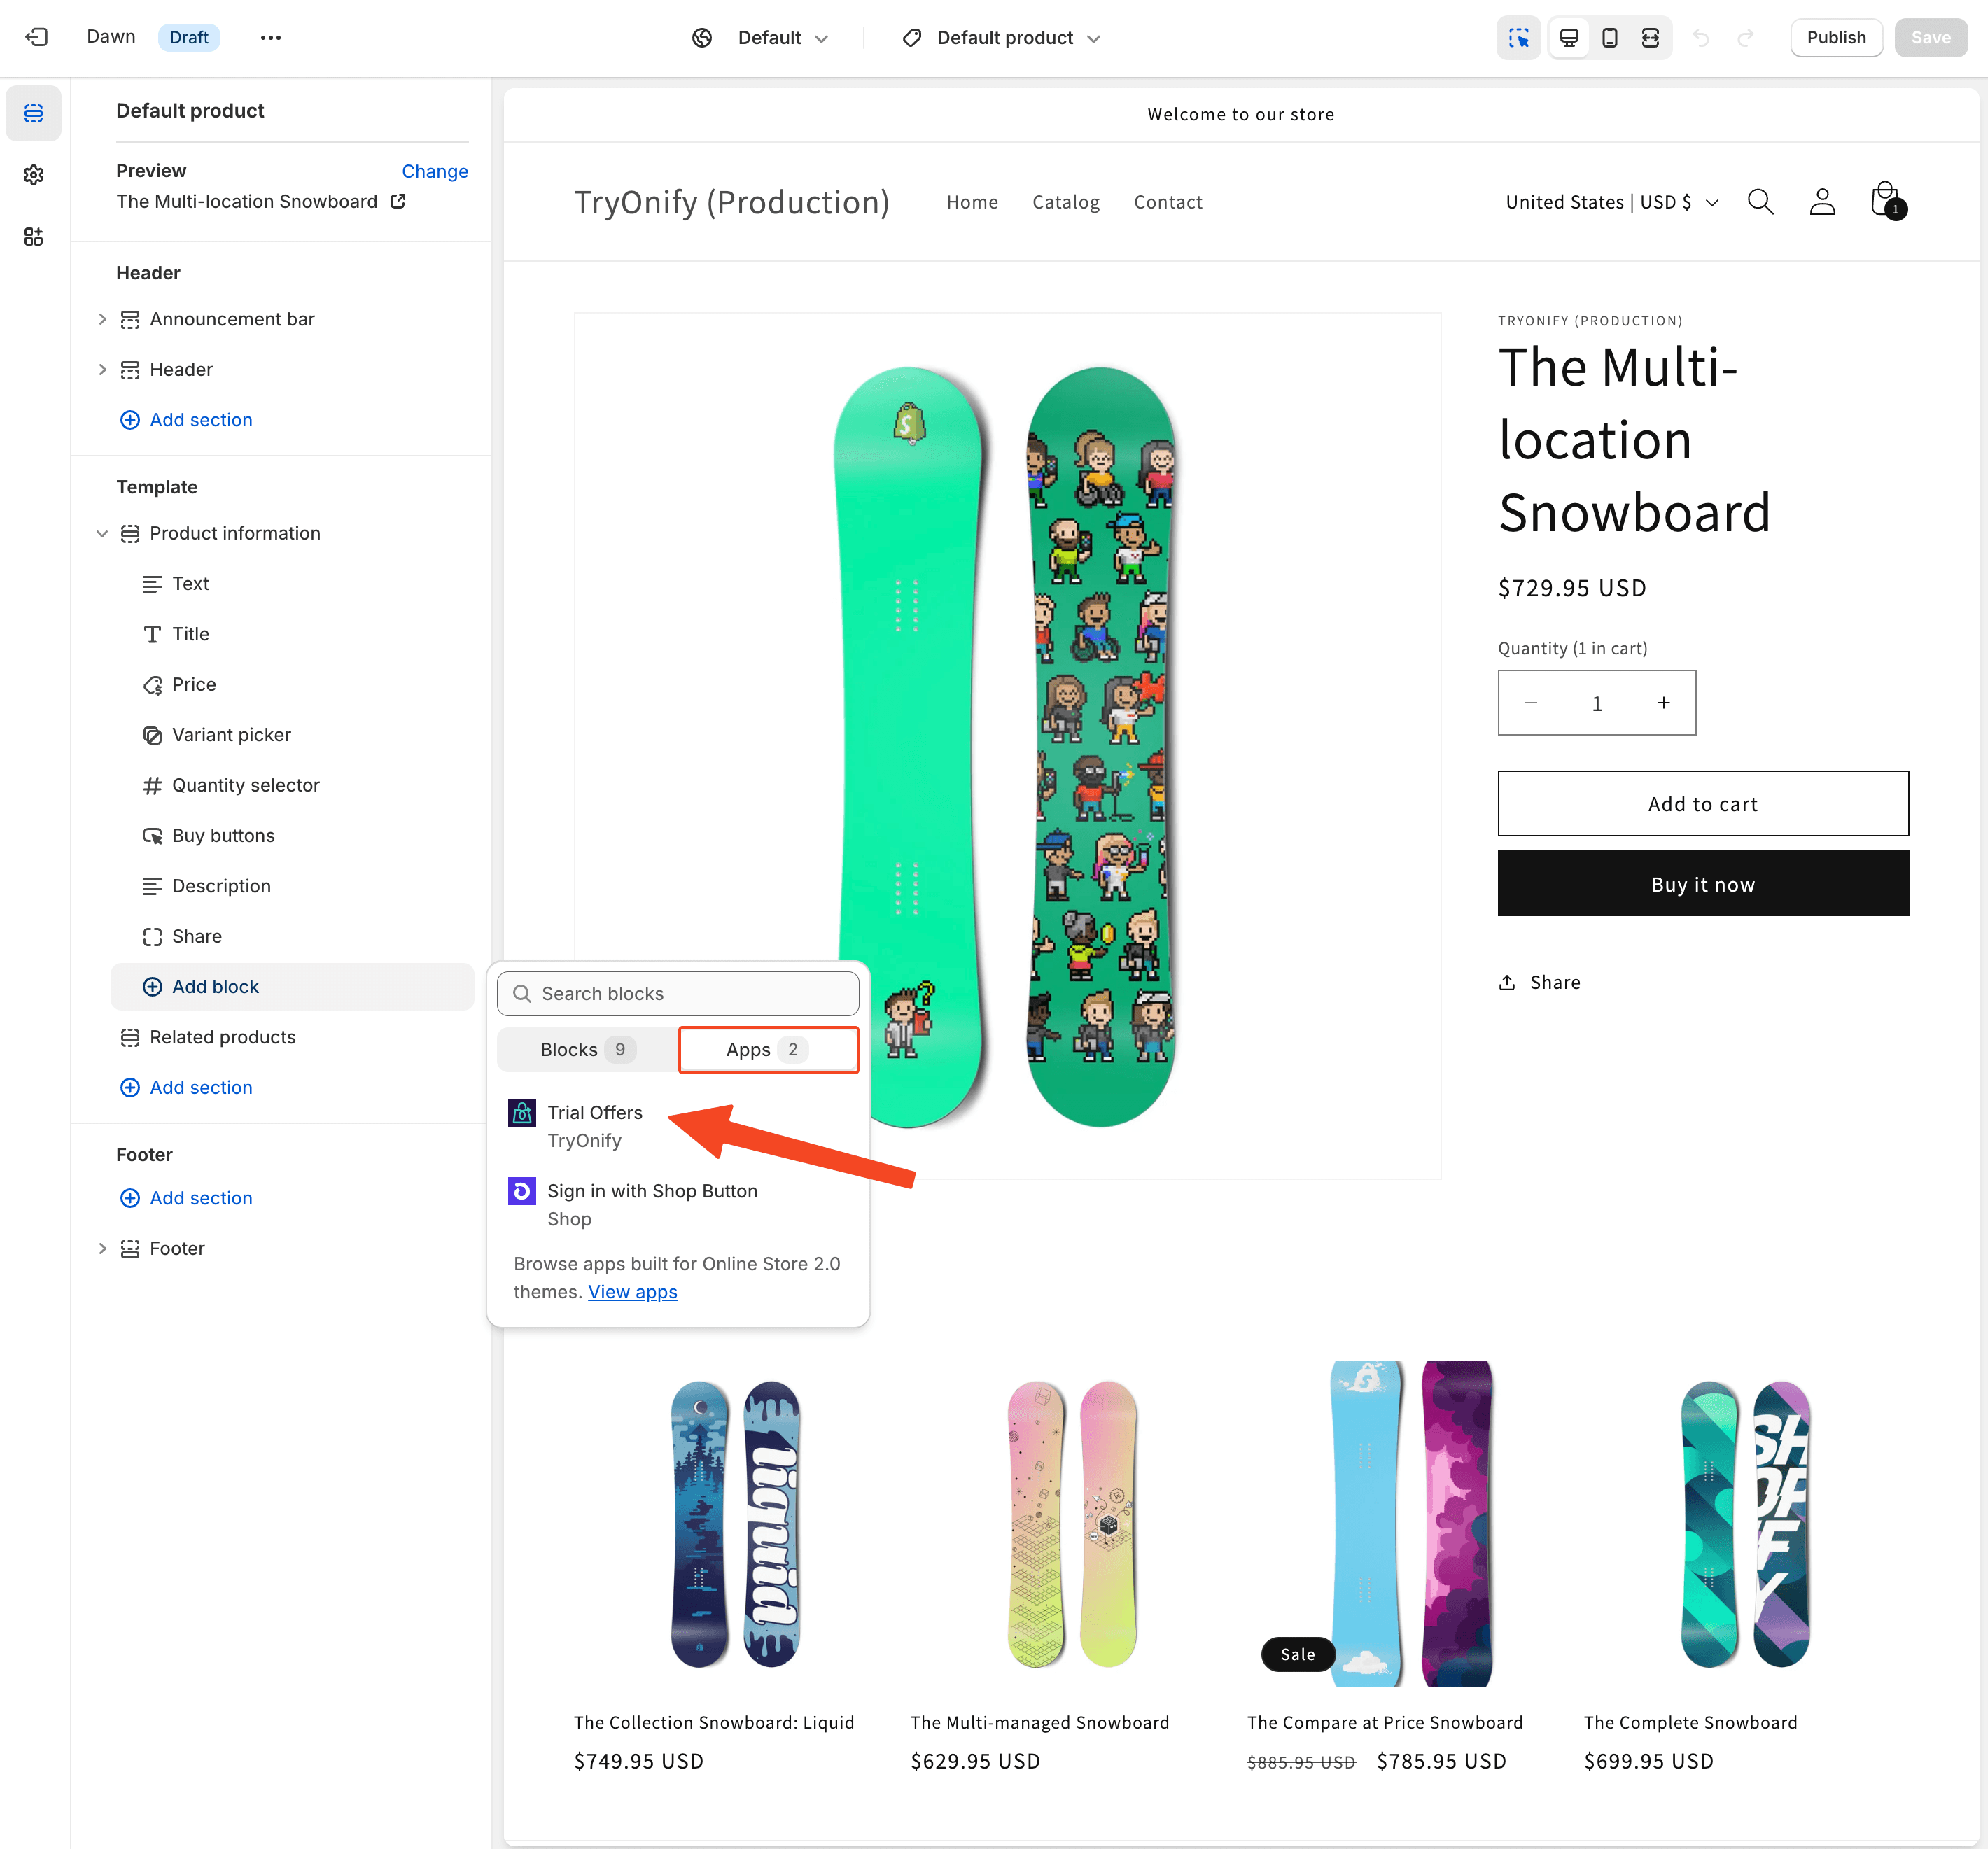
Once you have clicked "Add block", you'll see the following popup. Switch over to the "Apps" tab and click "Trial Offers" by TryOnify.
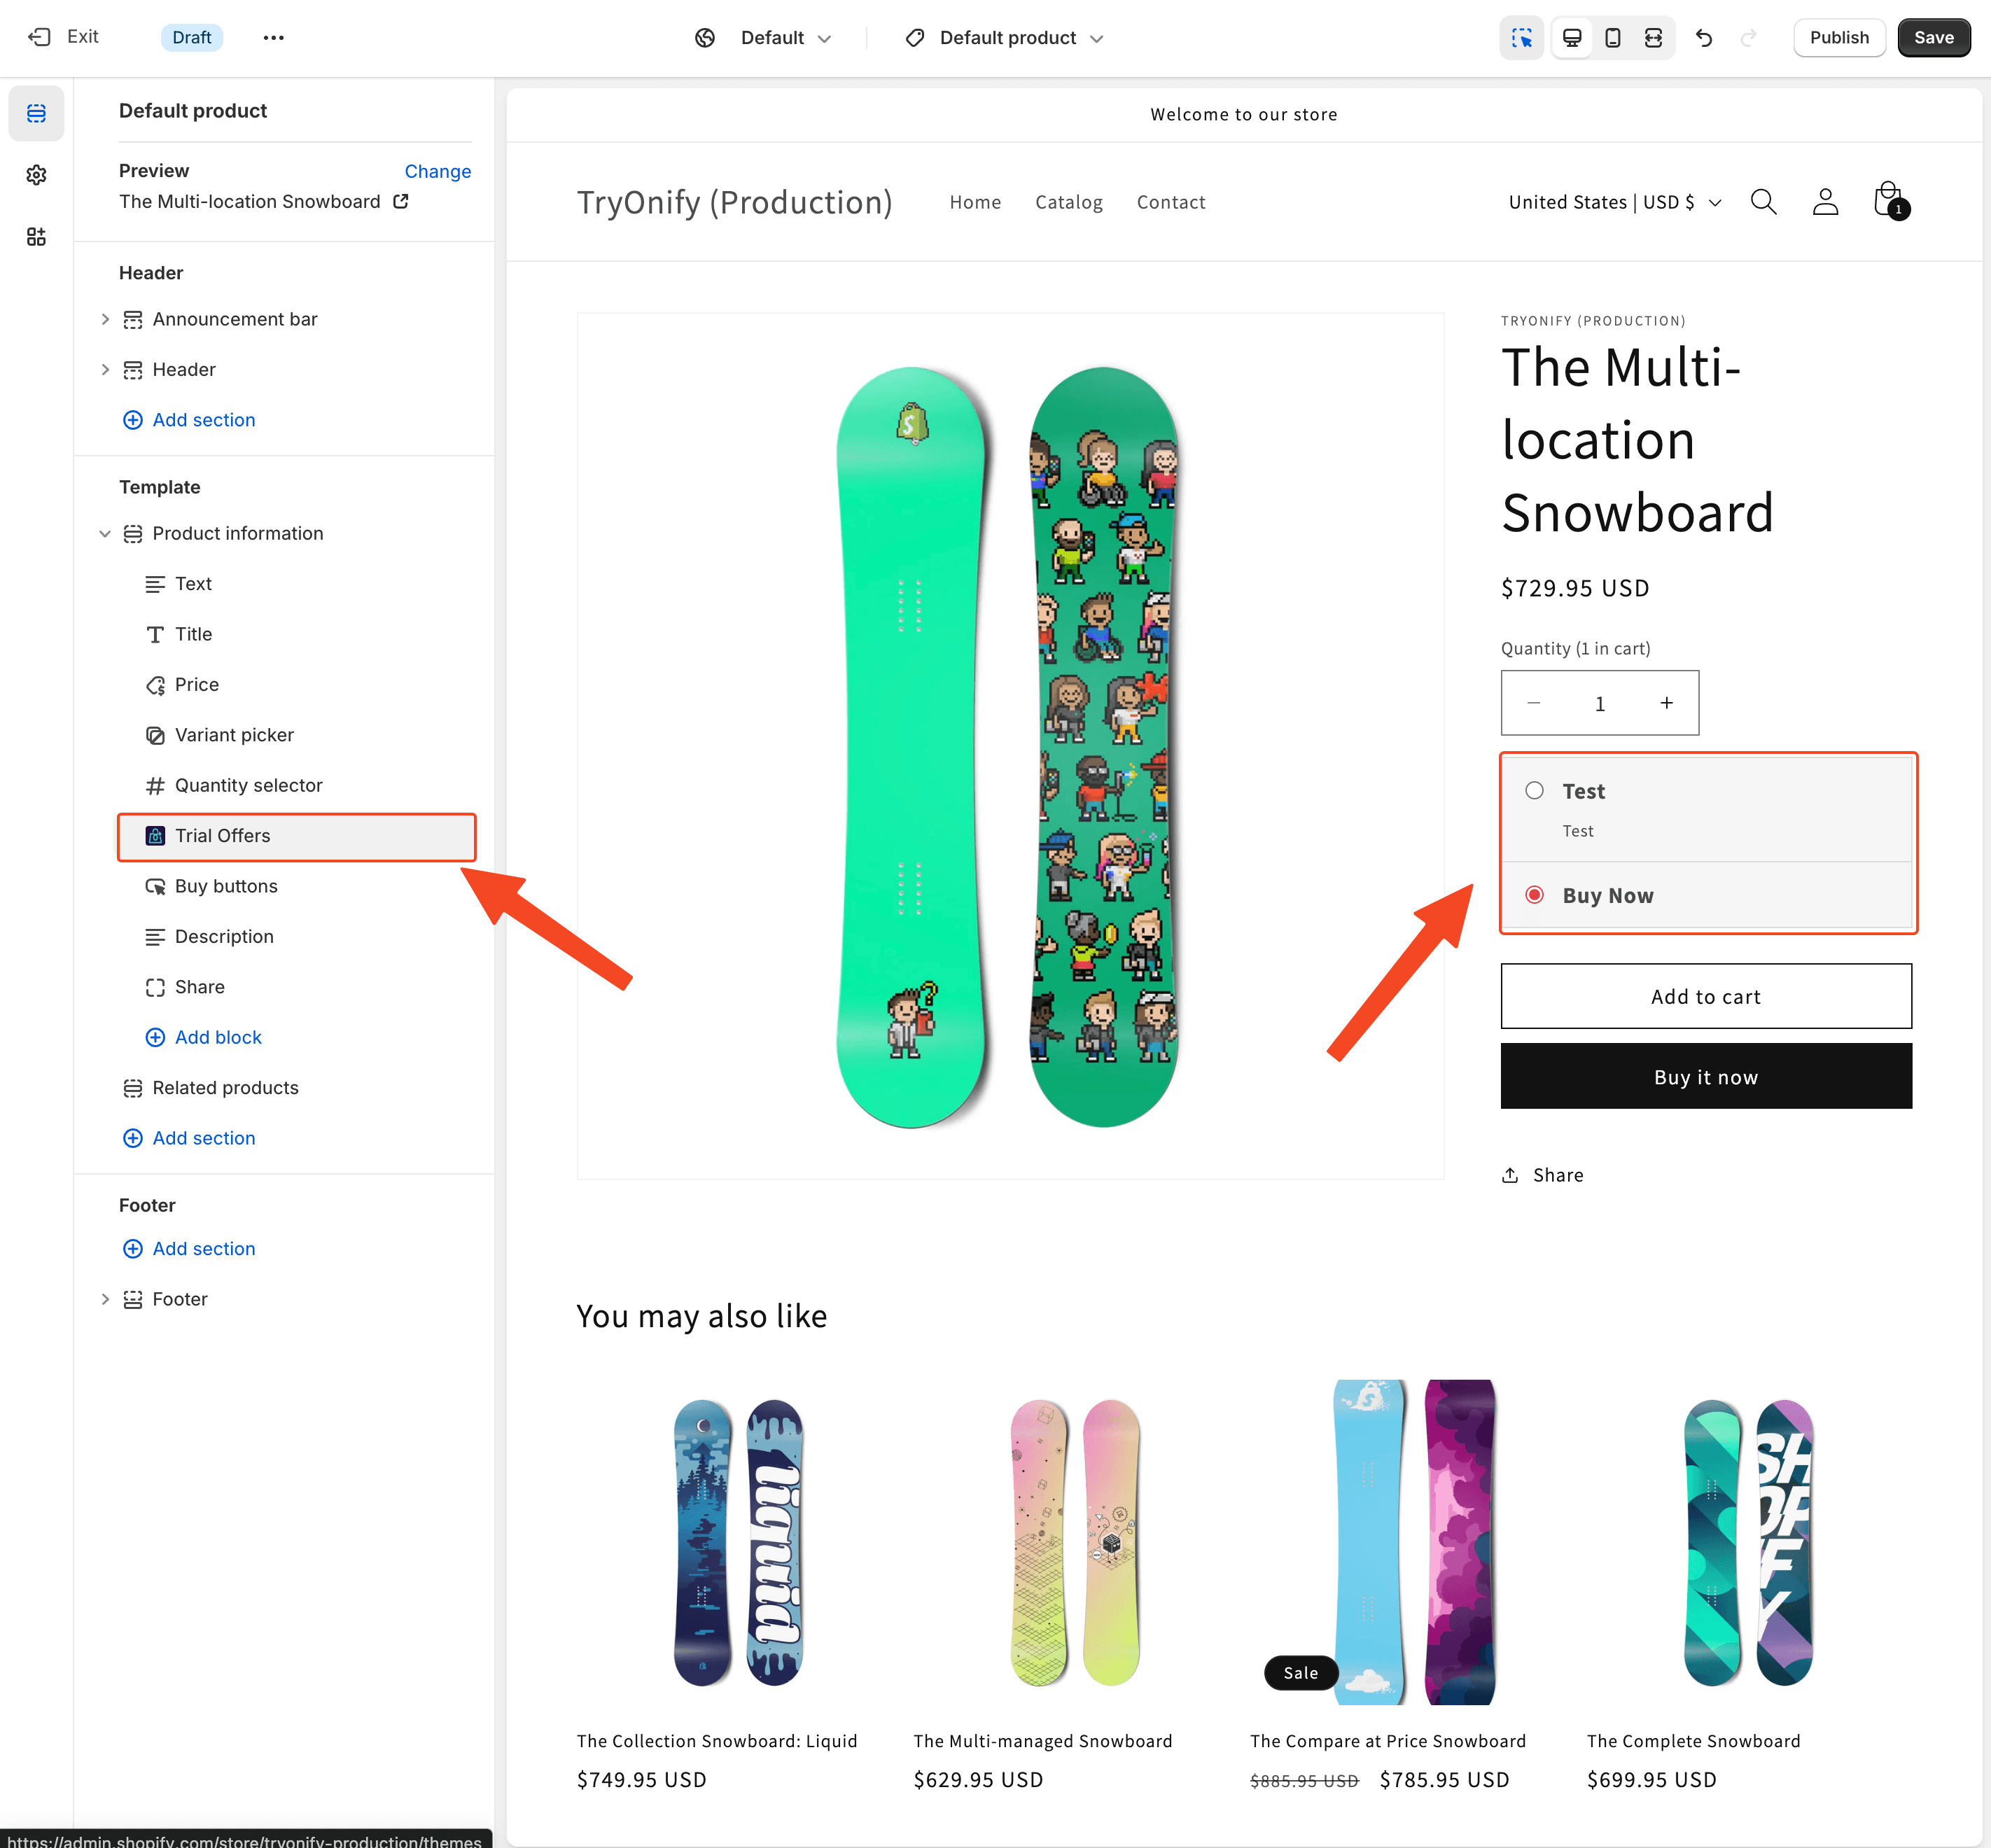
You should now see "Trial Offers" by TryOnify in the left menu and the TryOnify widget on the right. Feel free to relocate the "Trial Offers" block wherever you prefer. We recommend moving it directly above "Buy buttons". You can move the block by clicking and holding the left button on your mouse or touchpad and dragging it up or down.
Last but not least, hit "Save" in the top right corner!
App Embed Installation
If your theme is a bit older (legacy 2.0), then you'll need to activate TryOnify using an App Embed.
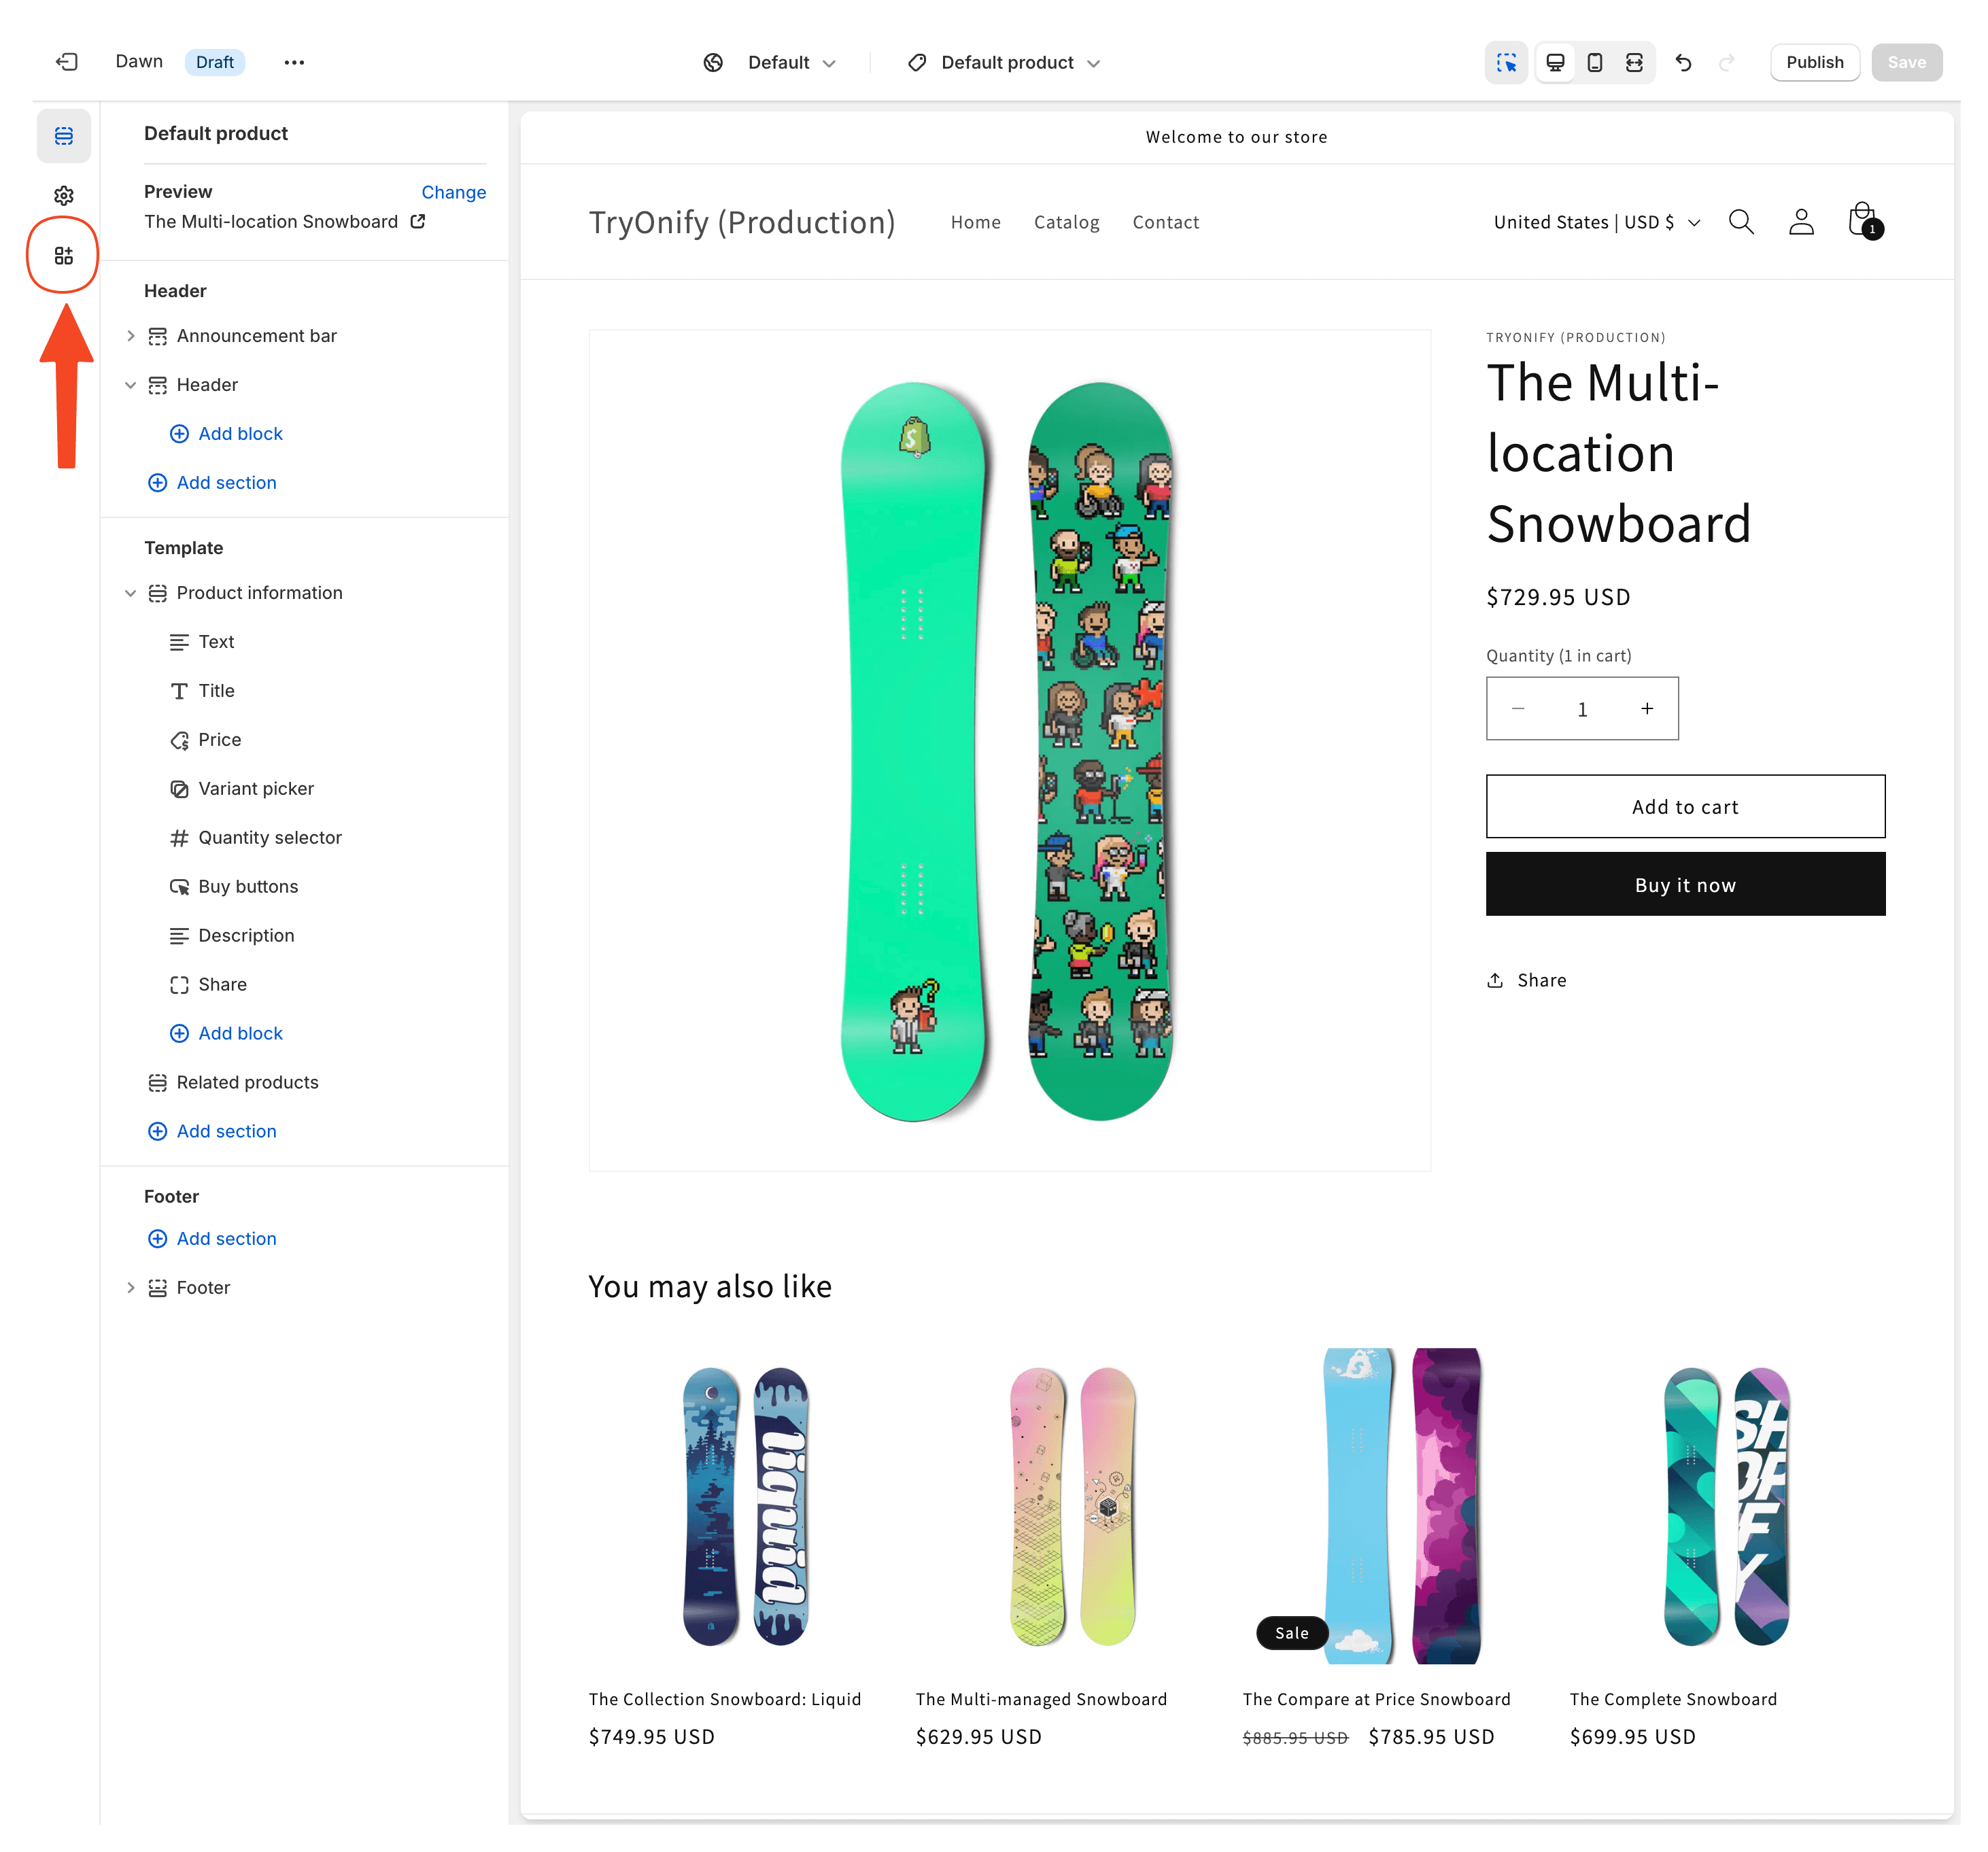
Click the 3rd icon from the top on the leftmost navigation menu. Hover over the icon to make sure it says "App embeds", before clicking it.
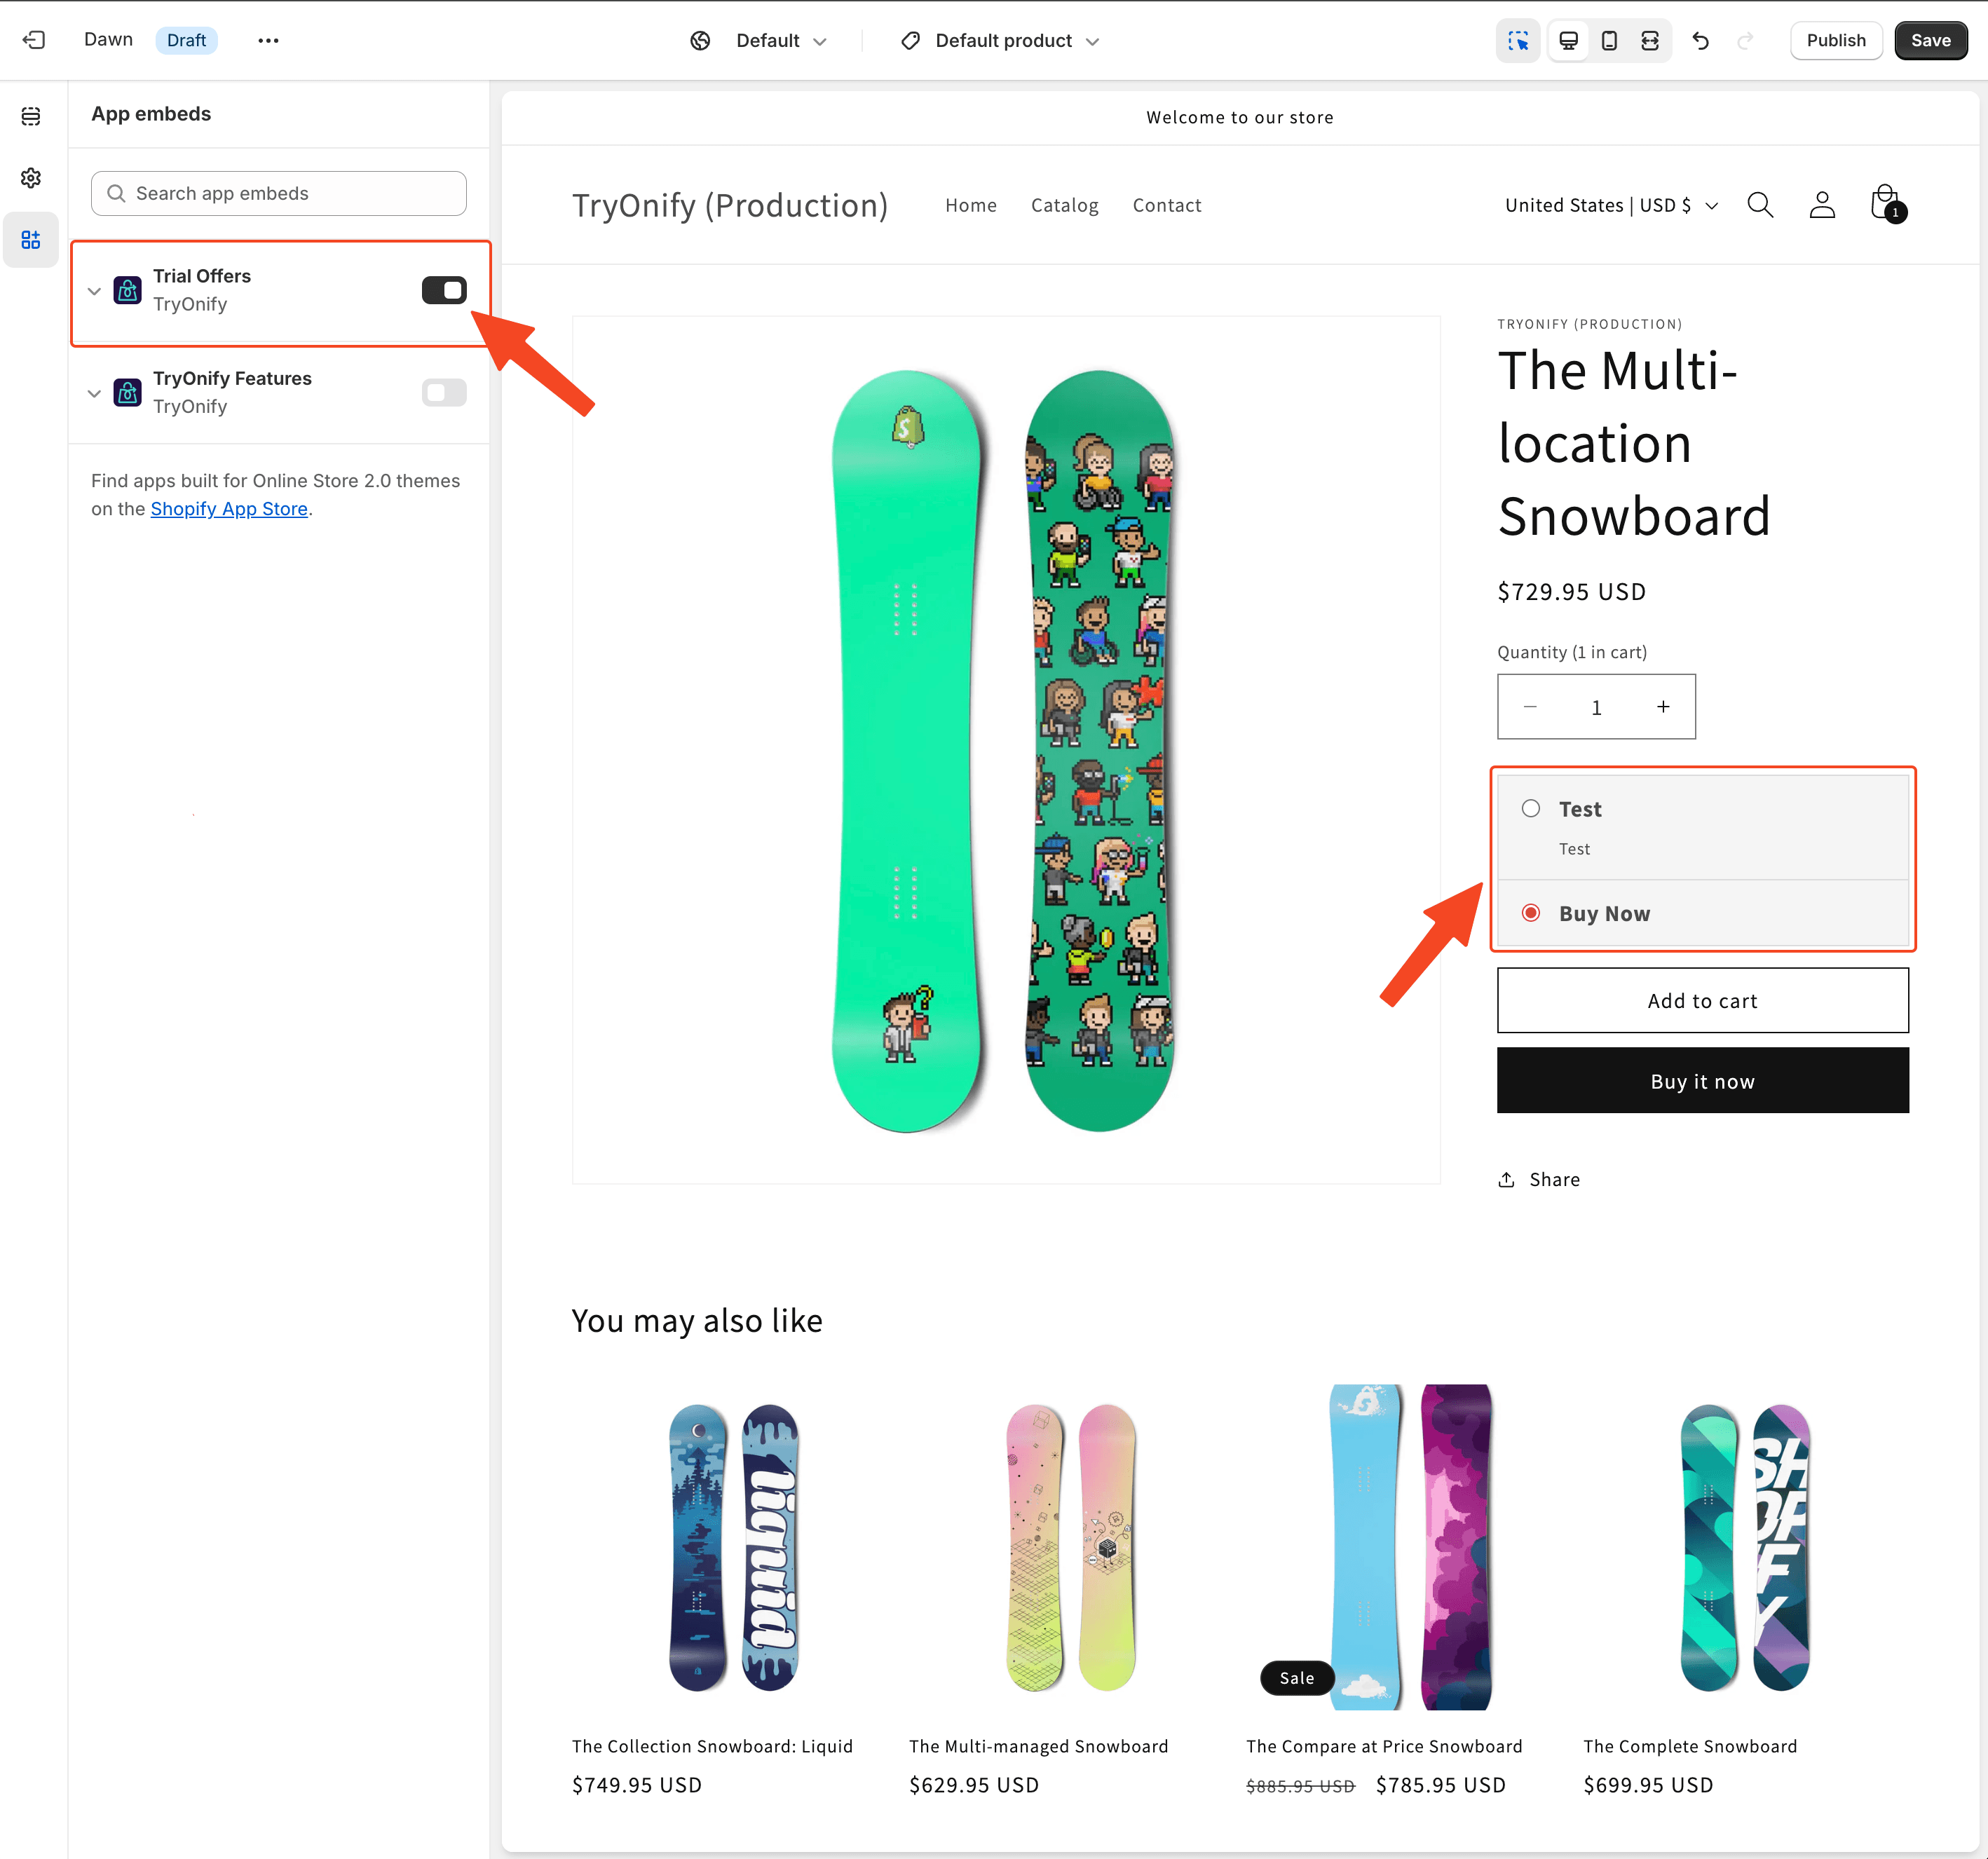
Now you should see 2 options by TryOnify. Find "Trial Offers" and click the toggle to turn it on. Leave "TryOnify Features" off. You'll see the TryOnify widget appear on the right.
Finally, hit "Save" in the top right corner.
Sanity Testing
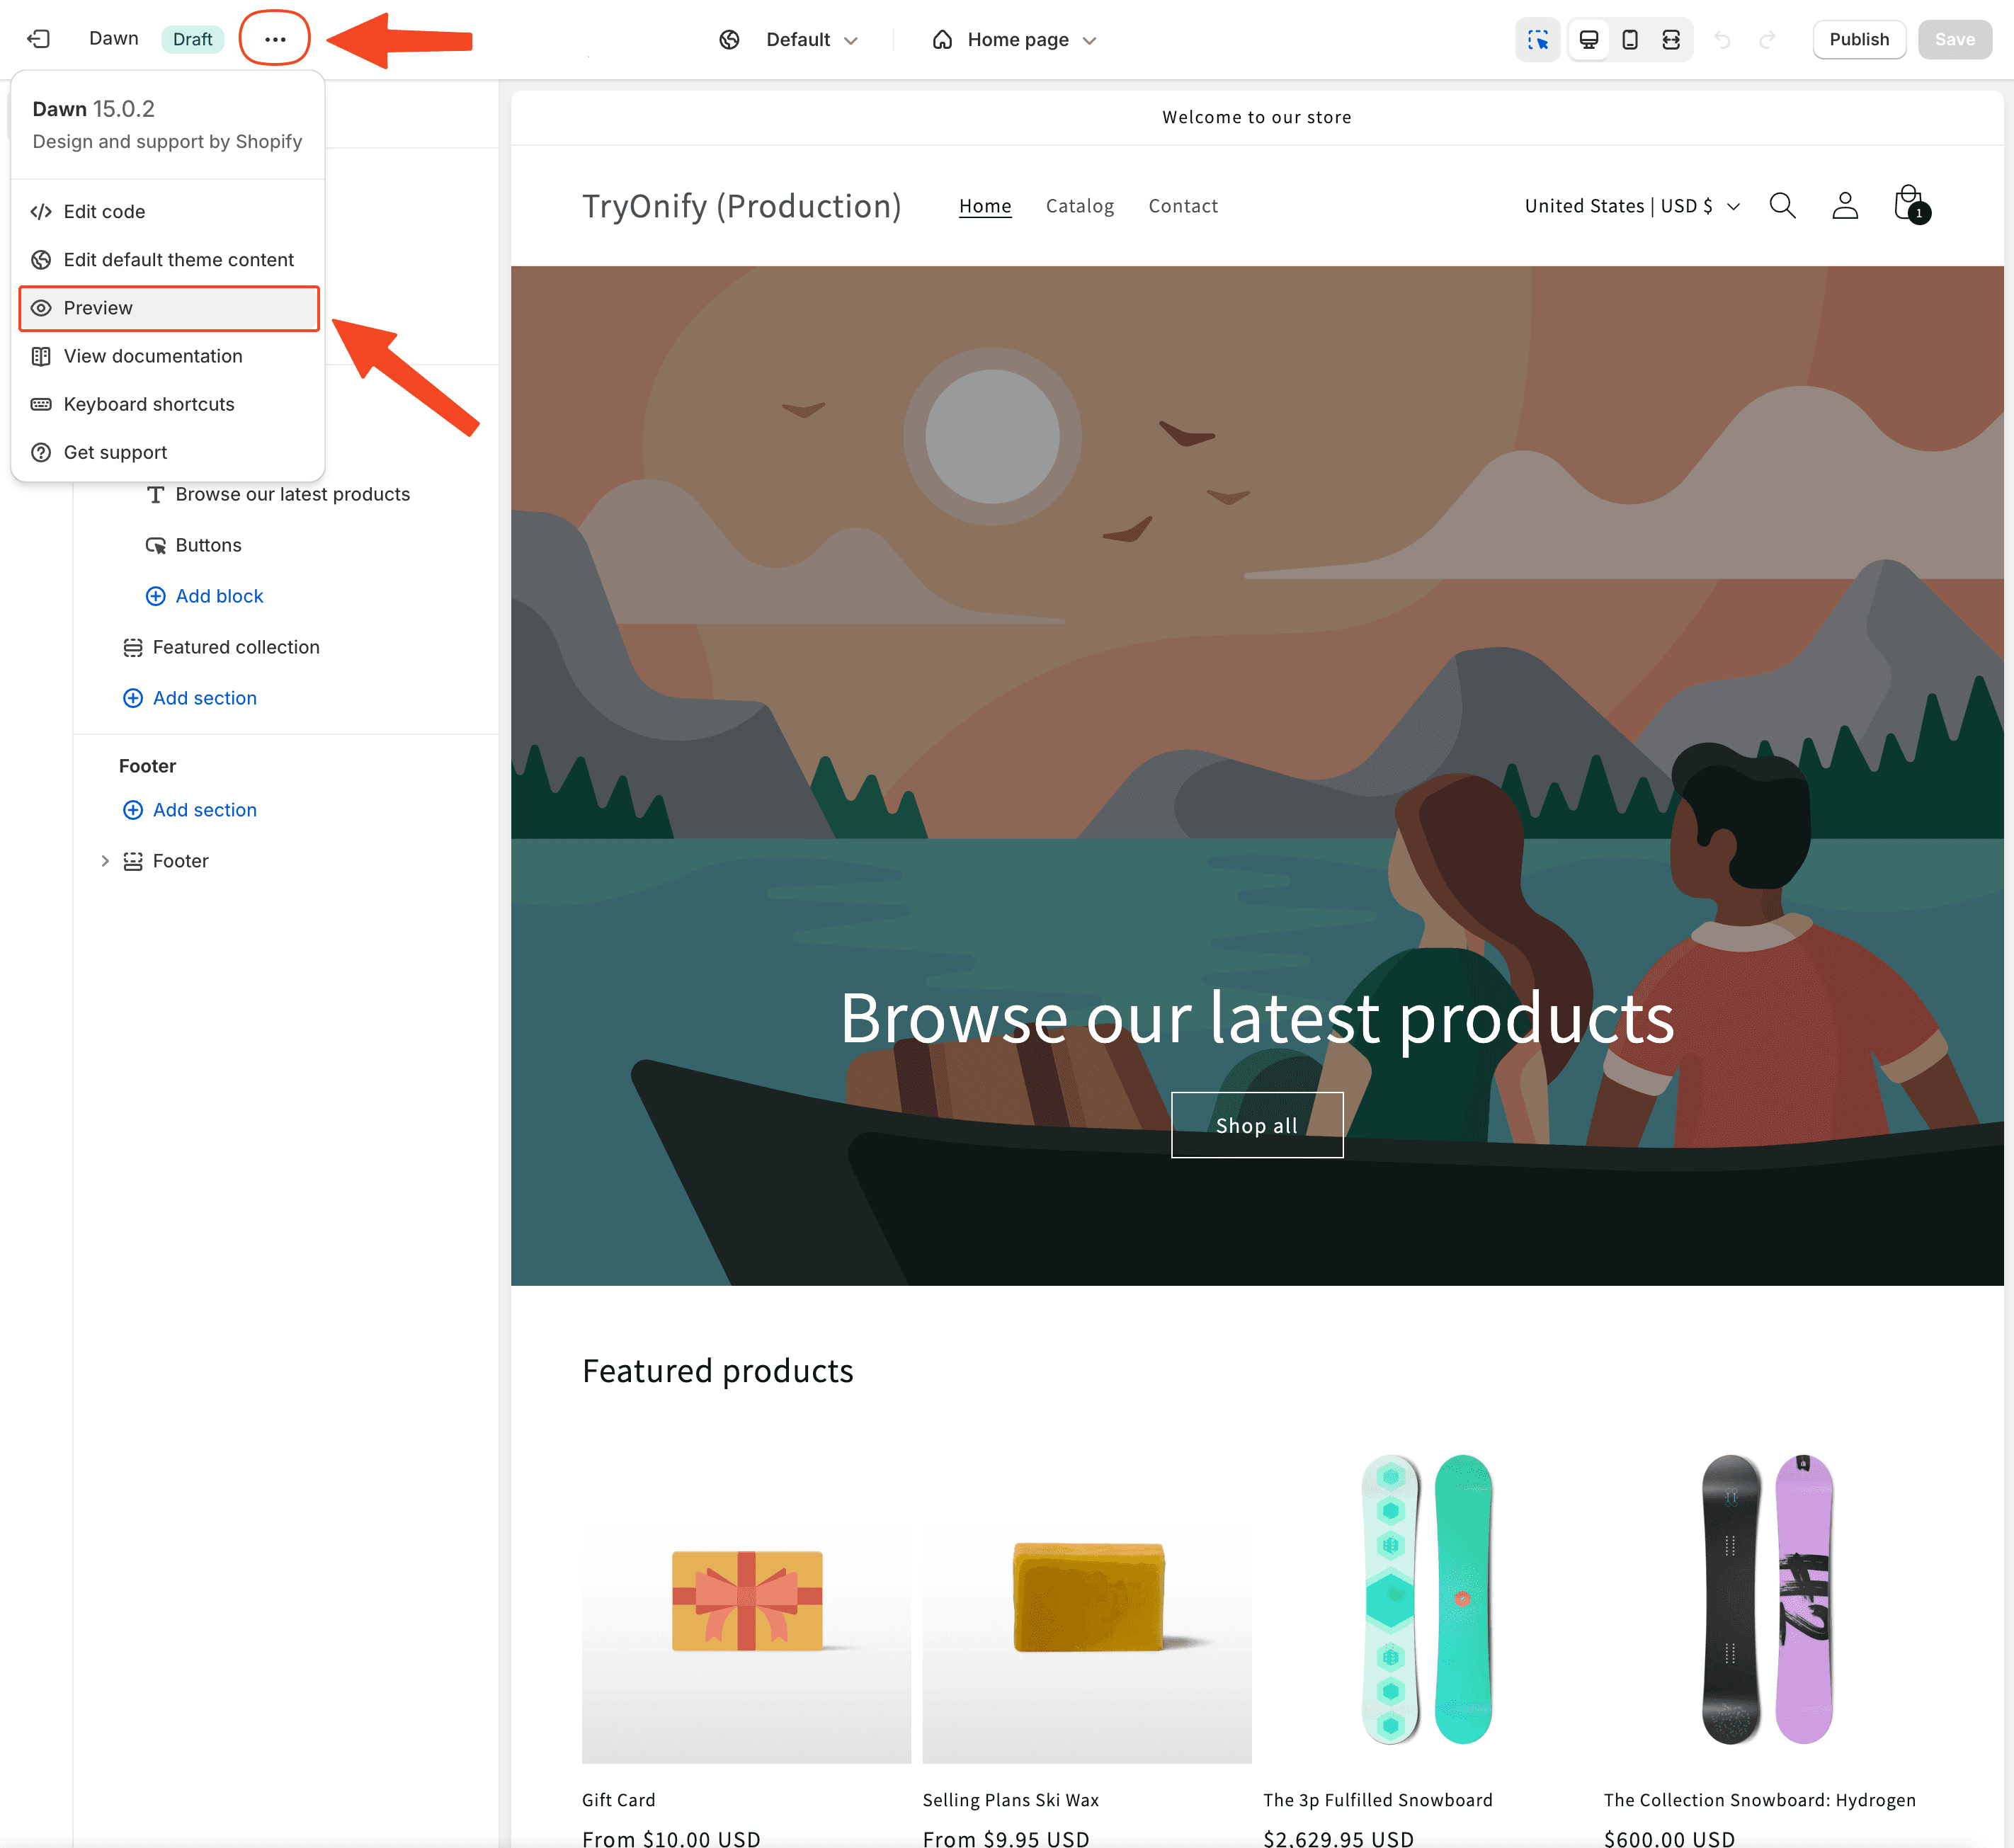
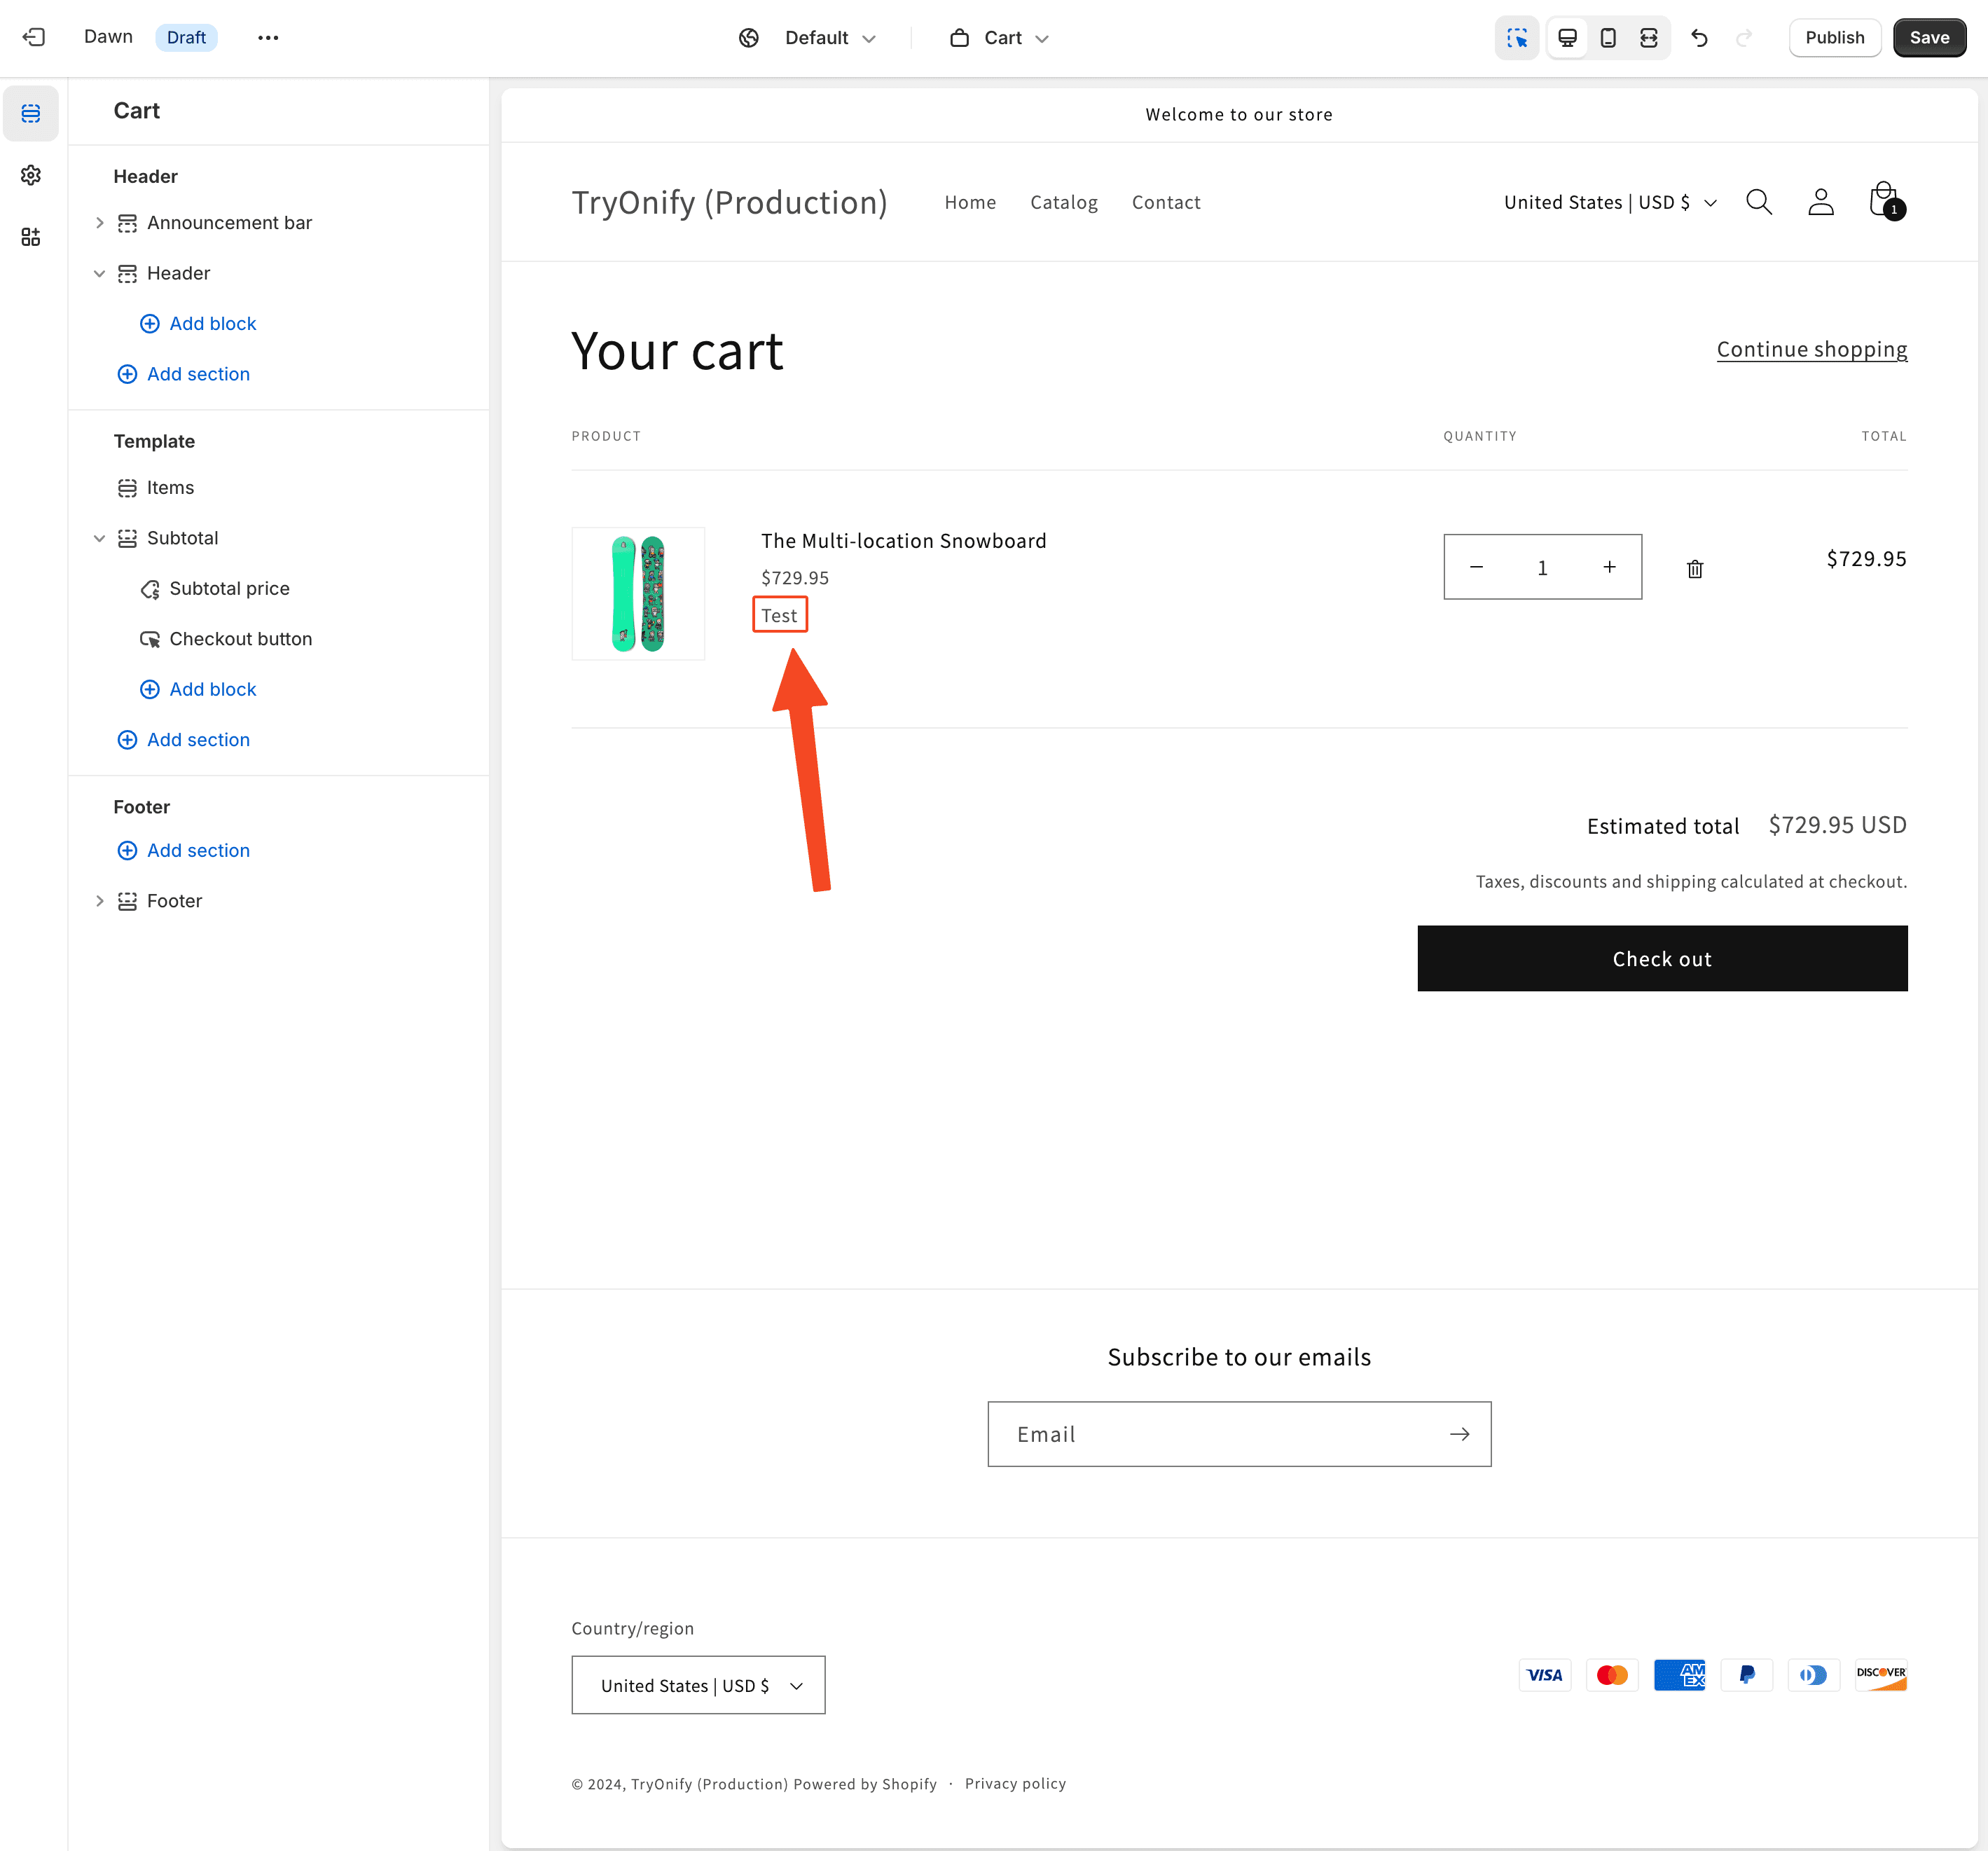
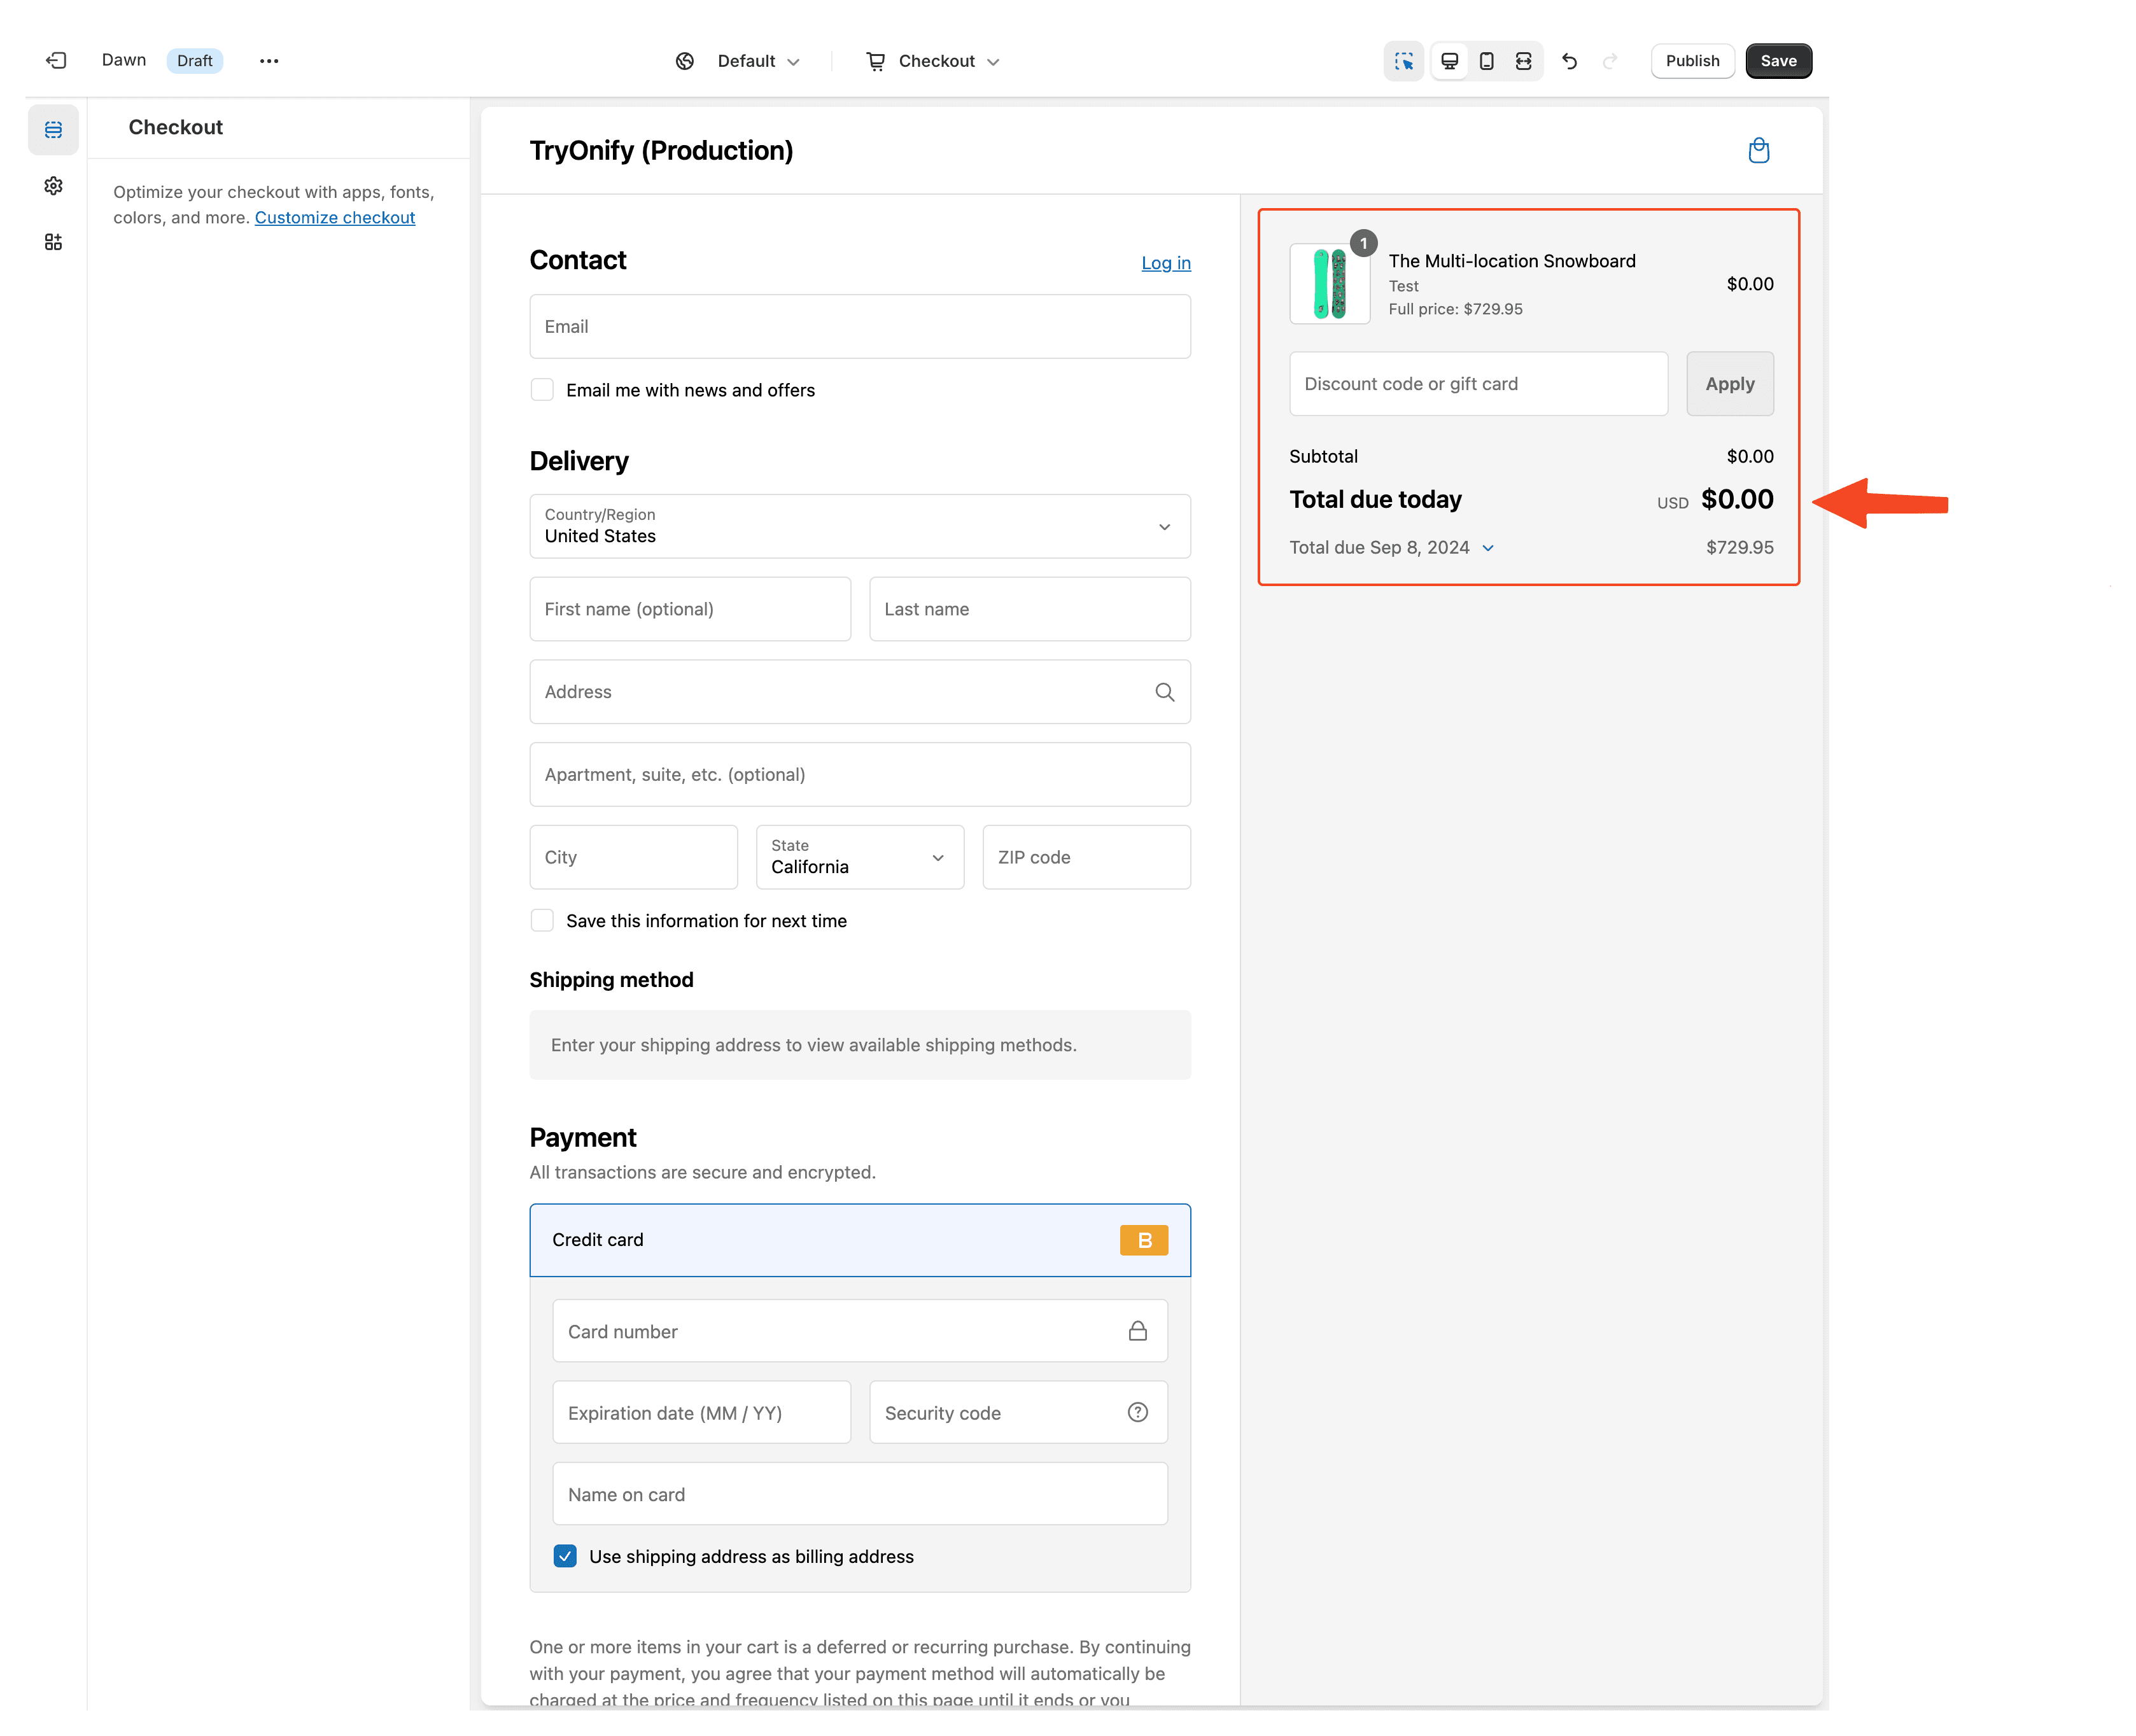
While you're in the theme editor, you can test that TryOnify works by clicking your Try Before You Buy payment option and adding the product to your cart. You can do this in the editor itself (it will take 2 clicks to navigate as the 1st click only selects the element for editing) or by clicking the 3 dot icon in the top left corner and then selecting "Preview" from the dropdown menu.
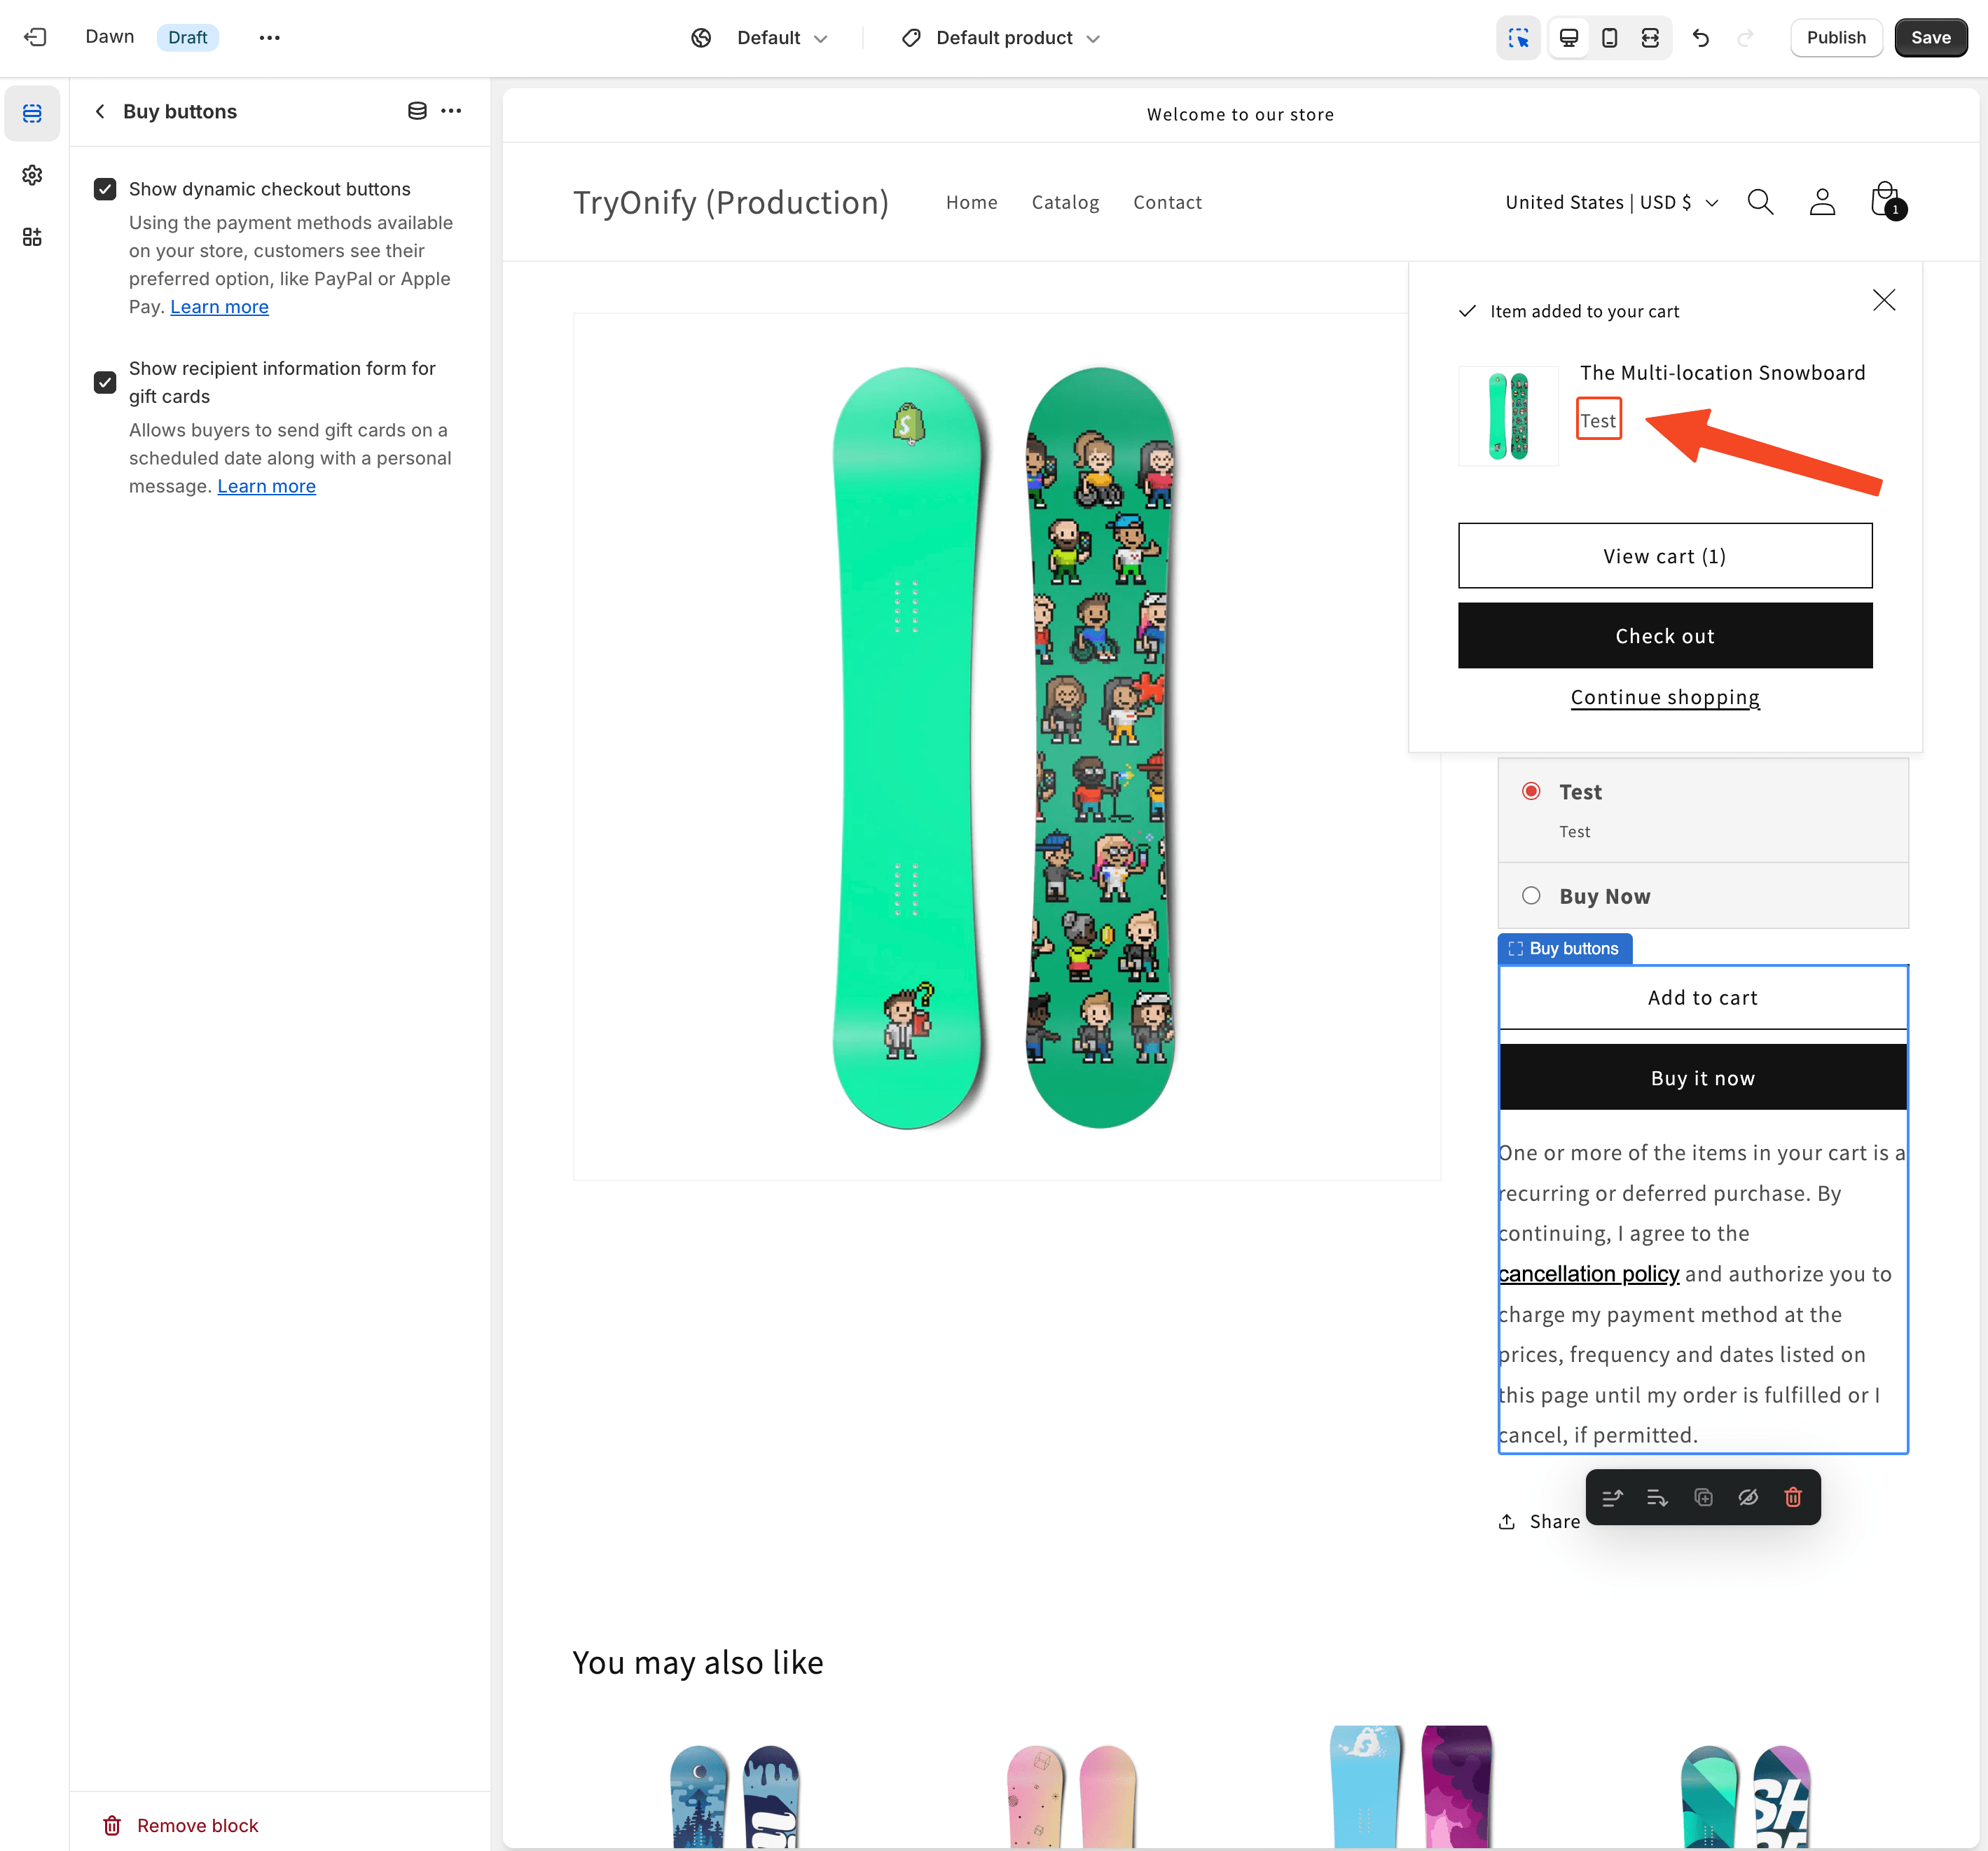
You should check these 3 areas to ensure that TryOnify was setup correctly:
Cart popup from Product Detail Page (PDP)
Cart page
Checkout page
Here is what you need to look for to validate TryOnify's successful installation 👇
Cart popup from Product Detail Page (PDP)
Cart page
Checkout page
Custom Themes
If neither of these methods worked for you or you have a custom theme that is incompatible with TryOnify, please reach out to support@tryonify.com for further assistance.
